Service Orders
Service Order Setup
In order to effectively manage Service Orders through your UMS system, several items should first be configured through the Setup menu. These include Service Order Categories, Service Order Codes, and Service Order Templates. Some initial codes and categories must be configured before any Service Orders can be processed. In some cases, initial entries are built in to the UMS system. Additional items may be set up as needed for your Company’s personnel and processes.
Service Order Category
Service Order Categories help to manage the service orders generated through your UMS system. A set of categories is built into UMS, and those items are already available when you start using the system. Additional categories can be created and maintained through Setup > Service Order Category. The Setup Service Order Category dialog box will open.
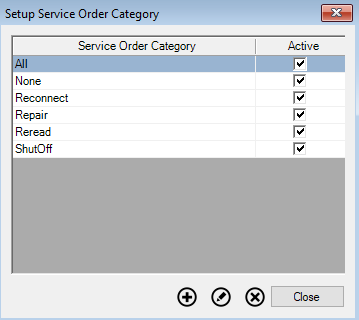
Figure 164: Setup Service Order Category
Previously added Categories will appear in the list, in alphabetical order and a checkmark will appear in the Active column for the active categories. Use the Add, Edit, and Delete buttons to manage the list.
Add/Edit Category
Click the Add button to create a new category. The New Service Order Category will open. Alternately, select an existing category and click Edit to open the Edit Service Order Category dialog box.
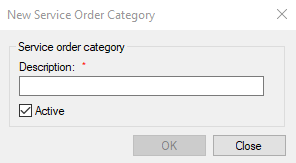
Figure 165: New/Edit Service Order Category
Type or edit the task or service description. The category description will be used to filter or sort service orders by type.
Delete Category
Use the Delete button to delete an existing category that is no longer needed. You will be prompted to confirm the deletion.
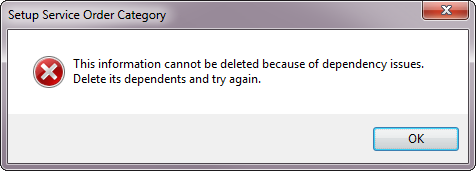
You will not be able to delete any categories that are already associated with any Service Orders in UMS. If you try to delete a category that has been assigned to any orders, a warning will appear, and you will not be able to continue with the deletion.
Figure 166: Unable to Delete Service Order Category
Service Order Code
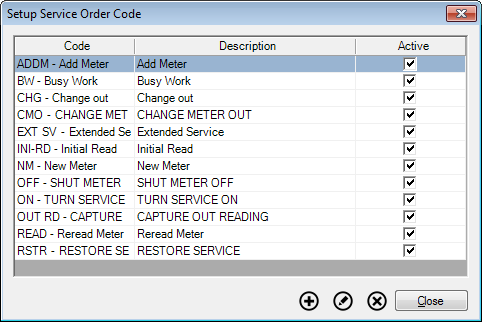
UMS Service Orders are identified by a unique code when they are created. Each code can also include a more detailed explanation for the purpose of the code
Figure 167: Setup Service Order Code
Add/Edit Service Order Code
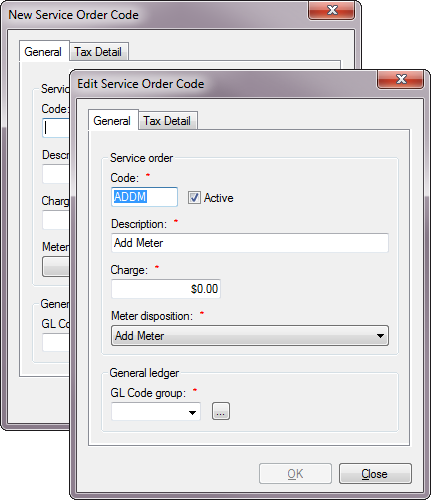
Click the Add button to create a new code. The New Service Order Code will open. Alternately, select an existing category and click Edit to open the Edit Service Order Code dialog box. The windows both operate the same way.
Figure 168: New/Edit Service Order Code
The Add (or Edit) Service Order Code window has two tabs, General and Tax Detail.
General Tab
Figure 169: New Service Order Code – General Tab
This tab is selected by default when the window opens.
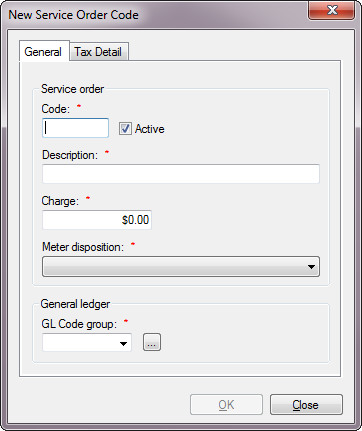
Code. Enter a code designation or abbreviation, up to six characters (including spaces).
Active. Check this box on or off to make the code available or unavailable for use. For a new code, it is checked on by default.
Description. Enter a description or purpose for the code.
Charge. If there is a standard charge associated with the particular task that the code represents, enter that value. When the code is used, that charge will automatically apply unless you manually override it.
Meter Disposition. Select a meter action or outcome from the drop-down menu. Selection is required, but one of the options is None.
General Ledger. This field allows you to select the GL account to which charges, if any, should apply. Select a code group from the drop-down menu.
If the GL account you need is not listed, click the Browse button next to the field. This will open a New GL Code Detail dialog box, where you can create a new account code.
Refer to General Ledger section for more specific information conderning GL codes and how to set them up.
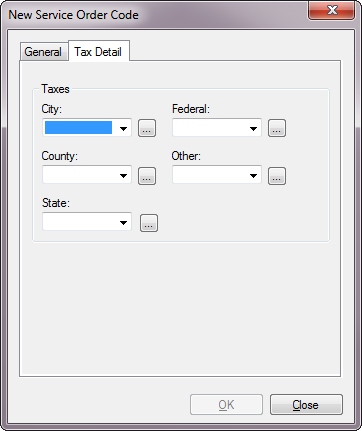
Tax Detail Tab
Figure 170: New Service Order Code – Tax Detail Tab
Use this tab to specify tax details related to this service order code. This function allows you to include or exclude takes from charges related to service codes.
There are five levels of taxes available (City, County, State, Federal, and Other). Each of these is set individually, and all five windows work the same way. If any tax codes have already been created for any of the tax levels, they will appear in the applicable drop-down menus. Select the applicable one for the type of tax you need.
If the one you need is not available, the Browse button will open a New Tax Code dialog box, where you can create a new applicable tax code.
Refer to the Tax Codes section under the General Ledger chapter for more information on creating and managing tax codes.
Delete Service Order Code
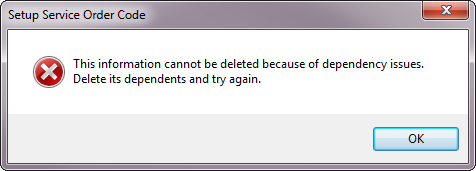
Use the Delete button to delete an existing code that is no longer needed. You will be prompted to confirm the deletion.
You will not be able to delete any codes that are already associated with any Service Orders in UMS. If you try to delete a code that has been assigned to any orders, a warning will appear, and you will not be able to continue with the deletion.
Figure 171: Unable to Delete Service Order Code
Service Order Templates
This UMS function allows creation of templates that streamline the generation of service orders. The templates can be pre-filled with common information so that repetitive entries are minimized.
Select Setup > Service Order Templates. This opens the Setup Service Order Template window, where templates are managed.
Figure 172: Setup Service Order Template
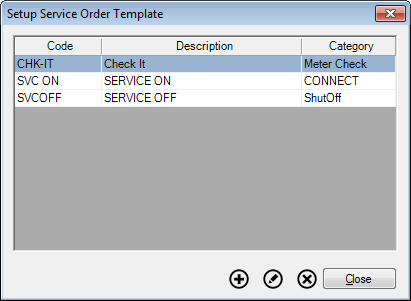
Use the Add, Edit, and Delete buttons to manage the templates.
Select a template and click Delete to remove it from the available templates.
Select a line and click Edit to open the selected template for changes. This will open the Edit Service Order Template window, pre-populated with the existing template information.
Click Add to open the New Service Order Template window and generate a new template.
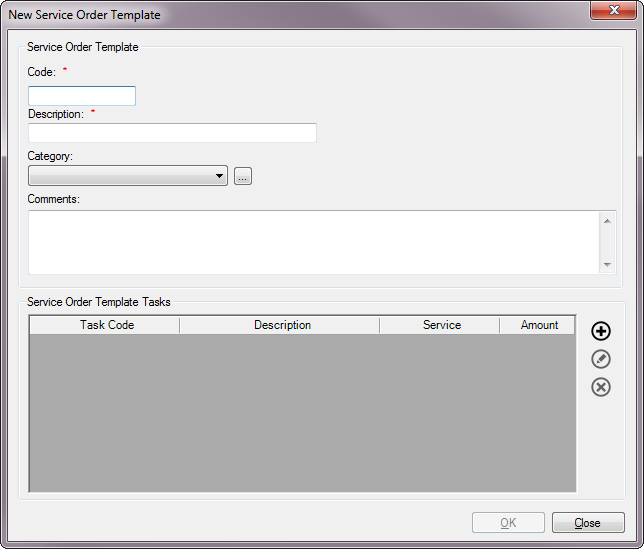
Figure 173: New Service Order Template
Code. Type a code for the template you want to create, up to six characters (including spaces).
Description. Type a descriptive word or phrase to identify your template.
Category. Select a category for your template from the drop-down menu, or click the Browse button to create a new code from the New Service Order Category dialog box. Refer to Service Order Category for more information on new codes.
Comments. Type any standard comments you want to have by default in work orders created from this template. These comments will be editable in the service orders.
Service Order Template Tasks. Set up any standard tasks that you want to have by default in work orders created using this template. These tasks will be editable in the service orders. Use the Add, Edit, and Delete buttons to manage these tasks. When you add (or edit) a task, the New (or Edit) Service Order Template Task window opens.
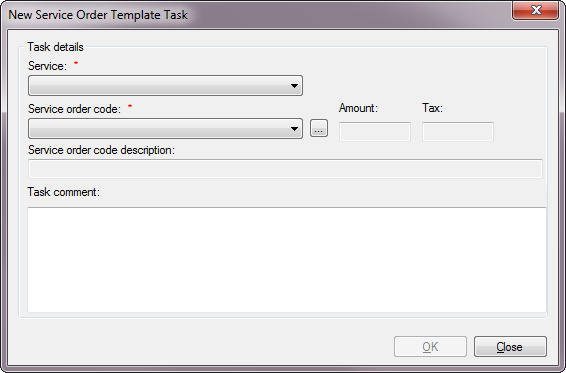
Figure 174: New Service Order Template Task
Service. Select the service (utility) to which the service order task will apply. All available services will be listed in the menu.
Service Order Code. Select the appropriate service order code from the menu, or use the Browse button to open the New Service Order Code window and create a new entry. Refer to Service Order Codes for details on creating new codes.
Amount, Tax, and Service Order Code Description. These fields are automatically filled, based on the information set up when the selected code was created. They cannot be manually edited. If changes need to be made, exit this function and add or edit the code before proceeding.
Task Comment. Enter any relevant comments concerning this task that should appear by default in service orders created with this template. These task comments will be editable in the service order.
OK. When you click OK, the task will be saved and you will be returned to the New Service Order Template screen. From there, you can complete the template or add more tasks.
Service Order Management
Enhancements to UMS Service Orders have allowed them to be managed in three ways:
- From UMS you can manage all service orders for an individual account
or for groups of accounts, by selecting Management > Service Orders from the main menu.
- Service orders for a particular account, can be accessed and managed
in UMS by selecting the applicable Customer/Location in the Account Control Panel, and use the Service Orders tab.
- CUSI Mobile Service Orders (MSO) allows a Utility to manage their
work such as “Install Meter” or “Reread Meter” from the office or on site. Managing work using the Mobile Service Orders feature enables the Utility to tightly integrate with other areas of the application such as inventory. Any changes happen almost instantly, with no need to sync up the data later. When a reading is taken in the field, workers in the office can immediately see the changes.
Ultimately, the same service order tools will be available, but the selection process will be slightly different.
Mobile Service Order (MSO) Required Permissions
Access to service order and service order status activities is determined by the UMS permission “Setup Service Orders” for standard UMS user account types. Users with UMS Administrator accounts have full access to all service order activities.
To set appropriate permissions for users in a security role, a UMS Administrator user should use the Security Control Panel in UMS (Setup >> Security >> Roles). The “Setup Service Orders” permission control is in the Service Order group.
These are the required permission levels for the given service order and service order status activities:
None: no direct access; may see some data in lists or search results
View: can view full service order or status data, but cannot create or change
Add: can create new entries, but cannot change any existing service orders or statuses
Edit: can change any service order or status, but cannot delete existing data
Delete: full control of all service orders and statuses; same access as UMS Administrator
Service Order Control Panel
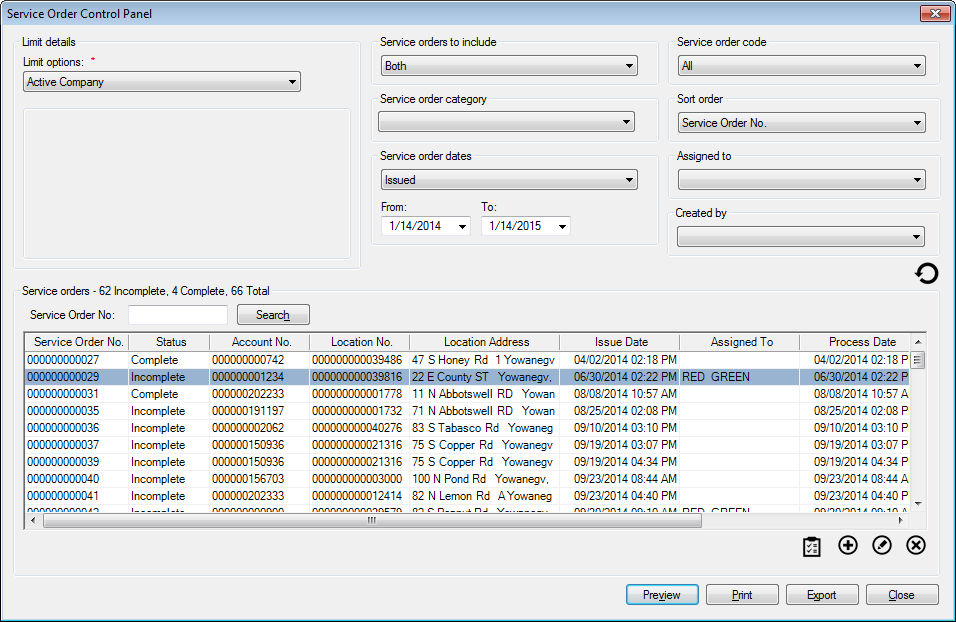
From the main menu, select Management > Service Orders. This will open the Service Order Control Panel.
This control panel allows you to select groups of service orders to manage, based on limit options you select for your particular task needs.
Figure 175: Service Order Control Panel
This screen is divided into two main sections: the limit options/search area at the top, and the results grid at the bottom.
If you know the number of the specific Service Order you need to review, you can search directly for that individual item using the Service Order No. field and Search button, located just above the results field. Otherwise, you can limit the list of results by applying the available limiters and filters.
- Limit Options. Standard limit options apply. See Limit Options
for details on using these limits.
- Service orders to include. This filter allows you to select work
orders based on completion status. Select Incomplete, Complete, or Both from the drop-down menu. The default option is Both, including all orders.
- Service Order Code. Select from the available service order codes
in the drop-down list. The default option is All, including all codes.
- Service Order Category. Select from the available categories in
the drop-down list, or leave this field unselected to include all categories.
- Sort Order. Select from the drop-down list which field should be
used to sort the selected service orders.
- Service Order Dates. Select a date type (Issued,
Completed, or Processed) from the drop-down menu, then enter a date range for your search. The dates both default to the current date.
- Assigned to. This filter allows you to select service orders
assigned to a specific worker. Select a name from the drop-down list, or leave the field unselected to include all service orders (both assigned and unassigned).
- Created by. This filter allows you to select service orders
created by a specific user. Select a username from the drop-down list, or leave the field unselected to include all service orders.
Once your filters are in place, click the Refresh button (
 ) to update the results at the bottom of the screen.
The tools at the bottom of the screen (Complete, Add, Edit, and Delete) will be the same as those you will have if you manage service orders from the Account Control Panel instead. Proceed to Managing Service Orders for details.
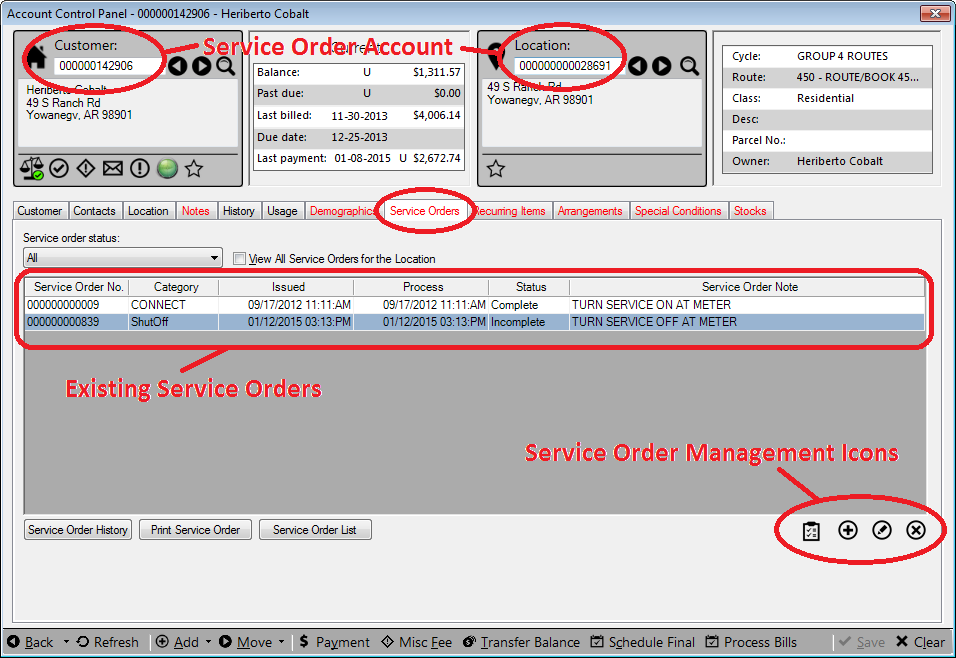
Service Order tab on the Account Control Panel
Select the Customer/Location, and open the Service Orders tab within the Account Control Panel.
Note: If there is no Service Orders tab, go to Setup > Customize Account Control Panel and select Service Orders from the Available list on the left and move it to the Assigned list on the right. Close and re-open the Account Control Panel.
Figure 176: Service Order Management from the Account Control Panel
The Account (Customer/Location) information attached to the existing service orders and those that will be created from here is listed in the Dashboard section of the window. All service orders already associated with the Account are listed in the tab window.
The tools at the bottom of the screen (Complete, Add, Edit, and Delete) will be the same as those you will have if you select service orders from the Management Window instead. Proceed to Managing Service Orders for details.
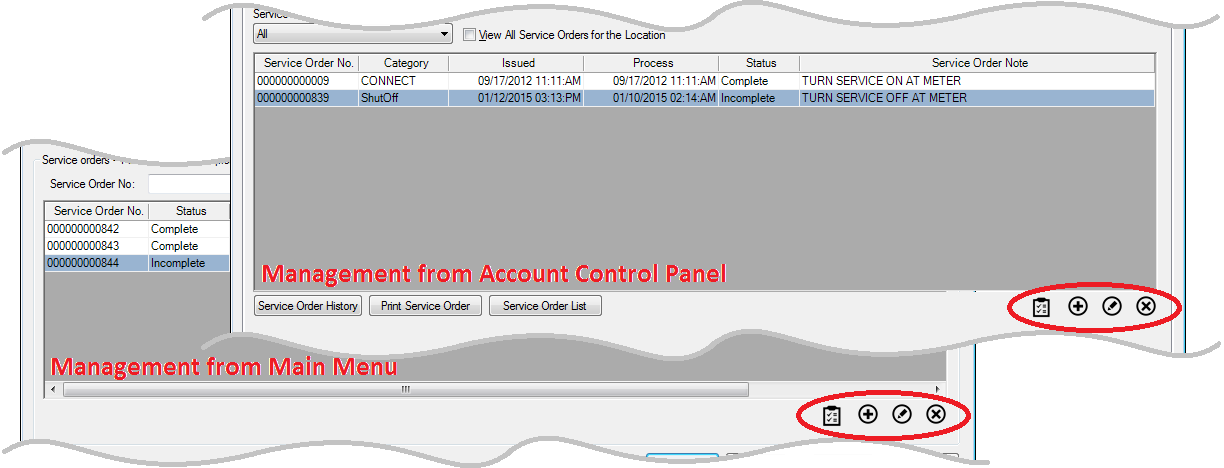
Managing Service Orders
Whether the Service Orders were generated or listed through the Management Menu or the Account Control Panel, the same screens and tools will be available for managing them.
Figure 177: Service Order Management from the Account Control Panel or Main Menu
There are four main functions in managing Service orders. The Add, Edit, Delete, and Complete functions access Mobile Service Orders in a browser.
Create Service Orders
In UMS create a new service order for the open Account by clicking the Add
button in the Service Orders tab on the ACP. The Add New Service Order screen will open in a browser window.
The selected Location and Customer numbers will populate. This is the Account for which the service order is being entered.
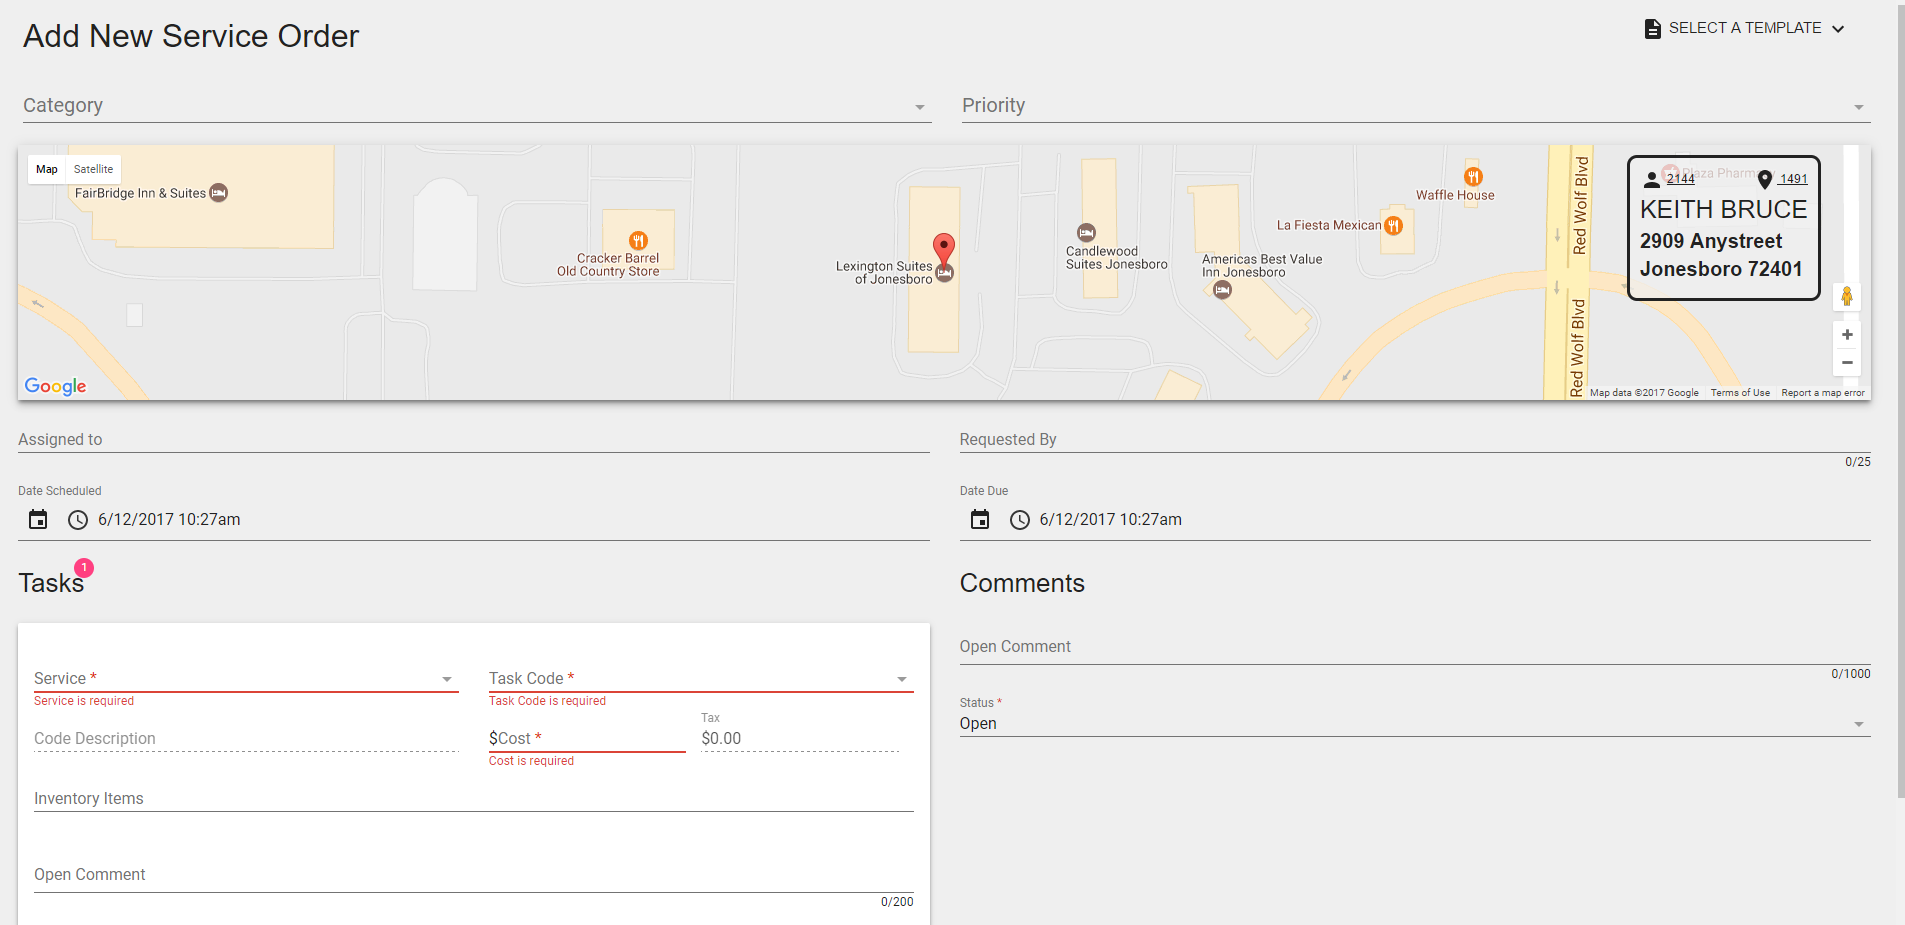
Figure 178: Add New Service Order from UMS
From Mobile Service Orders, follow these steps to create a service order:
Click the
 icon in the bottom right corner of the SERVICE
ORDERS dashboard to open an empty service order for editing.
icon in the bottom right corner of the SERVICE
ORDERS dashboard to open an empty service order for editing.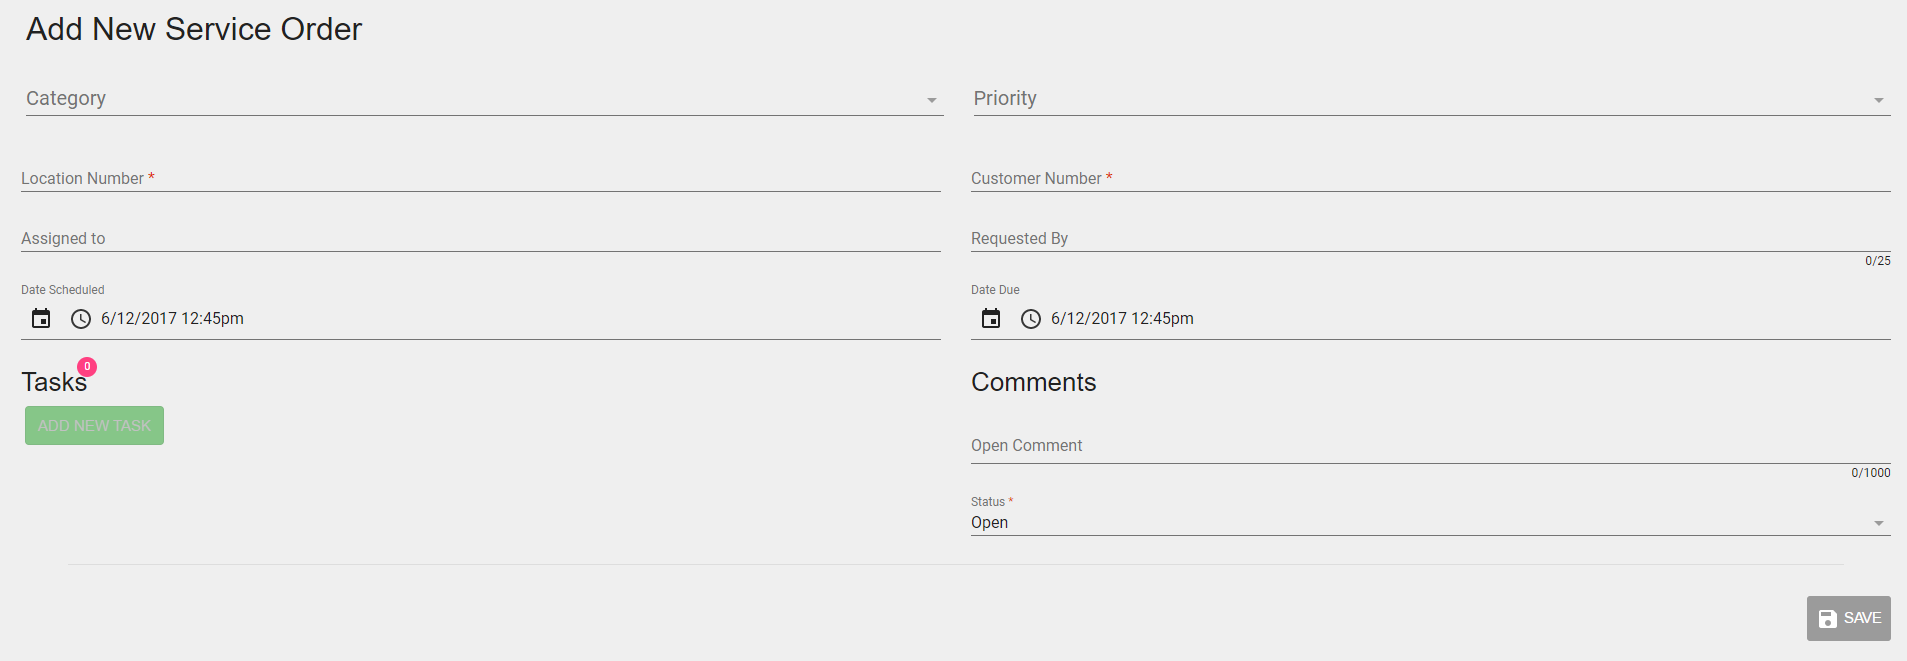
Figure 179: Add New Service Order from MSO
Fill in all of the desired/necessary fields on the empty service order.
Filling out the location field:
Typing into the location field will trigger a search on locations.
Locations can be searched by location number or location address.
After selecting a location, the customer field is no longer a search field, and one of 3 things will happen:
If the chosen location has multiple current customers associated with it a list of current and final customers will be populated in the drop down. Any of the current customers can be chosen.
If the chosen Location has only one current customer that customer will be populated into the customer field and any final customers will be available for viewing in the customer drop down.
If the chosen Location has no associated customers, the customer field will be left blank and will not be able to be edited.
Deleting the chosen location will change the customer field back into a searchable field.
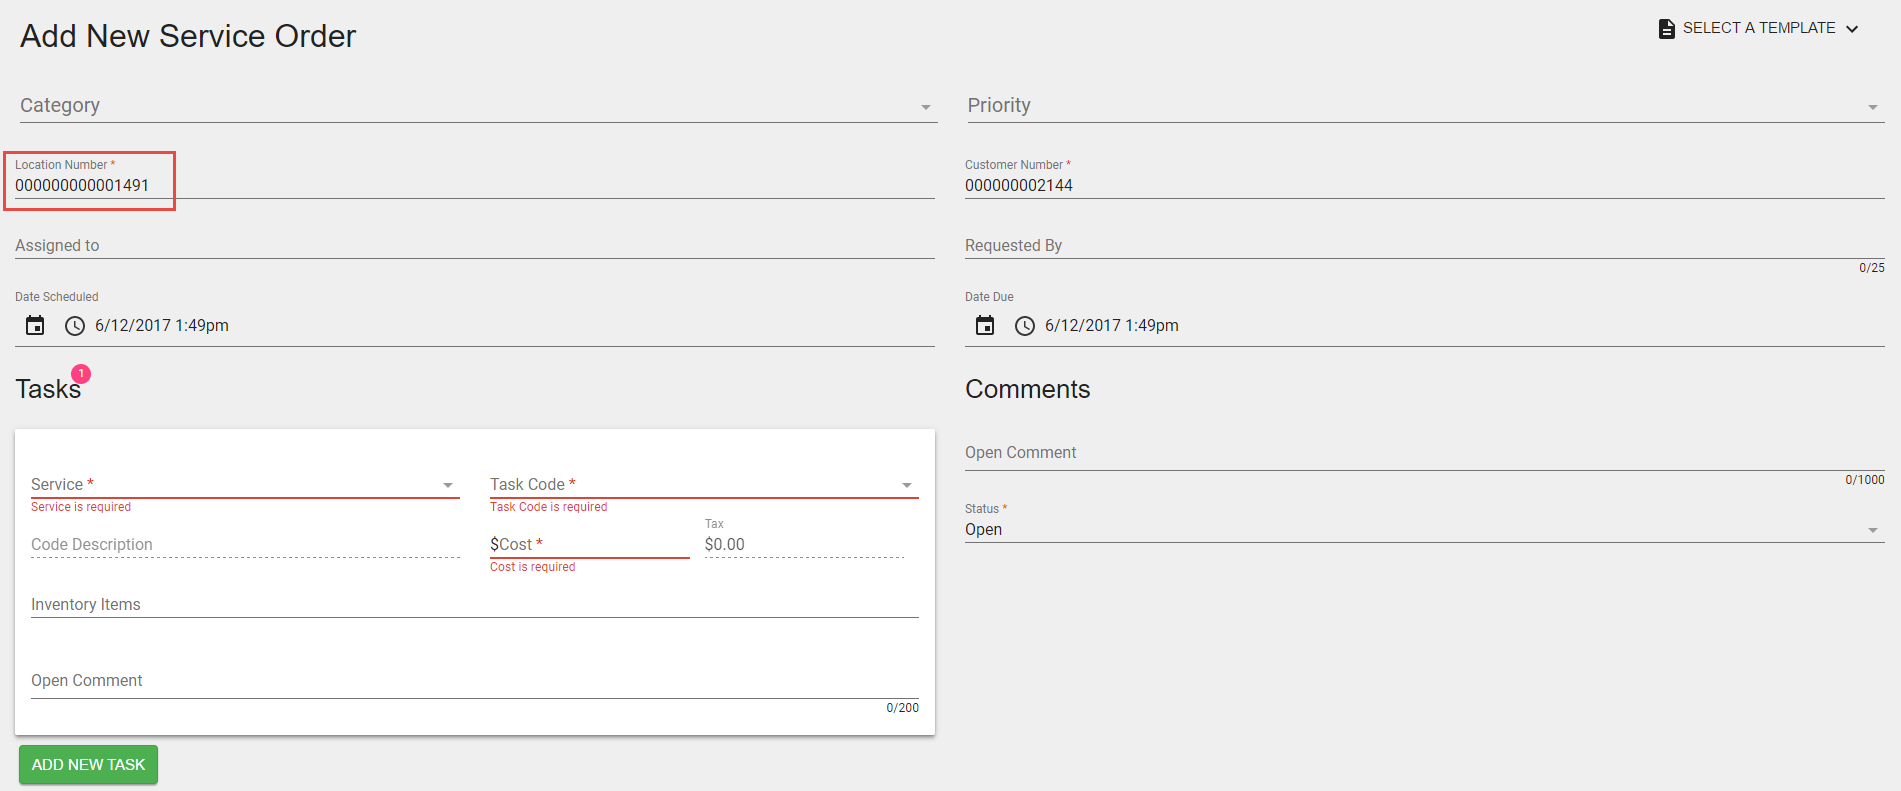
Figure 180: Add New Service Order from MSO – Location Number
Optional: The SELECT A TEMPLATE option that is located at the top right corner has a list of predefined templates that will fill in the following fields:
Description
Type
Open Comment
At least one task template, with the following fields defined:
Service
Code
Cost
Open Comment
Filling out the customer field:
Typing into the customer field will trigger a search on customers.
Customers can be searched by customer number, customer address, or customer name.
The events upon customer selection are the same as specified in the location field, but with location field being populated with locations.
Adding a task:
At least one task is required, with a description, service, task code, and cost.
Inventory items can optionally be added to the task. Selecting the “Inventory Items” field will display a list of available inventory items at the service order location. Typing in the field will filter the list. Selecting an inventory item from the list will add it to the task.
If the task has inventory items that accept register readings, the readings can be entered or edited in the field(s) next to each inventory item. The number of fields is determined by the number of registers on the inventory item.
Click the save button to save the data.
Changes will be reflected on the Service Order card, located on the SERVICE ORDERS dashboard.
Edit a Service Order
In UMS, on the Service Orders tab of the ACP, highlight the desired service order and click the Edit
button. The Edit Service Order screen will open in a browser window.
From MSO dashboard, follow these steps to edit an existing service order:
In the My Service Orders section, click the service order card you wish to edit.
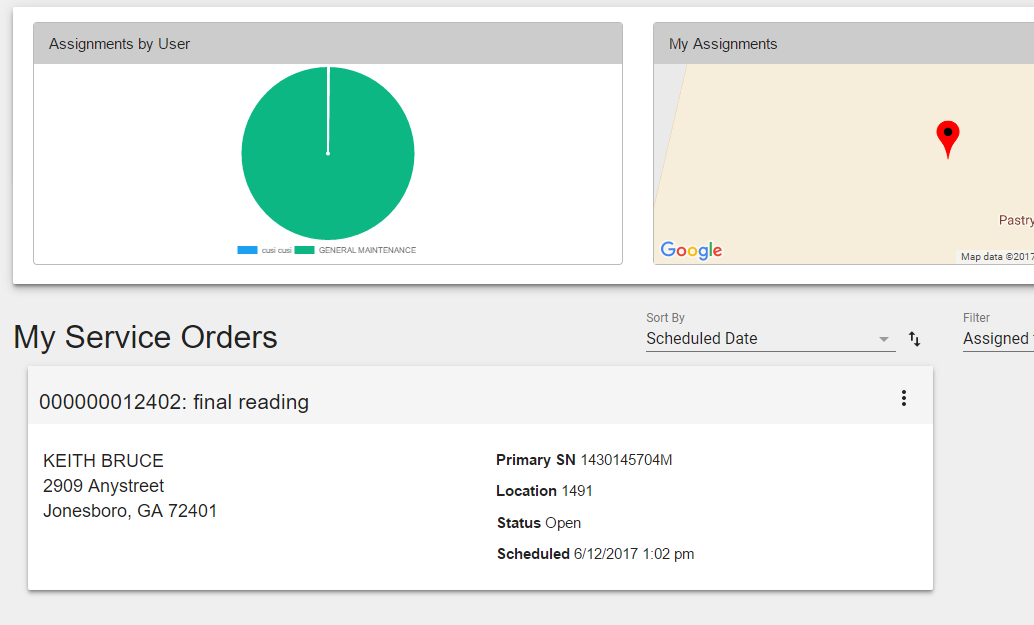
Figure 181: Edit Service Order from MSO – Dashboard
The Edit Service Order screen will display.
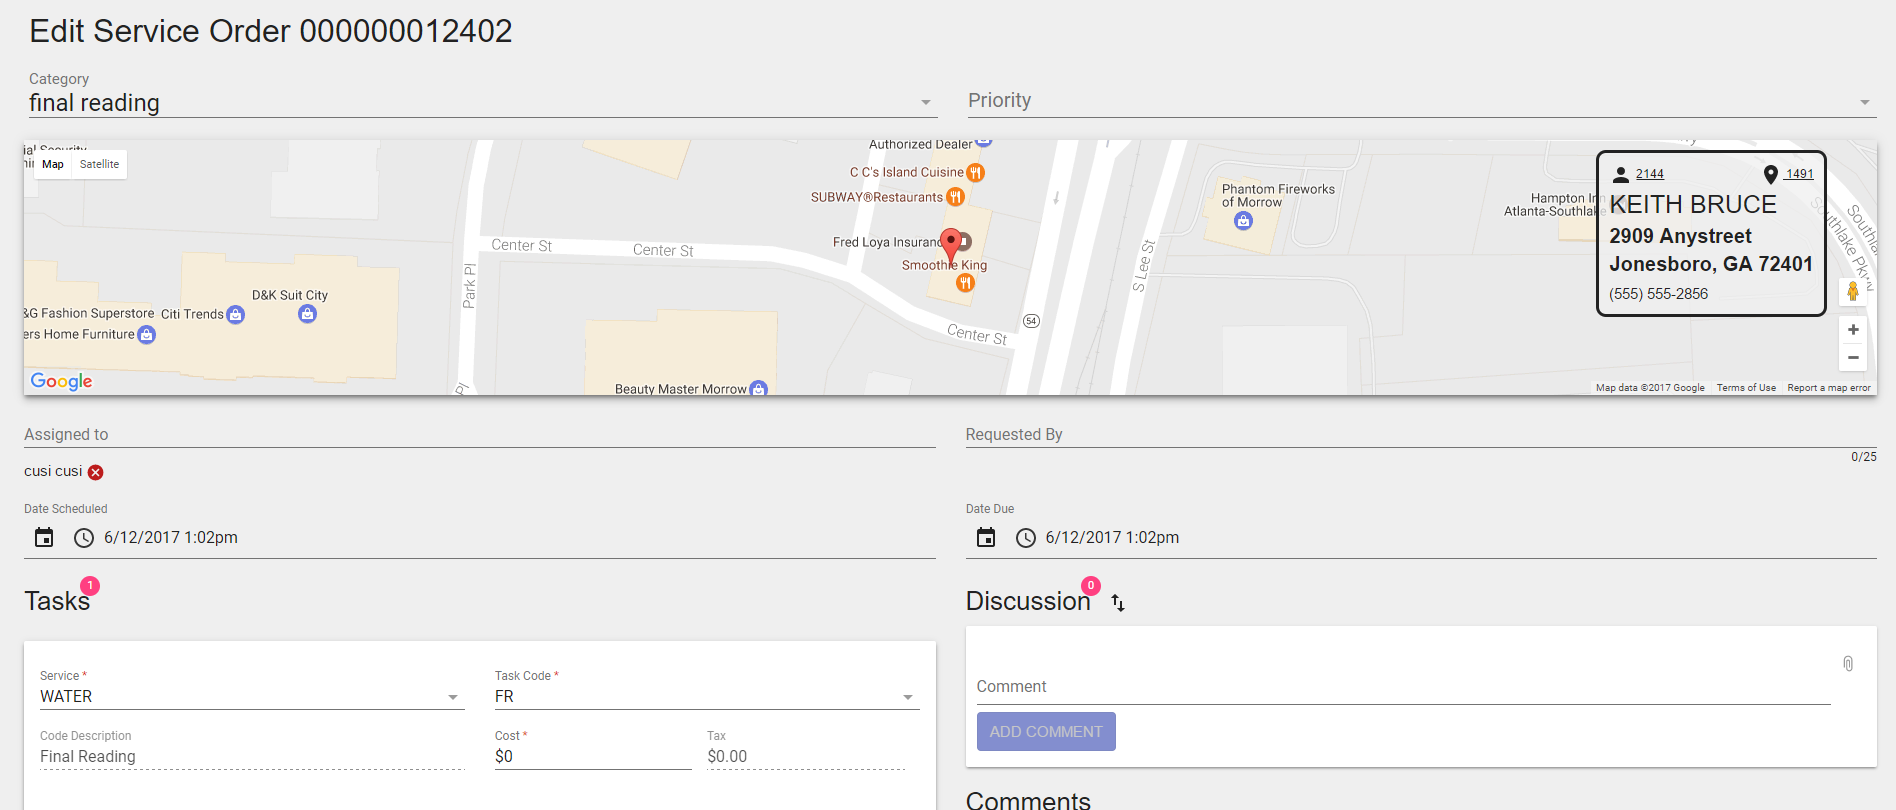
Figure 182: Edit Service Order from MSO – Edit screen
Edit the fields as necessary.
Click the save button to save edits.
Changes will be reflected on the Service Order card, located on the SERVICE ORDERS dashboard.
Delete a Service Order
A service order can be deleted if two conditions are met:
- The currently signed in user has delete permissions for service
orders.
The service order has not been closed.
In UMS, on the Service Orders tab of the ACP, highlight the
desired service order and click the Delete  button. The
following box will display. Click yes to delete the Service order.
button. The
following box will display. Click yes to delete the Service order.
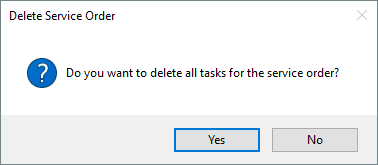
Figure 183: Delete Service Order from UMS
From MSO dashboard, follow these steps to delete an existing service order:
Select the vertical ellipsis located on the top right corner of a service order card.
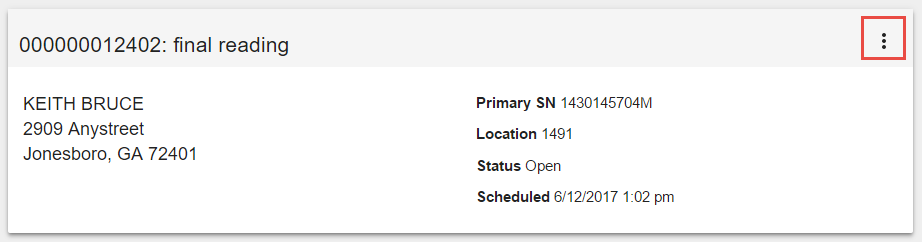
Figure 184: Delete Service Order from MSO
Select the trash can icon
 from the pop out menu.
Confirm the deletion by selecting “Yes” on the confirmation dialog box.
Quickly Assign/Unassign worker to/from a Service Order in MSO
This feature lets you do two things:
- See who is assigned to a service order from the SERVICE ORDERS
dashboard.
- Quickly assign/unassign someone from a service order on the
dashboard.
To do either of them, follow these steps:
Select the vertical ellipsis located on the top right corner of a service order card, as shown in Figure 184.
Clicking the
icon will trigger a dropdown menu with a list
of all the workers.Assigned workers have a
 beside them.
To assign someone, select their name. A confirmation will briefly display in the bottom left of the screen that they have been assigned to that service order.
To unassign someone, select an already assigned worker (names with a
beside them). A confirmation will briefly display in the
bottom left of the screen that they have been unassigned from that
service order.
Discuss a Service Order in MSO
Discussion is available in some areas of MSO—such as Service Orders—to facilitate communication. Comments are displayed in a discussion style, sorted by date, so that the conversation is easy to follow. Each comment in a discussion displays the user avatar, and first and last name of the user who posted the comment.
Adding Discussion Comments
To add a comment to a discussion in a service order:
Enter text into the text box at the bottom of the discussion area on the right side of the service order.
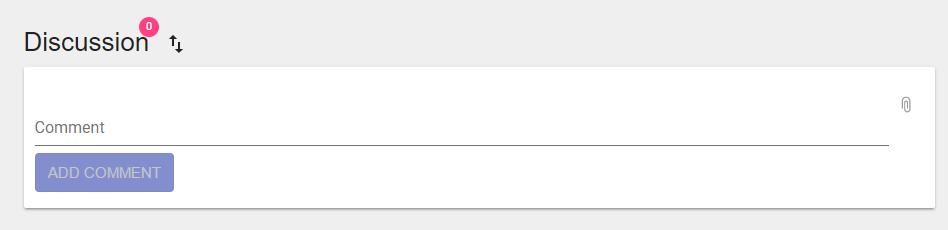
Figure 185: MSO Discussion
Press the Enter key, or click the ADD COMMENT button to post the new comment.
To add a carriage return to a comment, hold down the Shift key while tapping the Enter key.
To add an attachment to a comment, click the paperclip icon. A dialog will appear, allowing a file to be selected. Attachments will be uploaded when the new comment is saved.
According to the current sort direction, the new comment will either be added to the top or the bottom of the discussion.
Editing Discussion Comments
Users can edit their own discussion comments. To edit a comment:
Click the
 icon on a comment.
- The icon will only be available on a comment for the
user who created the comment.
- The

Figure 186: MSO Discussion Edit
The comment text will become editable, and three new icons will appear: an attachment icon
 , a save icon
 , and
a cancel icon
, and
a cancel icon  .
.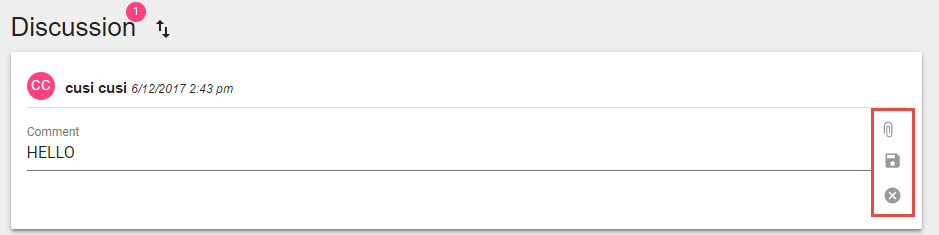
Figure 187: MSO Discussion Edit options
- Only one comment can be in “edit mode” at a time. The edit buttons on
the other comments in the discussion will be unavailable while a comment is being edited.
To add an attachment, click the attachment icon
. A dialog
will appear, allowing a file to be selected. The new attachment will
be uploaded immediately.To delete an attachment, click the delete icon next to the desired attachment. A dialog will appear, asking the user to confirm deletion. Choosing “Yes” will delete the attachment. The change cannot be undone.
After making changes to a comment, click the save icon
to
save the changes, or the cancel icon to discard the
changes.Once changes have been saved or canceled, the save and cancel icons will disappear, and the edit icons will be available again.
Discussion Mentions
When adding or editing a discussion comment, users can be mentioned in the text by entering an @ symbol followed by the user’s login name. When the @ symbol is entered, a dropdown menu will appear, listing all available users, including each user’s display name and login name. Typing part of a user’s display name or login name will filter the list, and pressing Enter or Tab will insert the user at the top of the dropdown menu into the comment. Clicking a user in the dropdown menu will also insert the user into the comment.
The first time a user is mentioned in a particular comment, a notification email will be sent to that user when the comment is saved.
Deleting Discussion Comments
Users can delete their own discussion comments, and administrators can delete any comment. To delete a comment:
Click the
 icon on a comment.
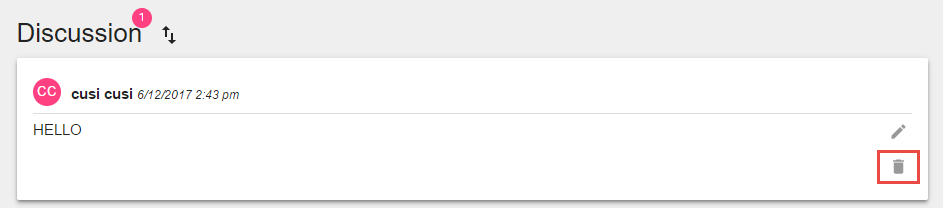
Figure 188: MSO Discussion Delete
- The icon will only be available on a comment for
administrators, or for the user who created the comment.
- The
A dialog will appear, asking the user to confirm deletion. Choosing “Yes” will delete the comment from the discussion. Choosing “No” will cancel the operation.
When a comment is deleted, any attachments on the comment will also be deleted.
Sorting Discussion Comments
By default, comments in a discussion are sorted by date, with the newest comment at the top. However, sorting order can be reversed by clicking the sort icon next to the title of the discussion area. Clicking the icon again will restore the default sort order.
Service Order Statuses
In MSO, users may create a new status which may then be used to update the status of a service order. Users may also edit or delete user-defined statuses. To access Service order Status Items click the drop down beside the MSO username in the top right corner of the MSO dashboard.

Figure 189: MSO Service Order Status
Click the System Settings option.
The following screen will display. Click the Service Order Statuses option.
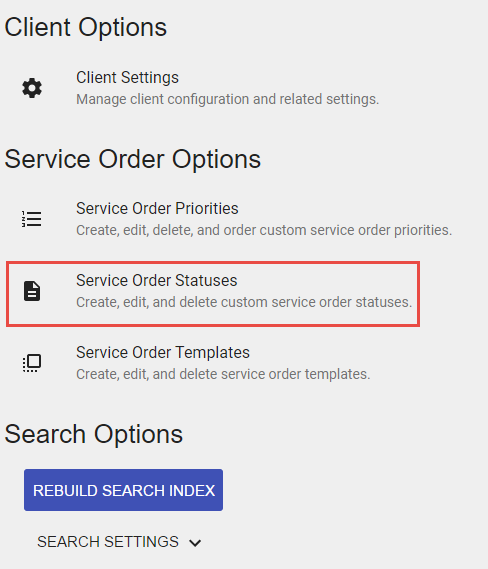
Figure 190: MSO Service Order Status settings
The Service Order Status Items screen will display. Two core options are available - neither can be edited or deleted.
Open
Closed
Create a new Service Order Status in MSO
Click the CREATE NEW STATUS button to add new status.
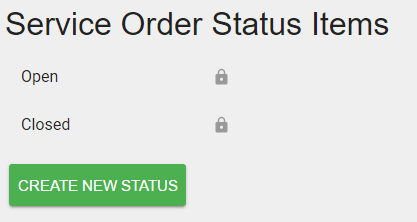
Figure 191: MSO Service Order Status Items
The Create New Service Order Status screen will display.
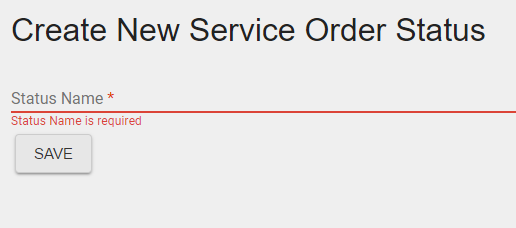
Figure 192: MSO Service Order Status – Create
Enter the desired status in the Status Name field and click SAVE.
The new status will be displayed.

Figure 193: MSO Service Order Status – Created
Edit a Service Order Status in MSO
Click the status to be edited.
The Service Order Status Detail screen will display.
Click in the Status Name field and make the desired modification.
Click Save.
The newly named status will display.

Figure 194: MSO Service Order Status Edit
Delete a Service Order Status in MSO
Click the
icon to delete a Service Order StatusStatuses cannot be deleted if they have been previously used.
Priorities
Users can manage a customizable set of service order priorities. Each priority must have a name and a color. Once a color is chosen, it will be used throughout the application to help visually emphasize service orders based on their priority. To access Service Order Priorities, click the dropdown beside the MSO username in the top right corner of the MSO dashboard, as shown in Figure 189.
Click the System Settings option.
The following screen will display. Click the Service Order Priorities option.
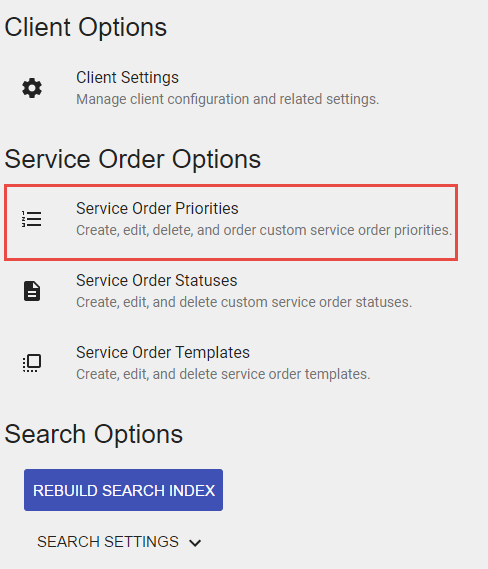
Figure 195: MSO Service Order Priorities
The Service Order Priorities screen will display.
Figure 196: MSO Service Order Priorities – Add
Click the Add option to add a new priority.
Enter the desired Priority Name.
Select the desired associated color
Click Save
Searching Service Orders in MSO
Service Orders can be searched for in the global site search bar and any service order drop down.

Figure 197: MSO Service Order Search
Service Orders queries will be matched on:
Service Order Number
Service Order Description
Closing a Service Order in MSO
Users with the correct permissions can close a Service Order by following these steps:
- While on the edit page for the Service Order you want to close click
the dropdown for Statuses, which is located in the bottom right corner of the service order.

Figure 198: MSO Service Order Closing
- Select Closed in the drop down list, which will open the closed
comments section

Figure 199: MSO Service Order Closing selection
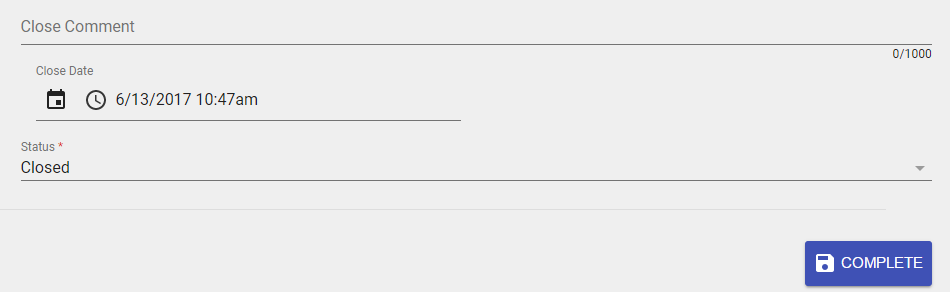
Figure 200: MSO Service Order Closing comment
Click the complete button found at the bottom right of the screen
- You will be redirected back to the list page. The closed service
order will no longer be listed, but can still be found in search. The service order will be read-only.
Service Order Fees
When a service order is closed, service order fees are calculated, and an unposted charge is created and located on the UMS ACP History tab. The charge total includes the sum of the cost for each task, and associated taxes.