Process Bills
Regular Billing
From the menu bar, select Billing>Calculations>Process Bills. The Bill Process dialog box displays
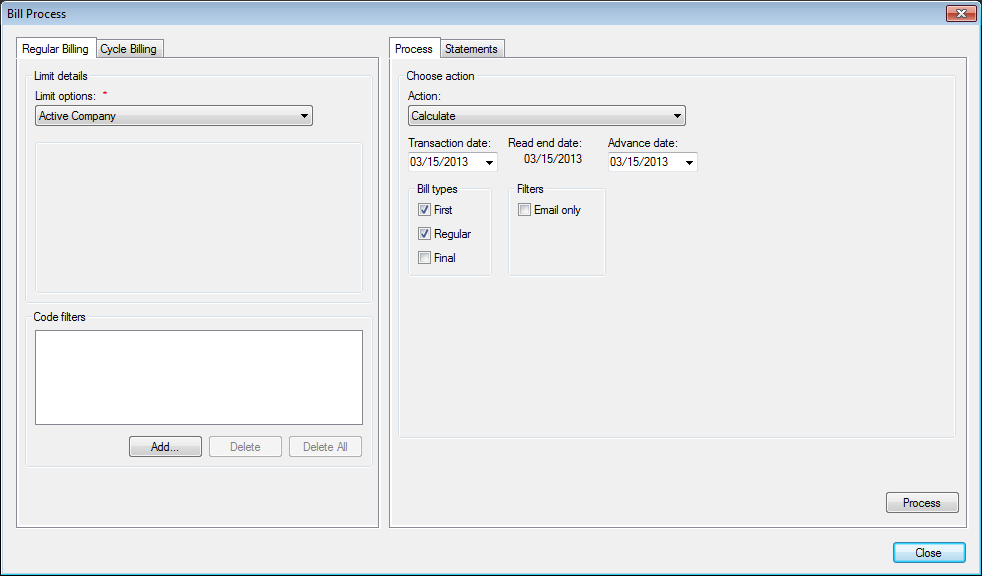
Figure 544: Processing Regular Bills
Select the desired Limit options, such as Route or Cycle
Click Add
 and add the desired Code Filters to further
limit the accounts that are being processed
and add the desired Code Filters to further
limit the accounts that are being processedClick the drop-down list arrow and select the applicable Transaction date. This will be the transaction date of the bills in the customers’ history
When a rate code is defined to bill minimums in advance, Advance date is enabled. This only applies for Minimum & Consumption and MFI & Consumption rates
Click the checkbox next to the desired Bill types - Regular, Final, or e-mail
Regular. Include Regular bills in this calculation
Final. Include Final bills in this calculation
E-mail. Limit the bill file to e-mail bill customers
Click the drop-down Action list arrow and select the desired processing action
Calculate. Calculate the charges for this billing
Review Calculations. Review the calculated amounts for each customer in the billing. Charge details and meter reads can also be verified from Review Calculations
Billing Edit List. Allows the user to view, print, or save a report with the charge details for the current bill calculation
Different formats are available. A default can be selected or changed under Setup>Administrator>Report Association. Or, no default can be selected and the user can choose between all three when running the report
Billing Exceptions. Will allow the user to view, print or save a report with the billing exceptions from this calculation
Post. Post the calculated charge amounts to customer accounts
Post & Create Statement. Generate statements for the current calculated charges while posting the calculated charges to customer accounts
Click Process. The processing takes place in the background and the screen refreshes
Review Calculations
Select Review Calculations from the Action list
Click Process
Click the Amount column header to sort the results by the Amount field and look for exceptionally small or large bill amounts
To sort the results in ascending (small to large) order, click once on the column header
Click a second time to reverse the sort to descending (large to small) order
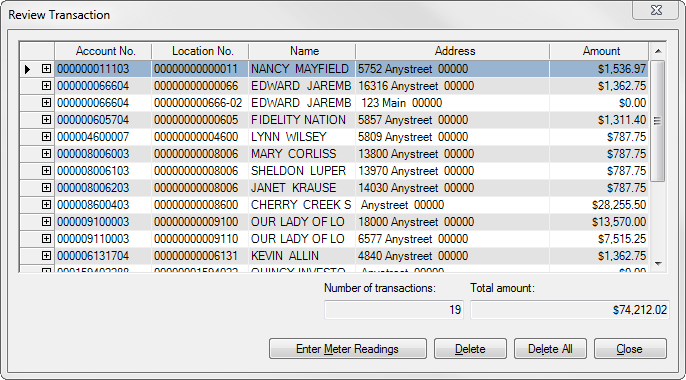
Figure 545: Process Regular Bills - Review Transaction
Click Add
next to an account number, then the
Details link to see the charges for each service
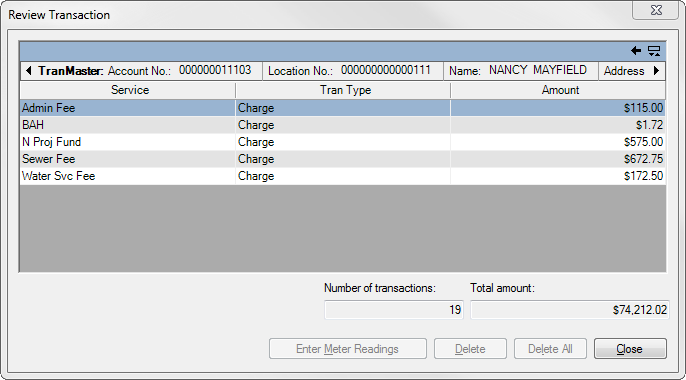
Figure 546: Process Regular Bills - Transaction Breakdown
Click the back arrow in the upper right corner of the window to return to the condensed calculation list
Use the Enter Meter Readings button to access the Enter Meter Readings screen and review or edit the current and prior reads for the selected account. The charges for that account can be recalculated as soon as the readings are corrected
Use the Delete and Delete All buttons to delete incorrect calculations. Delete erases the calculation for only the selected account; Delete All removes all of the current calculations so the user can start over
Review Edit List(s)
Select Billing Edit List from the Action list
Select the Sort order: Account No, Name, Location No, or Zip Code
Click Process
The selected report will open in a preview window, from which it can be printed or saved

Figure 547: Example of Bill Register Unposted Report
Billing Exceptions
Select Billing Exceptions from the Action List
Click Process. A window will open where the user can select options for the report
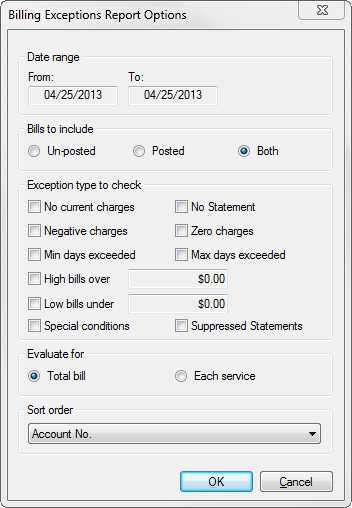
Figure 548: Billing Exceptions Report Options
Date range- will default to the date of the billing
Bills to Include:
Unposted will show exceptions for bills that have not been posted
Posted will show exceptions for bills that have been posted
Both will show exceptions for both posted and unposted bills
- Exception Type to check. Specifies which exceptions will be
shown on the report
No Current Charges – includes services, on active customers, that do not have a current bill
No Statement – includes services, on active accounts, in which a statement was not created
Negative Charges – includes accounts on which a negative charge has calculated, or that a credit balance exists after calculating
Min Days Exceeded – Includes bills in which the days of service was smaller than the minimum days for the rate
Max Days Exceeded. Includes bills in which the days of the billing period is greater than the max number of days for the rate
High Bills. Includes accounts with a bill equal to or higher than the amount entered to be considered a high bill
Low Bills Under. Includes accounts with a bill equal to or less than the amount entered to be considered a low bill
Zero Charges. Includes services on active accounts which calculated a zero charge
- Evaluate for. Will allow you to decide to evaluate the
exceptions on either the whole bill, or each service individually
- Sort order. Click the drop-down list arrow and select how you
want to sort the report
Account No. Sorts and groups the exceptions by the account number to which they apply
Location No. Sorts and groups the exceptions by the location to which they apply
Bill Date. Sorts and groups the exceptions by the bill date to which they apply
Exception Type. Sorts and groups exceptions by the exception type to which they apply
Route No. Sorts and groups the transactions by the route number associated with the governing location number
Total Charges (Lowest to Highest). Sorts and groups by total charges in the order of smallest charge to largest charge
Total Charges (Highest to Lowest). Sorts and groups by total charges in the order of the largest charge to the smallest charge
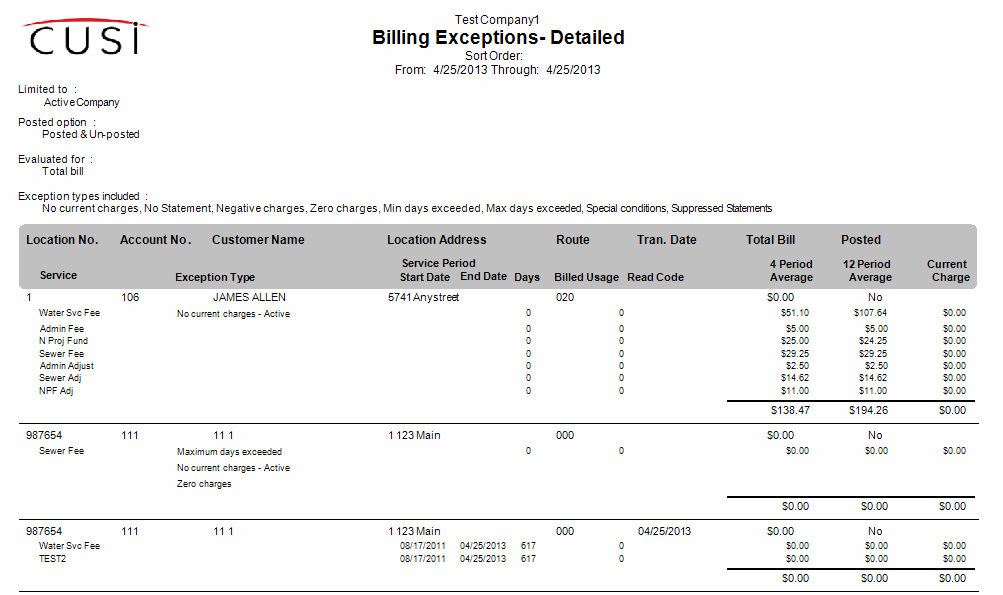
Figure 549: Example of Billing Exceptions Report
Post Charges
Select Post from the Action list. To allow the user to send a single statement file that can include multiple billing sessions or days, this option only posts the charges to the customer accounts; statements will be generated in a separate process
Click Process. UMS will post the calculated charges to the customers’ accounts
After the charges post, a message prompts the user to print posting totals:
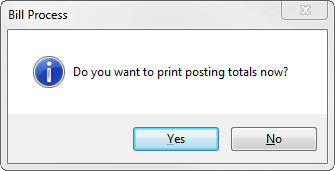
Figure 550: Print Posting Confirmation
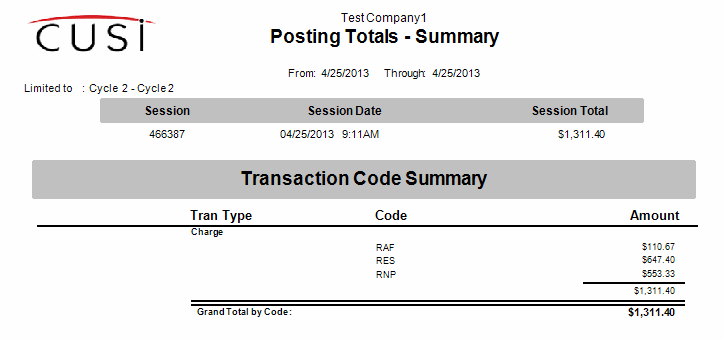
Figure 551: Example of Posting Totals Report
Post & Create Statement
Select Post & Create Statement from the Action list
Enter the Due Date for the statements
The Statement Date will default to the Transaction Date
The Optional Date allows the user to set another date that can be printed on the statement form
Enter a Comment for the statements, if desired
Click Process
After the charges post, a message prompts the user to print posting totals
Cycle Billing
From the menu bar, select Billing>Calculations>Process Bills. The Bill Process dialog box displays
Open the Cycle Billing tab
Select Cycle to be billed. The dates for the first available unbilled cycle period will appear
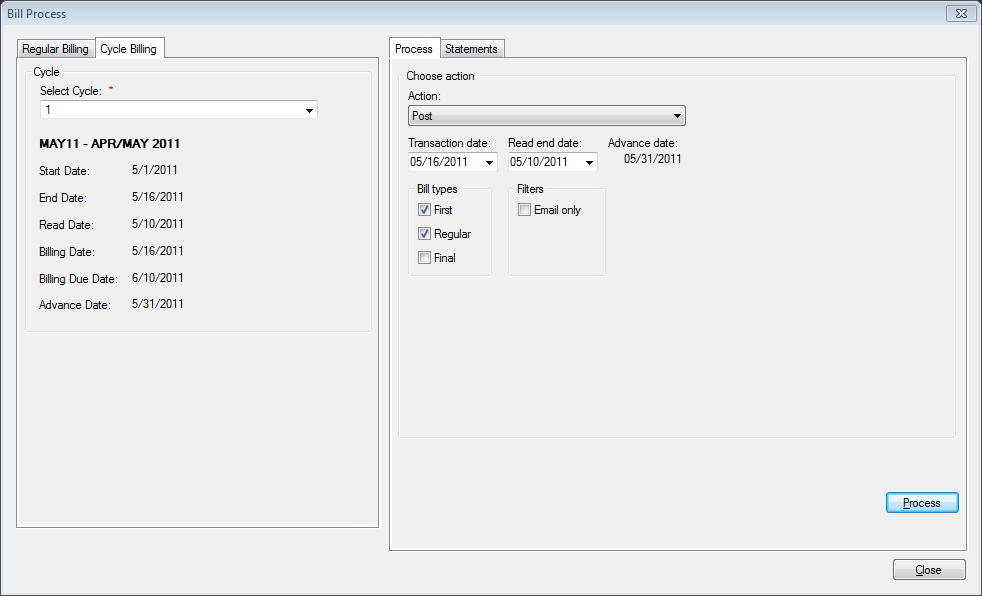
Figure 552: Process Cycle Billing
The Transaction Date will automatically be populated based on the cycle period dates that have been previously configured. If it needs to be changed, it can be overridden from this screen
When a rate code is defined to bill minimums in advance, Advance date is enabled. This only applies for Minimum & Consumption and MFI & Consumption rates
Select the Bill Types: Regular, Final, or E-mail
Regular. Include Regular bills in this calculation
Final. Include Final bills in this calculation
E-mail. Limit the bill file to e-mail bill customers
Click Process
Review Calculations
Select Review Calculations from the Action list
Click Process
Review Edit List(s)
Select Bill Edit List, Bill Edit List Format 2, or Charge Edit List from the Action list
Select the Sort order: Account No, Name, Location No, or Zip Code
Click Process
The selected report will open in a preview window, from which it can be printed or saved
Post Charges
Select Post from the Action list
Click Process. UMS will post the calculated charges to the customers’ accounts
After the charges post, a message prompts the user to print posting totals
Post & Create Statement
Select Post & Create Statement from the Action list
Enter the Due Date for the statements
The Statement Date will default to the Transaction Date
The Optional Date allows the user to set another date that can be printed on the statement form
Enter a Comment for the statements, if desired
Click Process
After the charges post, a message prompts the user to print posting totals