Final Bill Wizard
The Final Bill Wizard is a step-by-step interface for disconnecting a Customer and generating a final bill. This includes entering details such as address, services, deposits/contracts, open work orders, meter readings, and calculations.
Details
Before the Wizard can be used to move a Customer out of a Location, all existing transactions at a Location must be posted. Balances may still be outstanding or past due, however. Any payment arrangements set up before the move-out will still be in effect, regardless of the Account status.
Note: All items marked with a red asterisk (*) are required fields, and the Account cannot be finalized until all required fields have been properly completed.
To open the Wizard, select Management>Final Bill Wizard from the main menu or Move > Move Out from the Account Control Panel footer toolbar.
Welcome
Figure 150: Final Bill Wizard - Select Location
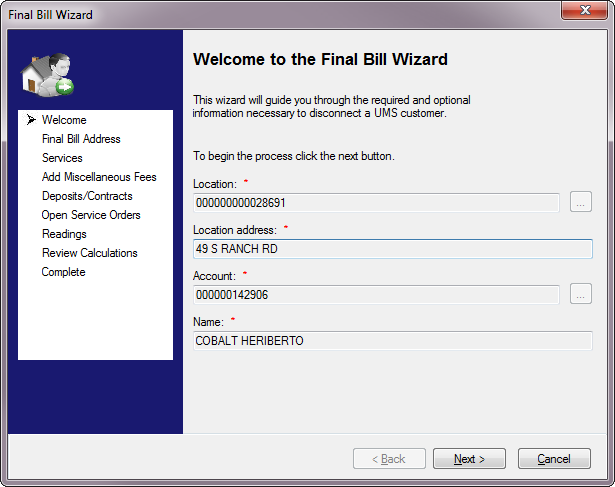
All fields are required, but only one entry is needed. Type or select (using the Browse button) the Account or Location number, and the remaining three fields will be populated automatically.
Notices pertaining to the selected account may also pop up:
Unposted Transactions
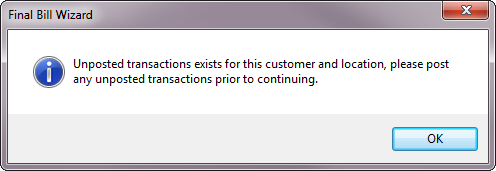
Before an Account can be finalized, all existing transactions must be posted. Additional charges or payments may be created through the finalization process, and balances may be outstanding, but the finalization cannot proceed until all existing transactions are posted. If the selected account has any unposted items, the following notice will prompt you to exit the Wizard and post all transactions before proceeding:
Figure 151: Unposted Transactions Notice
Payment Arrangements
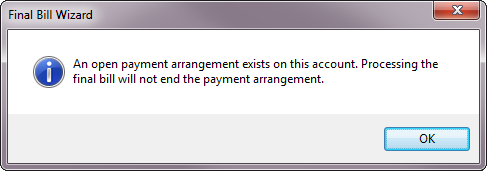
The close-out process has no effect on any payment arrangements on the Account. These will remain in effect until completed, regardless of Account status. If you select an account with an associated payment plan, the following notice will appear. No action is required.
Figure 152: Payment Arrangements Notice
Click Next to proceed to the Final Bill Address screen.
Final Bill Address
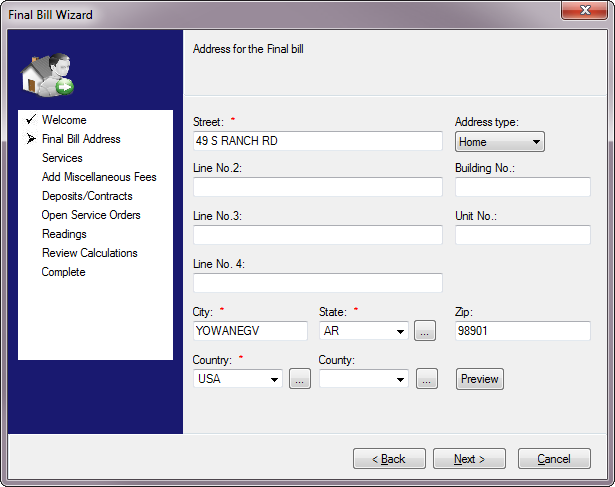
Figure 153: Final Bill Wizard - Final Bill Address
The fields in this screen will default to the address on file for the Account. If the final bill should be sent to a different address (for example the Customer’s forwarding address), edit the details as needed.
- Address Type. Optional. Select a designation (Home, Work, etc.)
for the billing address.
- Address fields. Verify or enter/edit the address details in the
fields provided. Only the first Address line, City, State, and Country are required.
- Preview. When you click Preview, a window with sample mailing
label text will open:
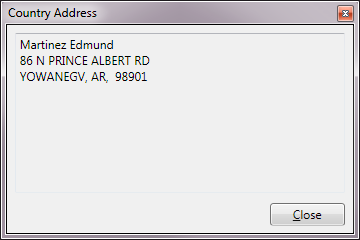
Figure 154: Final Bill Address Preview
Click Next to proceed to the Services screen, or Back to return to the previous one.
Services
Figure 155: Final Bill Wizard - Services
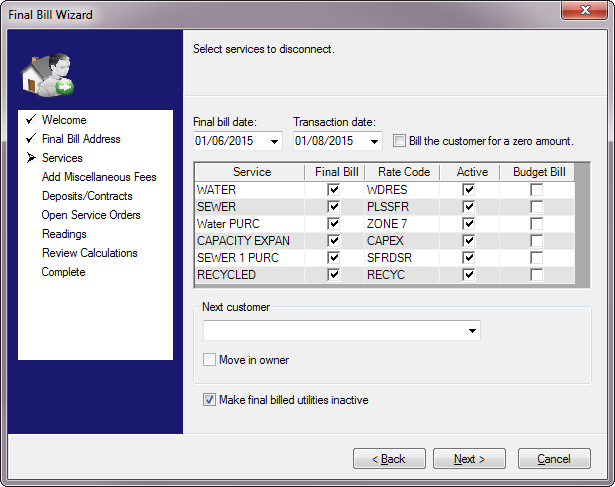
Final Bill Date. This is the day on which the resident left the location. The date will appear in the reference field in the account history. Type or select the date from the drop-down calendar.
Transaction Date. This will be the date associated with the final bill charges in the account history. Type or select the date for final bill transaction. Not that final bills cannot have a transaction date in the past.
Bill the customer for a zero amount. Check this box if the customer is to be billed even if there is no balance due.
Services grid. This table lists all the services which are active at the Location, with rate codes and status boxes for each. The Final Bill column contains checkboxes to indicate whether a final bill should be created. UMS is currently configured so that all available services will be closed out by default, and you will not be able to uncheck any of the boxes.
Next customer. If a customer is waiting for this location and is ready to move in, select the Customer from the list. The list should contain any Customer(s) who have been set up for this Location. If there is no Waiting Customer, leave the field blank.
Move in owner. If the new customer is the owner, click this checkbox. This box applies primarily to rental property, for which the Owner is responsible for billable activity when there is no tenant.
Make final billed utilities inactive. If this box is checked on, all utilities will be deactivated when the final bill is created. The services must be manually reset to Active when the next customer moves in to the Location.
Click Next to proceed to the Add Miscellaneous Fees screen, or Back to return to the previous one(s).
Add Miscellaneous Fees
Figure 156: Final Bill Wizard - Add Miscellaneous Fees
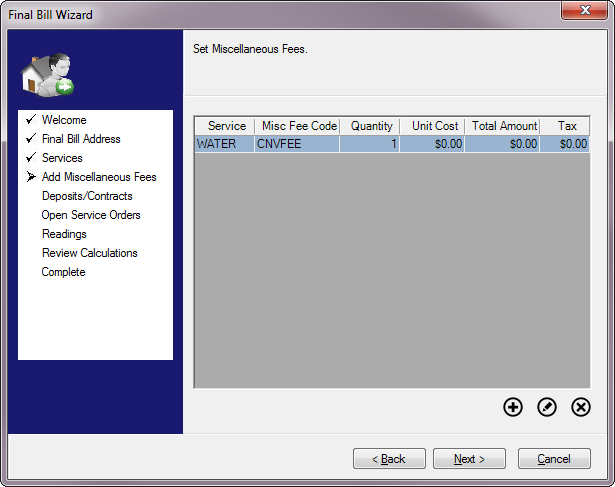
If there are any fees associated with the account finalization, enter them here.
Use the Add button to add any applicable miscellaneous fees, such as penalties of shut-off fees. The Edit and Delete buttons can be used to make changes.
Clicking Add opens the Add Miscellaneous Fee Details window, which will allow you to select from pre-defined service codes and fees. See Miscellaneous Transactions > Miscellaneous Fees for more information.
Click Next to proceed to the Deposits/Contracts screen or Back to revisit previous one(s).
Deposits/Contracts
Figure 157: Final Bill Wizard - Deposits/Contracts
This window will show any deposits on hold for the Account, and any contracts currently in place for the Customer.
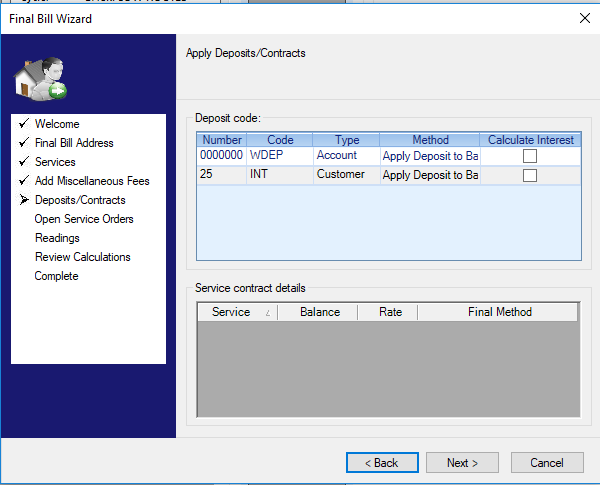
Deposit code. Each open deposit is listed with its deposit number, code, and type. The method column contains options for the application of the balances held. Click twice in the cell to open the list, and select the appropriate option for each line item. Selecting "Apply only to specific service(s)" requires at least one service to be selected and will refund any remaining deposit amount not applied to the selected services. The interest column allows users to calculate deposit interest before applying the method from the method column.
Service contract details. This section is for information only. Any current contracts for this account are listed in this field, identified by service, balance remaining, and final disposition of the contract once the account is finalized.
Open Service Orders
Figure 158: Final Bill Wizard - Open Service Orders
All open Service Orders will be listed in this window.
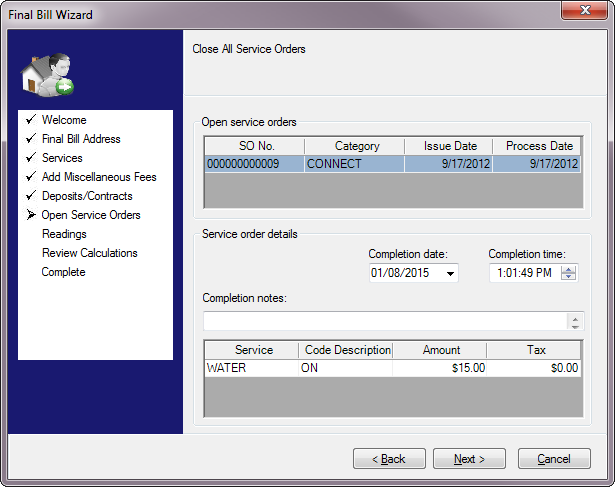
Open service orders. All current Service Orders will be listed in the table, including the Service Order number (SO No.), category, issue date, and process date.
Service order details. This information will change, depending on which service order is selected in the Open service orders table above. The Completion date and Completion time fields will default to current date/time. Edit these as applicable for each open service order
Completion Notes. This information will change, depending on which service order is selected in the Open service orders table above. Enter any applicable notes concerning each service order.
Charge table. The service and code related to the selected service order. The charge field will default to the standard charge defined for the code when it was set up (refer to Service Order Management). If a different amount should be charged, enter the new charge here. Any applicable taxes will be automatically calculated, depending on how the taxes were defined when the service order code was created.
Click Next to proceed to the Readings screen or Back to revisit previous one(s).
Readings
Figure 159: Final Bill Wizard - Final Readings
In order to calculate a final bill for metered services, final meter readings must be entered. In the above example, only one metered service is present, so only one reading must be entered. Final readings may be entered from actual reads or estimated based on historical information.
The upper part of the window contains information about all meters for all services, and this is where current reads are entered for each meter.
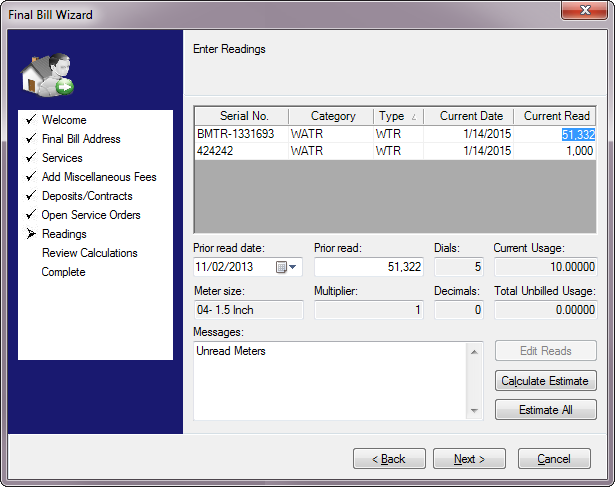
Serial No. This is the serial number for the meter being read. It identifies the source of the entry. This is not a manually editable field, it is provided for meter identification only.
Category. This is the service that is measured by the indicated meter. This is not a manually editable field. It is provided for service identification only.
Type. This is the type of meter being read. This is not a manually editable field. It is provided for meter identification only.
Current Date. This is the date of the final read, which is generally the same day the Account is finalized. The field defaults to the current date. If another date should be used to calculate the final bill, click in the field and type the correct date or select it from the drop-down calendar.
Current Read. Type in the final meter reading.
The lower part of the window contains additional information about the meter selected in the upper section. This includes prior read in formation as well as notes and reading options. This section of the window will change depending on which line is selected in the grid above.
Prior Read Date. This is the date of the last meter reading. It can be edited if necessary, by typing in the field or by selecting a date from the drop-down calendar.
Prior Read. This field is automatically filled with the last entered meter reading. It can be edited if necessary.
Dials. This is the number of dials on the meter. This is not a manually editable field. It is provided for information only. This information is necessary if an office estimate is needed for the reading.
Current Usage. This is automatically calculated as the difference between the current and prior reads. It cannot be manually edited.
Meter Size, Multiplier, Decimals, Total Unbilled Usage. These fields are for information only, and cannot be manually edited.
Messages. Any meter reading notes or exceptions will appear here. This field is for information only, and cannot be manually edited.
Edit Reads. This button applies only for multi-read meters. If the service is set up for single-read, the button will be grayed out.
Calculate Estimate. Click Calculate Estimate if the final reading for a selected service needs to be estimated. Refer to Meter Readings for more information on estimated readings.
Estimate All. Click Estimate All if the final reading for all metered services need to be estimated. Refer to Meter Readings for more information on estimated readings.
Click Next to proceed to the Review Calculations screen or Back to revisit previous one(s).
Review Calculations
Figure 160: Final Bill Wizard - Review Calculations
The final charges are calculated and displayed on screen for review. At any point, you can click Back to return to previous screens and make edits.
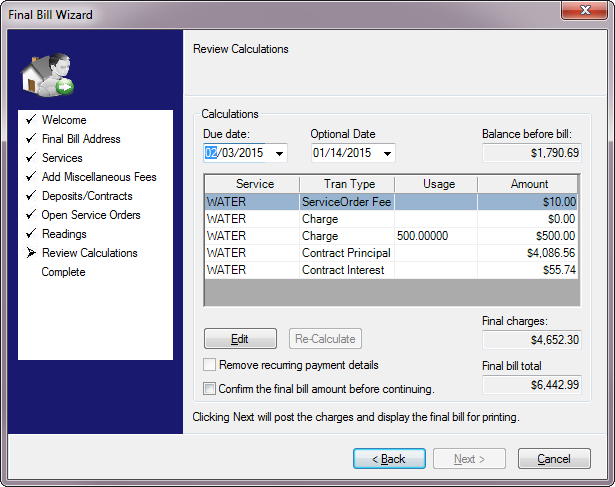
Due Date. Select the due date for the final charges. The default value is based on the current date, plus the due date window defined by your Company. (This option is set through Setup > Preferred Dates.) This date can be edited if needed.
Optional Date. This field may be used to hold any other relevant date tracked under your company’s processes. It will be stored and will be printed as specified, but does not affect the billing process.
Balance before bill. This field show the account balance prior to the new charges created during move-out. It cannot be manually edited.
Charge grid. This table lists all charges associated with the account as line items for review. They are separated by Service, Transaction Type, and Amount. If a metered charge is listed, a Usage amount will also be displayed.
Final Charges. This is the total of the charges created in the move-out process. It will be the total of the amounts listed in the above grid, and cannot be manually edited.
Final Total Bill. This is the total of the previous account balance (Balance before bill) and the new charges (Final Charges). The value is calculated automatically, and cannot be manually edited.
Edit. To make any changes, click the Edit button. This opens the Utility Maintenance screen through which you can make the necessary changes to the rate setup.
Re-Calculate. This button is only active if the Edit button has been used. Click Recalculate to re-perform the bill calculations based on your changes.
Note that the Recalculate button will activate even if no actual changes were saved. You will need to click the Recalculate button in order to proceed, even though recalculating will not change the results.
Remove Recurring Payment Details. This checkbox is only active if recurring payments have been set up for this Customer. Check the box on to remove the payment information on file when the move-out is complete, or off to keep the information.
Note that the Remove Recurring Payment Details checkbox will only be displayed if the customer is not in current or waiting status for any other locations, and will default to the value of the company option Remove recurring payment details on final bill. There is no community option for this setting, therefore communities will also use the company default.
Confirm the final bill amount before continuing. Click this checkbox to confirm that the correct bill amount is shown and that posting can take place.
Note: The Next button will not become active until this checkbox is selected.
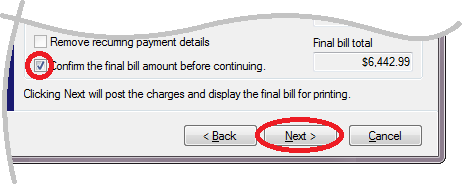
Figure 161: Review Calculations – Confirm and Continue
When you click Next, you will be prompted to confirm that you wish to proceed with posting the transactions and creating the final bill. Click Yes to continue.
Figure 162: Final Bill Confirmation
Once you have confirmed the final bill, you will be taken to the Complete screen.
Complete
Figure 163: Final Bill Wizard - Complete
At this point, the final charges have been posted, but the disconnection information has not yet been saved.
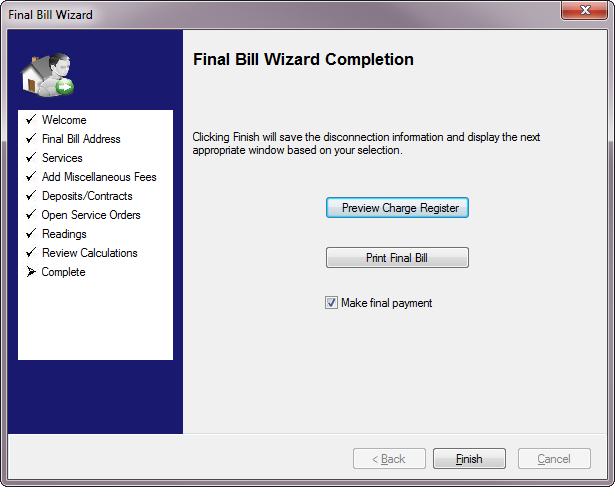
Note: The Back button is no longer active, so you can no longer make changes to the move-out details.
Preview Charge Register. Click this button to preview the Charge Register report. Refer to UMS reporting for more information on this report.
Print Final Bill. Click this button if you prefer to print this bill separately, rather than including it in regular billing. You will be prompted to choose a bill format before the bill is printed.
- Make final payment. If this box is checked, a New Payment
window will open when you click Finish, so that you can immediately enter the Customer’s final payment. Refer to Payments for further details on entering payments.
Once all of the tasks are complete, click Finish to complete the move-out and finish the Final Bill Wizard.