UMS Reporting
UMS offers a number of pre-defined reports to help in the management of your Company’s records.
To access these reports, select Reporting from the main menu bar. If the standard UMS queries and formats do not meet all the requirements for your processes, custom reports can also be created.
All UMS reports can be printed, saved electronically, or exported to other applications.
Common Reporting Functions
Report Limits
When you generate a report, especially for large data sets, it is important to define the scope of the information returned so that your report is not encumbered with too much unnecessary information. UMS reports are designed to allow you to limit queries to only applicable information.
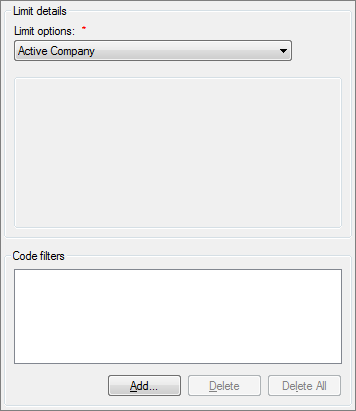
Limit Options and Code Filters
Limit options and code filters are two very useful tools for narrowing the range of queried data. These are not always applicable, and are not available for some reports, such as General Ledger reports and operations summary reports. However, almost all of the standard reports will include standard limit options and code filters fields in the left-hand side of the report options dialog box.
Figure 374: Reporting - Limit Options and Code Filters
For specific information on applying limit options and rate codes, see UMS Overview Common Functions.
Date Range
Many reports include date-specific information, and therefore date ranges are useful for limiting the results to only a desired time frame.
Report date ranges are most often in the form of From/To (or From date/Through date) fields, but some reports are designed to pull information as of a particular date (As of field). In some cases, the time frame needs to be limited further, and both the From and To limits will also have an unlabeled time field just below them.

Figure 375: Reporting – Date/Time Range Examples
Note: The headers for the date/time sections will vary according to what type of date is needed, such as Transaction Date or Meter Read Date.
These fields will generally default to the current date/time. Change the dates as needed either by typing a new date or by clicking on the arrow at the end of the box and selecting the desired date from the drop-down calendar. Refer to Dates for more specific information on using the calendar function. If applicable, change times by typing a specific time or using the up/down arrows to select a particular time of day.
Sort Order
For most reports, the results can be sorted by a selected parameter. The sort options are generally fields appearing in the report, although not all report fields are always available for sorting.
Sort order appears as a drop-down menu near the bottom of the report options dialog box. If an order other than the default order is needed, select a sort factor from the drop-down menu.
Report type
There are three primary report types, Detailed, Condensed, and Summary.
Note: These report types may not always be applicable to all reports, and if a type is not applicable, it will not appear in the menu. If a report has a defined format to which these report levels do not apply, the option will not be available at all, and the pre-defined format will be used.
Detailed reports include Information for each selected Account, divided by utility. Each listing will generally have one line per utility on the Account. The detailed report will include an overall summary at the end of the document.
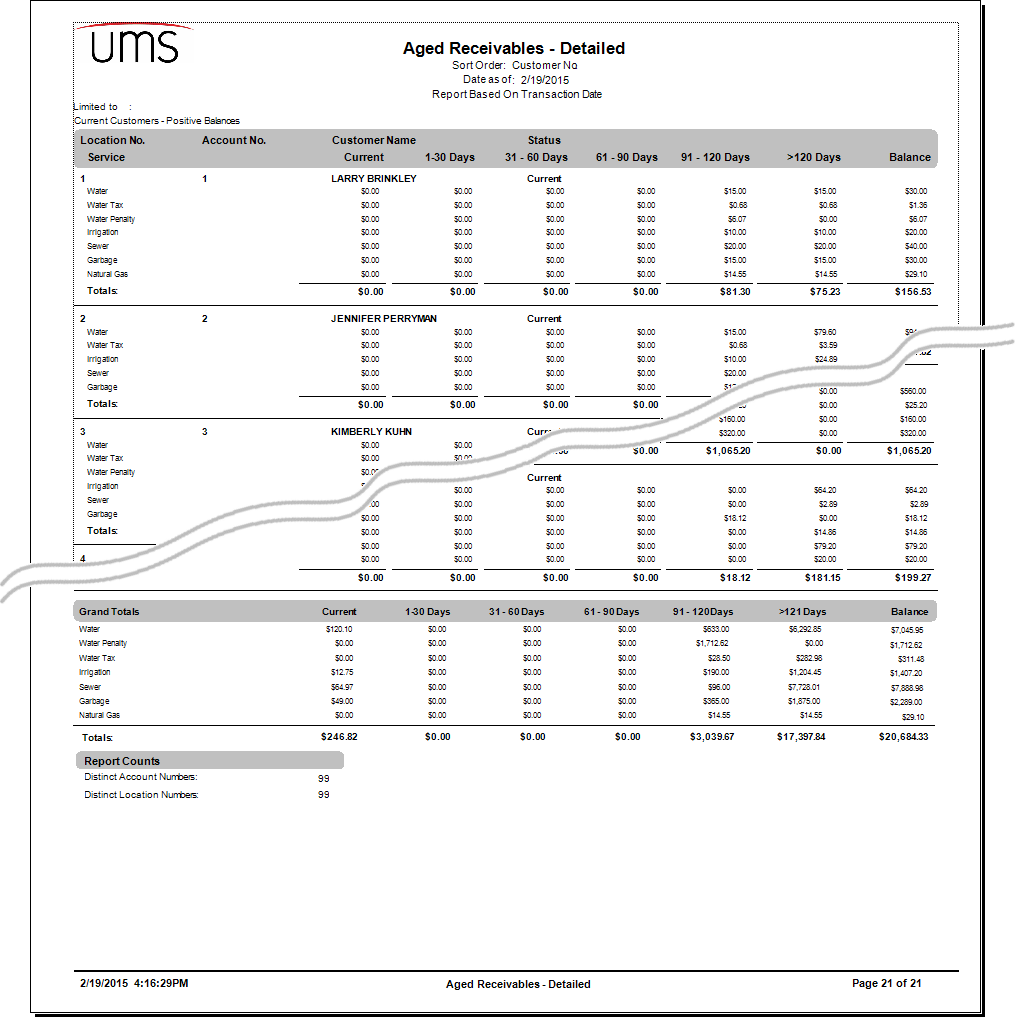
Figure 376: Detailed Report Example
Condensed reports include summary information for each Account, but the results are not broken down into utility-level information. The condensed report will include an overall summary at the end of the document.
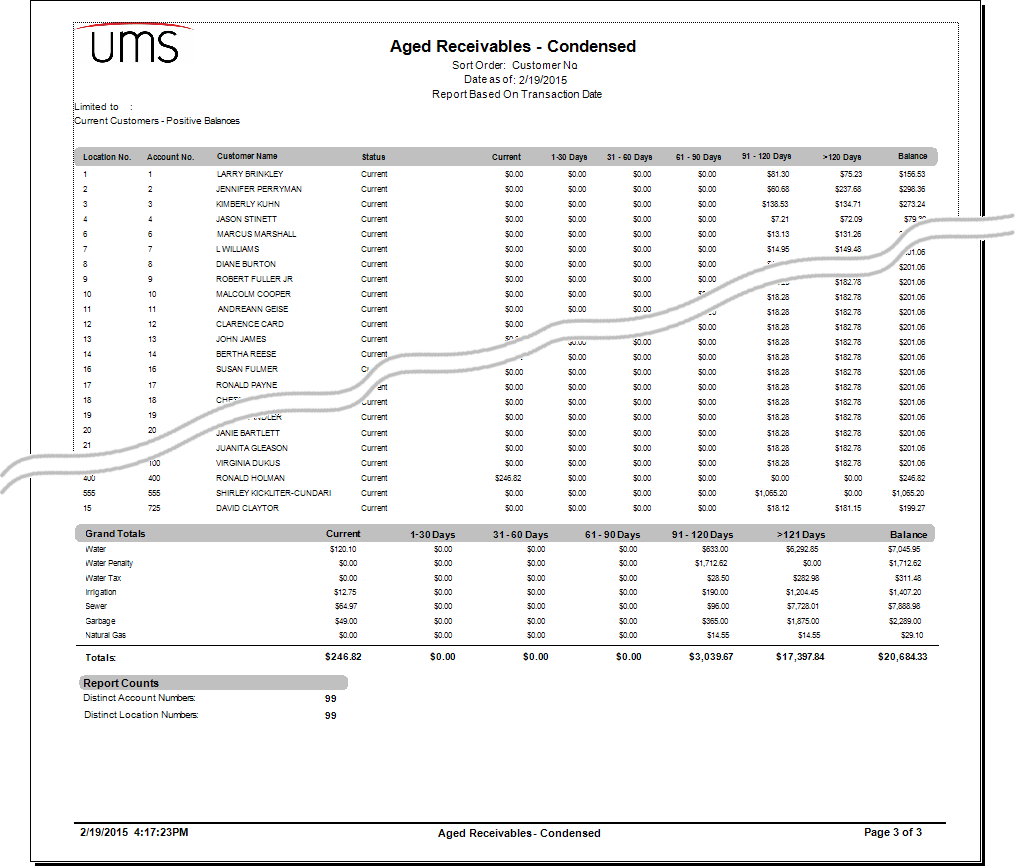
Figure 377: Condensed Report Example
Summary reports include only an overall summary, which is actually the same as the one provided in the detailed and condensed reports.
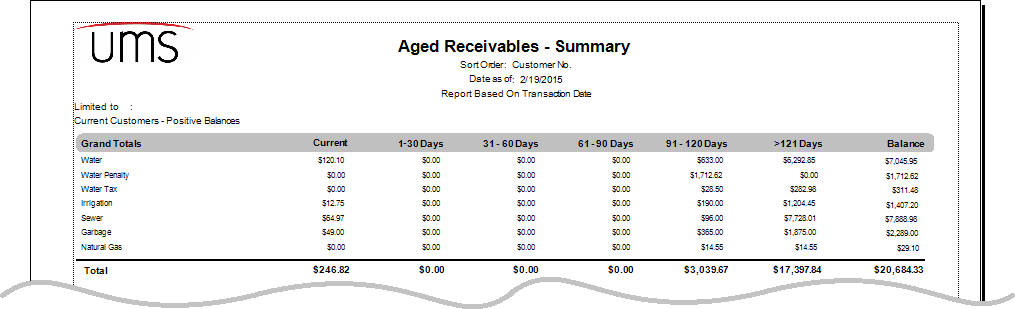
Figure 378: Summary Report Example
Report Output
All reports will have multiple output options. Preview, Print, and Export buttons will be available for all reports, in most cases appearing together near the Close button at the bottom of the report options window.
Figure 379: Report Output Options Example
Refer to Output Options for more specific information on each of these functions.
Exception Reports
In general, exception reports are designed to query the database for any abnormal or unusual information associated with UMS tasks or functions. This includes such items as abnormal bill calculations or discrepant meter readings. The parameters used to determine what constitutes abnormal can be customized for your processes. Any items falling outside of the defined normal limits will appear on the report for review and/or follow-up.
Adjusted Prior Reads
The adjusted prior reads report provides a list of any instances where the prior read for a bill is different than the current read from the previous bill.
From the main menu bar, select Reporting > Exception Reports > Adjusted Prior Reads to open the Adjusted Prior Reads report options window.
Adjusted Prior Reads Report Options
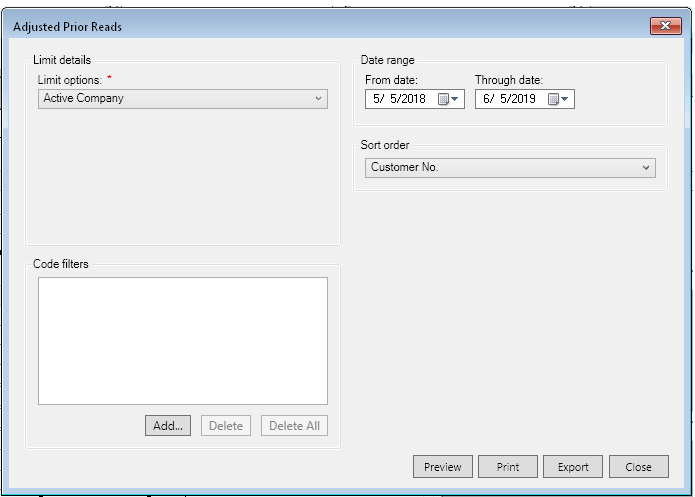
Limit details. Select the desired Limit options and Code filters.
Date range. Enter the date range for the report.
Sort order. Select the applicable sort order from the drop-down menu.
Customer No.: Sorts and groups the report by account number.
Location No.: Sorts and groups the report by location number.
Customer Name.: Sorts and groups the report by customer name.
Select the output option (Preview, Print, Export) for the report. Refer to Output for further details.
Billing Exceptions
The billing exception report provides a list of abnormal bill calculations for a billing cycle. Abnormal results may include no charges, high or low charges, suppressed statements, etc. This report should be reviewed before bill posting, in order to ensure that any abnormal results flags are addressed.
From the main menu bar, select Reporting > Exception Reports > Billing Exceptions to open the Billing Exceptions report options window.
Figure 380: Billing Exceptions Report Options
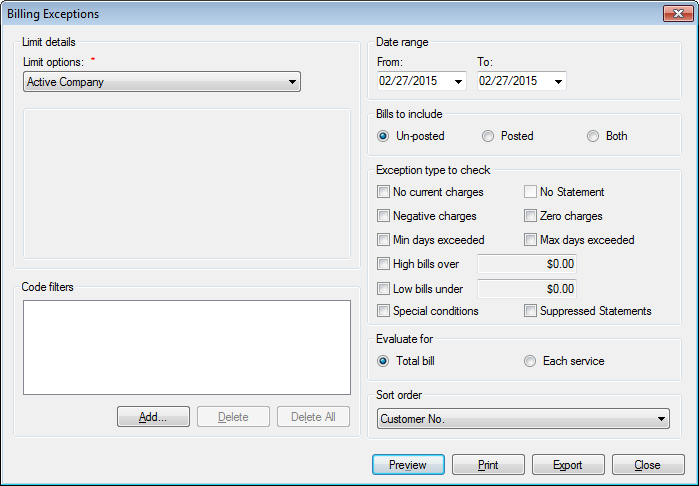
Limit detailsSelect the desired Limit options and Code filters. Refer to the linked sections for further details.
Date range. Enter the date range for the report. Refer to linked section for further details.
- Bills to include. Choose whether to include posted bills,
unposted bills, or both in the exception list by clicking the radio button next to your selection.
- Exception type to check. Select which type(s) of exception to
include in the report. The exception items are defined as follows:
- No Current Charges. Active accounts with services for which there
is no current charge.
No Statement. Active accounts for which no statement was created. This field become active when “Posted” is selected.
Negative Charges. Accounts for which a negative charge has been calculated, or which have a credit balance after calculating.
Zero Charges. Active accounts with services for which there is a zero charge
Min Days Exceeded. Bills for which the days of service was smaller than the minimum number of days for the rate.
Max Days Exceeded. Bills for which the days of service is greater than the maximum number of days for the rate.
High bills over. Bills higher than the high bill cutoff level entered in the field to the right. The amount box will be enabled when the box is checked. Enter or change the amount that constitutes a high bill, as applicable.
Low bills under. Bills lower than the low bill cutoff level entered in the field to the right. The amount box will be enabled when the box is checked. Enter or change the amount that constitutes a low bill, as applicable.
Special Conditions. Accounts with any conditions noted in the Special Conditions section of the Account Control Panel.
Suppressed Statements. Accounts with statement suppression indicated as a special condition.
Note: The bill would still be generated and emailed if the account has opted to receive an email bill.
- Evaluate for. Select whether to evaluate exceptions based on
individual services or on the total bill, by clicking the radio button next to your choice.
The results could differ if, for example, one service has a credit balance while others have owed balances that exceed the credit amount. This example would be flagged as an exception if Each Service were chosen, but not for Total bill.
- Sort order. Select the applicable sort order from the drop-down
menu.
- Select the output option (Preview, Print, Export) for the report.
Refer to Output for further details.
Exemption List
The Exemptions List report generates a list of all exemptions assigned to each Customer.
From the main menu bar, select Reporting > Exception Reports > Exemption List to open the Exemption List report options window.
Figure 381: Exemptions List Report Options
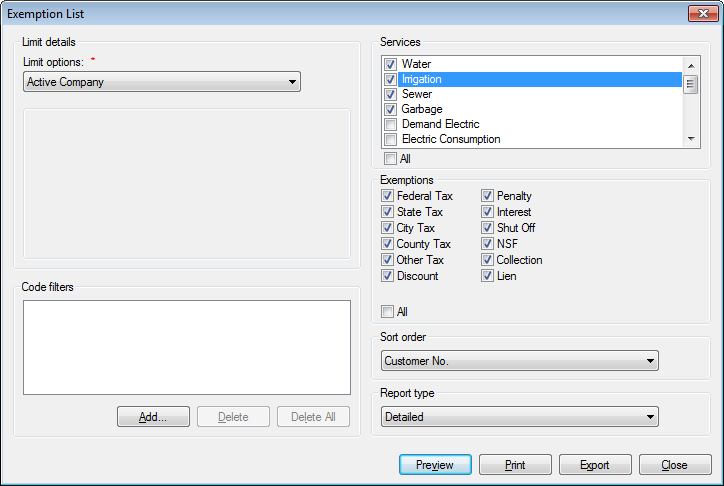
Limit detailsSelect the desired Limit options and Code filters. Refer to the linked sections for further details.
Services. Select the services to be included in the query, by clicking the checkboxes on or off, as applicable. Use the All checkbox below the list to select or deselect all services at once.
Exemptions are tied to services, and therefore the exempted service(s) must be selected for the exemptions to appear in the report.
- Exemptions. Select the type(s) of exemptions to include in the
query, by clicking the checkboxes on or off, as applicable. Use the All checkbox below the list to select or deselect all exemptions.
- Sort order. Select the applicable sort order from the drop-down
menu.
- Report Type. Select Detailed or Summary from the drop-down
menu. Condensed is not an option for this report.
- Select the output option (Preview, Print, Export) for the report.
Refer to Output for further details.
A detailed report will include identifying information (Location and Account numbers, Customer name, and service) for each exemption, and a series of 12 columns corresponding to the 12 exemption types. If a Customer has a given exemption, a “Y” will appear in the applicable column. Otherwise, the spaces will be empty.

Figure 382: Exemptions List Report Example
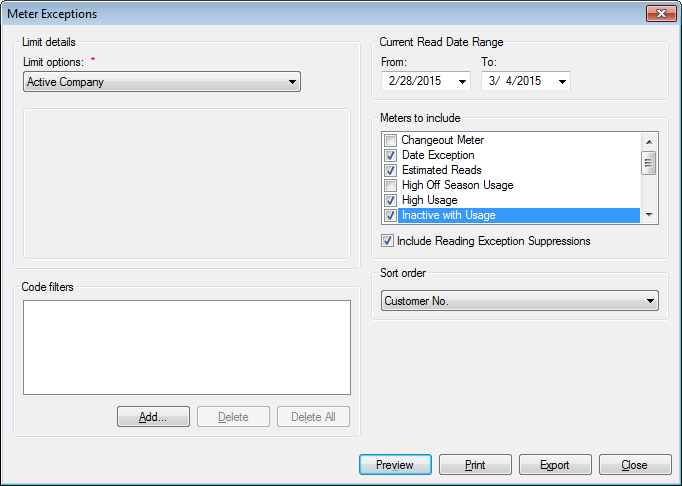
Meter Exceptions
The meter exception report provides a list of abnormal meter reads. Abnormal results may include estimated or unread meters, high or low usage, meters with situation codes, etc. This report should be reviewed before bill posting, in order to ensure that any abnormal results flags are addressed.
From the main menu bar, select Reporting > Exception Reports > Meter Exceptions to open the Meter Exceptions report options window.
Figure 383: Meter Exception Report Options
Limit detailsSelect the desired Limit options and Code filters. Refer to the linked sections for further details.
- Meters to include. Select the types of meter exceptions to include in
the query, by clicking the checkboxes on or off, as applicable. The exception types are defined as follows:
Change Out Meter: Meters which have been changed out since the last billing.
Date Exception: Meters with read dates outside the defined normal date range.
Estimated Reads: Meters where usage amount was estimated in this billing cycle.
High Off Season Usage. Meters which are associated with seasonal rates and have usage above the level defined as high in usage variance.
High Usage: Meters with usage above the level defined as high in usage variance.
Inactive with Usage: Meters which are set as inactive but show usage.
Low Usage: Meters with usage below the level defined as low in usage variance.
Meter off With Usage: Meters which are turned off but show usage.
Meters with Situation Codes: Meters for which a situation code has been entered.
Negative Usage. Meters for which the prior read is higher than the current read.
Rollover Meter: Meters for which the prior read is much higher than the current read, indicating that the meter has reached its maximum and rolled over to zero.
Unread Meters: Meters for which a reading was not recorded in this billing cycle.
Zero Usage: Meters which have no usage (current read = prior read) calculated.
Include Reading Exception Suppressions. If this box is checked, exceptions that have been suppressed (Setup > Reading Exception Suppression) will be included.
- Sort order. Select the applicable sort order from the drop-down
menu.
- Select the output option (Preview, Print, Export) for the report.
Refer to Output for further details.
Financial Reports
The financial reports group includes all reports that are related to accounting or auditing of accounts. In general, these reports are used to detail or summarize the status of specific accounts or the company as a whole, to assist in financial reconciliations.
Accounts Receivable Summary
The Accounts Receivable Summary lists all incoming revenue information for the selected date range. This report provides a way to verify transactions exported to accounting software. It can also be used to review billing totals by rate code.
From the main menu bar, select Reporting > Financial Reports > Accounts Receivable to open the Accounts Receivable Summary report options window.
Figure 384: Accounts Receivable Summary Report Options
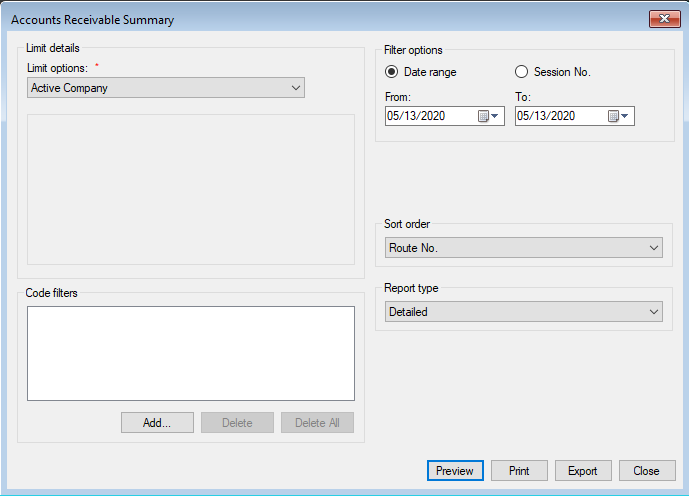
Limit details. Select the desired Limit options and Code filters. Refer to the linked sections for further details.
Transaction date range. Select the desired range of dates and times for the report. Refer to Date Range for more specific information on entering dates and times.
- Sort order. Select the applicable sort order from the drop-down
menu.
Route No. Sorts and groups the transactions by the route number associated with the governing location number
Rate Code. Sorts and groups the transactions by the rate code to which they apply
Revenue Class. Sorts and groups transactions by the customer's revenue class
Service. Sorts and groups transactions by the service to which they apply
- Report Type. Select Detailed, Condensed, or Summary from the
drop-down menu.
- Select the output option (Preview, Print, Export) for the report.
Refer to Output for further details. The displayed data will include:
Opening Balance. This is the Accounts Receivable balance as of close of business the day before the From date of the report
Service. This specifies the service to which the transaction applies
Transaction Type. This specifies the kind of transaction and whether there are any related open credits.
Base Amount. This is either the transaction amount or the base amount of a minimum + overage charge
Overage Amount. This is the amount of a charge created by usage over the minimum for an overage rate code.
Consumption. This is the usage associated with this transaction, if applicable.
Bill Count. This is the total number of bills on which a specified transaction appears.
Balance. This is the Accounts Receivable balance after the specified transaction is applied, kept as a running total through the report.
Headers (Route No., Rate Code, Revenue Class, or Service). Each group of transactions has a header, which is determined by the sort order. Filtered by Date Range/Session No.
Limit details. Select the desired Limit options and Code filters. Refer to the linked sections for further details.
Transaction date range. Select the desired range of dates and times for the report. Refer to Date Range for more specific information on entering dates and times.
Sort order. Select the applicable sort order from the drop-down menu.
Route No. Sorts and groups the transactions by the route number associated with the governing location number
Rate Code. Sorts and groups the transactions by the rate code to which they apply
Revenue Class. Sorts and groups transactions by the customer's revenue class
Service. Sorts and groups transactions by the service to which they apply
Transaction Date. Sorts and groups transactions by their transaction dates.
Report Type. Select Detailed, Condensed, or Summary from the drop-down menu.
Select the output option (Preview, Print, Export) for the report. Refer to Output for further details. The displayed data will include:
Opening Balance. This is the Accounts Receivable balance as of close of business the day before the From date of the report
Service. This specifies the service to which the transaction applies
Transaction Type. This specifies the kind of transaction and whether there are any related open credits.
Base Amount. This is either the transaction amount or the base amount of a minimum + overage charge
Overage Amount. This is the amount of a charge created by usage over the minimum for an overage rate code.
Consumption. This is the usage associated with this transaction, if applicable.
Bill Count. This is the total number of bills on which a specified transaction appears.
Balance. This is the Accounts Receivable balance after the specified transaction is applied, kept as a running total through the report.
Headers (Route No., Rate Code, Revenue Class, Transaction Date, or Service). Each group of transactions has a header, which is determined by the sort order.
Aged Receivables Summary
The Aged Receivable Summary report lists outstanding customer balances through a specified date. This report is helpful when determining shut off, penalty, or lien criteria.
From the main menu bar, select Reporting > Financial Reports > Aged Receivables Summary to open the Aged Receivables report options window.
Figure 385: Aged Receivables Report Options
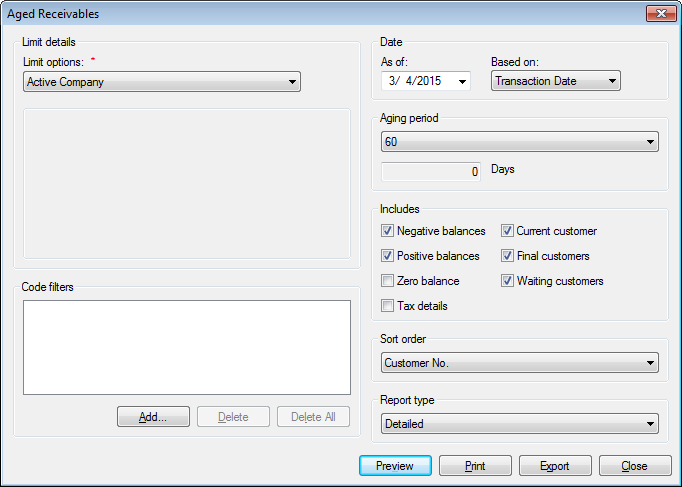
Limit details. Select the desired Limit options and Code filters. Refer to the linked sections for further details.
Date. Select the desired date cutoff for the report. Refer to Date Range for more specific information on entering dates.
Based on. Specify the type of date (Transaction Date or Due Date) entered in the Date field.
Aging period. Select the interval (number of days) for the aged receivables from the options in the drop-down menu. The options are 30, 60, 90, or 120 days, or Other. If Other is selected, the field below the menu becomes available, and you can type in any specific number of days between 1 and 1000.
- Includes. Select the type(s) of items and the type(s) of
customers to include in the report, by clicking the checkboxes on or off, as applicable.
Note: Any combination of Customer types may be selected to limit the scope of the report. If none is chosen, all Customer types will be included in the query.
At least one receivable item must be selected, or the report will not return any results. The available aged receivables options are defined as follows:
Negative balances. Accounts with aged negative balances (credit balances).
Positive balances. Accounts with aged positive balances (charges owed).
Zero balance. Accounts with an aged zero balance, those who have not been billed within aging period.
Tax details. Breakdown of taxes associated with the listed transactions. If multiple taxes (e.g. city and state) apply, each one will be listed separately. If Tax details is not selected, the report will show total taxes per service.
- Sort order. Select the applicable sort order from the drop-down
menu.
- Report Type. Select Detailed, Condensed, or Summary from the
drop-down menu.
A detailed report will include identifying information (Location and Account numbers, Customer name, and service), and a series of seven columns listing the balances in each aging period: current (unaged), within 1, 2, 3, or 4 times the aging period, beyond 4 times the aging period, total balance and the total number of accounts on each aging column.
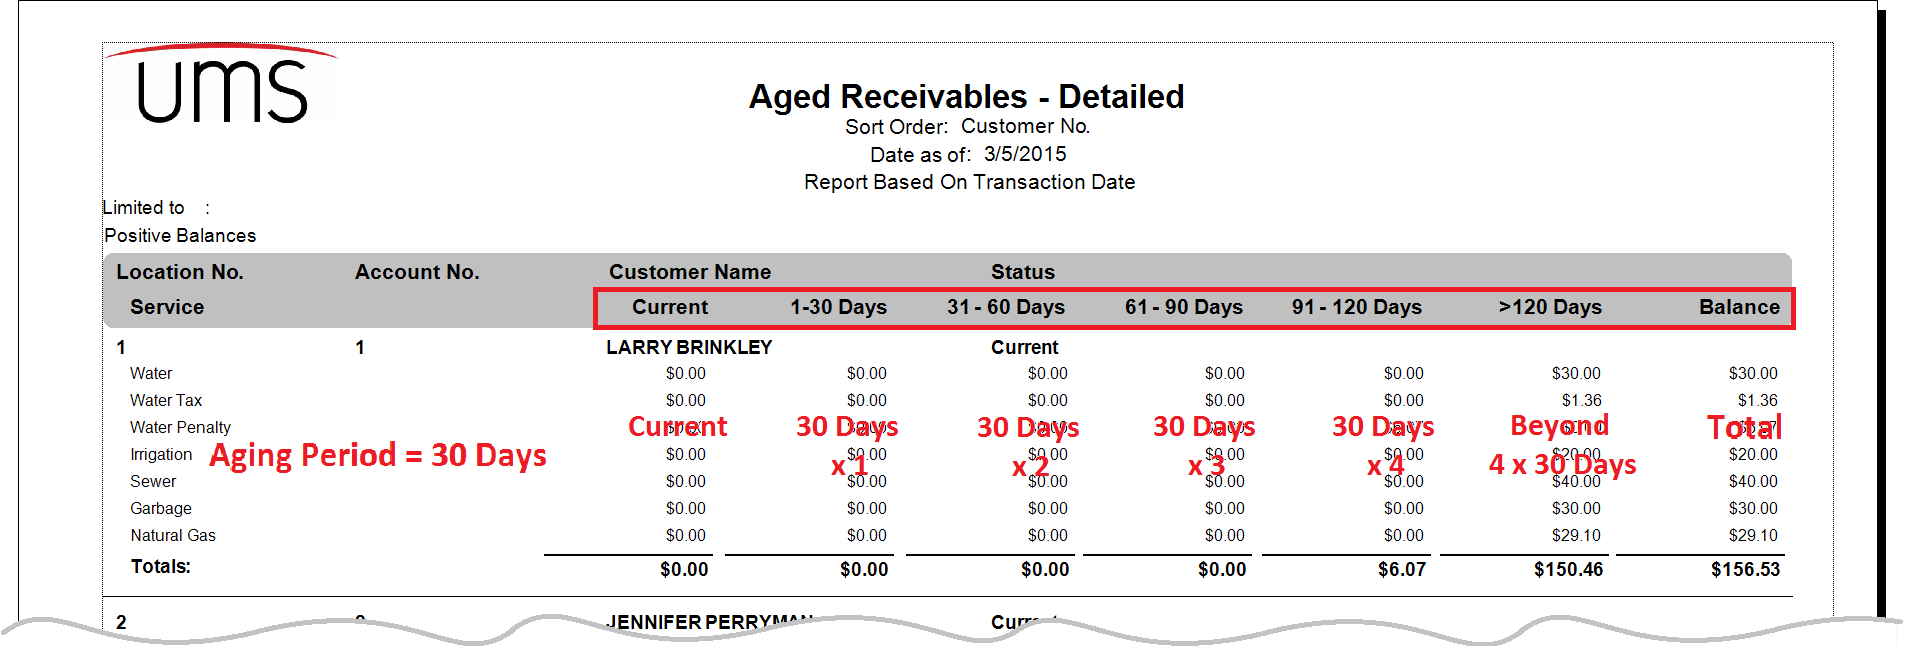
Figure 386: Aged Receivables Report Example
- Select the output option (Preview, Print, Export) for the report.
Refer to Output for further details.
Backdated Transactions
The backdated transactions report provides a list of transactions where the dates involved are further apart than expected. It can be useful for identifying incorrectly entered dates.
From the main menu bar, select Reporting > Financial Reports > Backdated Transactions to open the Backdated Transactions report options window.
Backdated Transactions Report Options
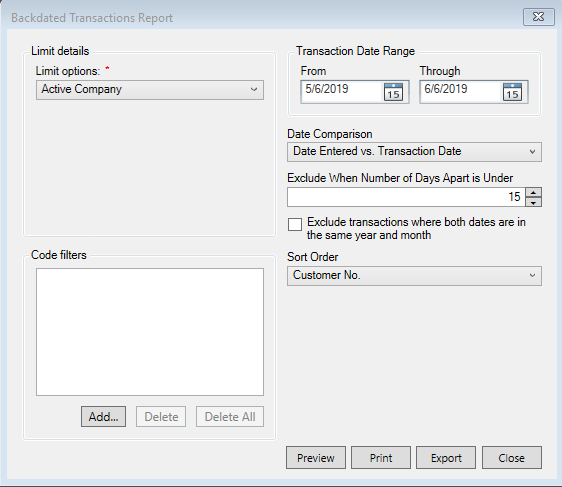
Limit details Select the desired Limit options and Code filters. Refer to the linked sections for further details.
Transaction Date range Enter the date range for the report. Refer to linked section for further details.
Date Comparison Select what dates to compare when calculating and displaying "Days Apart".
Date Entered vs. Posting Date
Date Entered vs. Due Date
Date Entered vs. Transaction Date
Transaction Date vs. Posting Date
Transaction Date vs. Due Date
Exclude When Number of Days Apart is Under Select the minimum number of days apart the selected dates must be in order to be included in the report.
Exclude transactions where both dates are in the same year and month When checked, transactions that occurred in the same year and month will not be included in the report.
Sort order Select the applicable sort order from the drop-down menu.
Customer No.: Sorts and groups the report by account number.
Location No.: Sorts and groups the report by location number.
Days Apart.: Sorts and groups the report by customer name.
Select the output option (Preview, Print, Export) for the report. Refer to Output for further details.
Bad Debt Write-Off List
The Bad Debt Write-Off List displays customers who have had outstanding past due balances written off. It includes a detailed view of accounts with written-off balances.
This report differs from the Write-Off Balance report in that the Bad Debt Write Off List report includes only the original written-off amounts and associated details, and not current information.
From the main menu bar, select Reporting > Financial Reports > Bad Debt Write Off List to open the Bad Debt Write-off List report options window.
Figure 387: Bad Debt Write-off List Report Options

Limit details. Select the desired Limit options and Code filters. Refer to the linked sections for further details.
Charge off dates. Select the applicable date and time range for the report. Refer to Date Range for more specific information on entering dates and times.
- Sort order. Select the applicable sort order from the drop-down
menu.
- Select the output option (Preview, Print, Export) for the report.
Refer to Output for further details.
The report type is pre-defined as detailed. In addition to identifying information (Customer name and number, Location number and address), it will include details (service, bill date, amounts and dates charged off) for each bad debt written off in the specified time frame.
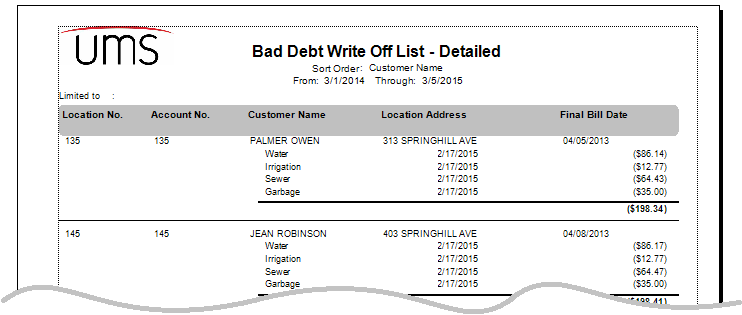
Figure 388: Bad Debt Write-off List Report Example
Balance Cash Drawer
This Balance Cash Drawer report provides reconciliation details to assist in balancing a cash drawer against total payments received. The details can be limited to specific batches or users, and can include posted and/or un-posted payments.
The reconciliation is based on starting balance less any deductions from the drawer. The deductions may fit the pre-defined types (returns, voids, payouts) or additional deduction types may be created. The sum of all entered deductions is subtracted from the starting cash on hand, and the difference indicates shortage, overage, or in-balance.
From the main menu bar, select Reporting > Financial Reports > Balance Cash Drawer to open the Balance Cash Drawer report options window.
Figure 389: Balance Cash Drawer Report Options
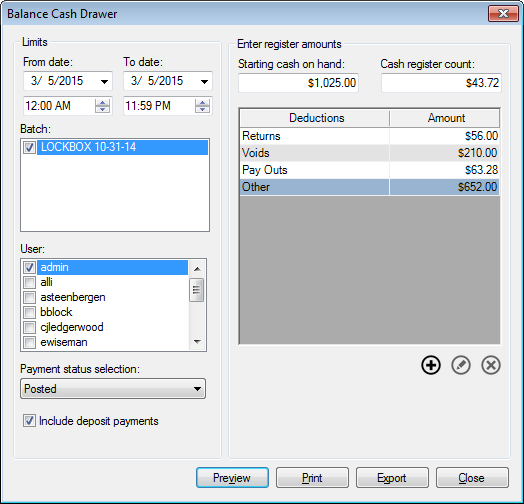
Limits. Unlike most reports, standard Limit Options do not apply. The Limits section includes options specific to this type of report.
From date/To date. Select the applicable date and time range for the report. Refer to Date Range for more specific information on entering dates and times.
Batch. Select the applicable payment batch(es) from the list in the selection box by clicking the checkboxes next to each batch name on or off, as necessary.
User. Select the User(s) for the drawer being reconciled by clicking the checkboxes beside each username on or off, as applicable.
Payment status selection. Choose Posted, UnPosted, or Both Posted and UnPosted from the drop-down menu. This enables you to choose the type pf item to reconcile, or to reconcile each separately, if needed.
Include deposit payments. If this box is checked on, payments received for deposits will be included in the reconciliation.
Enter Register Amounts. This section is where the reconciliation amounts are specified and identified.
- Starting cash on hand. Enter the amount of money in the cash
drawer at the beginning of the selected date range.
- Cash register count. Enter the current amount of money in the
cash drawer
- Deductions and Amount. Enter the dollar amounts corresponding
to each deduction type into the Amount column for each line.
Standard deductions are Returns, Voids, Pay Outs, and Other. Additional deduction types can be created, edited, or removed as needed using the Add, Edit, and Delete buttons below the table.
Note: Standard deductions are built in to UMS, and cannot be edited or deleted. Custom deductions that you add can be edited and deleted.
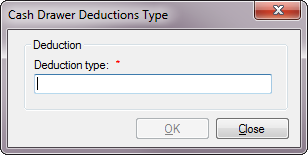
Figure 390: Cash Drawer Deduction Type
Free-type the new/changed deduction type in the filed provided, then click OK to return to the Balance Cash Drawer options. The new/updated type will be in the deduction list.
Select the output option (Preview, Print, Export) for the report. Refer to Output for further details.
Batch Totals
The Batch Totals report lists the details and totals of payment batches. It also lists totals broken down first by payment type (such as Cash, Check, or Charge), then by Service. Refer to Payment Management for more details concerning payment batches.
Note: If each cash drawer is assigned to an individual batch, the Batch Totals report can be used to balance the drawer.
From the main menu bar, select Reporting > Financial Reports > Batch Totals to open the Batch Totals report options window.
Figure 391: Batch Totals Report Options
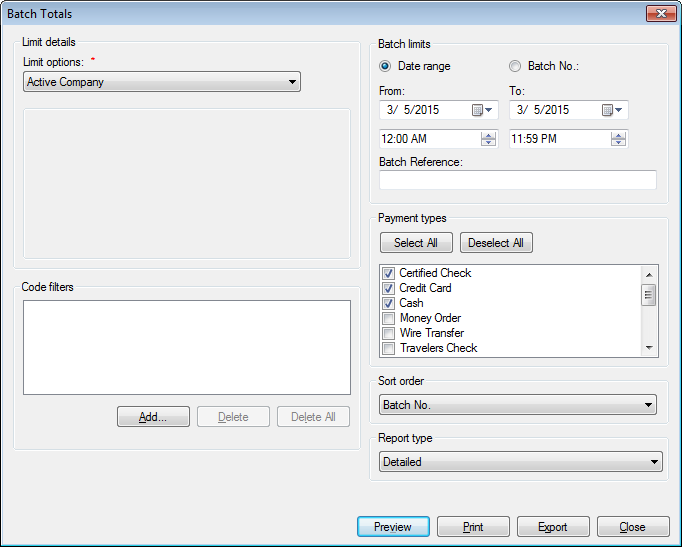
Limit details. Select the desired Limit options and Code filters. Refer to the linked sections for further details.
Batch Limits. Select the radio button next to either Date range or Batch No. to choose to generate the report by date or by batch. The screen will change slightly, depending on the selection:
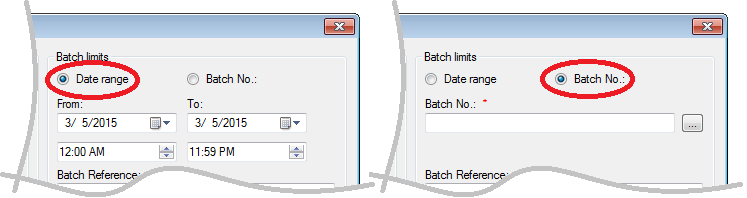
Figure 392: Batch Limits by Date Range and by Batch No.
Date range. Select the desired date and time range for the report. Refer to Date Range for more specific information on entering dates and times.
Batch No. Click the Browse button at the end of the Batch No. line to open the Batch Management window and select a batch. Refer to Payment Management for more information on batch management.
- Batch Reference. Enter a known Batch Reference in this field to
select any batch(es) with the specified reference.
Note: The reference used must be the same as what was saved with the batch in order for a search to find the batch. Use this field only if you know the Batch Reference.
Payment Type. Select the applicable payment type(s) from the list by clicking the checkboxes next to each type on or off, ass necessary. Use the buttons above the list to select (Select All) or deselect (Cancel) all payment types at once. At least one type must be selected, or the report will not yield any results.
- Sort order. Select the applicable sort order from the drop-down
menu.
- Report Type. Select Detailed, Condensed, or Summary from the
drop-down menu.
A detailed report will include each batch with its specific information (date, totals, number of payments, and status) and its individual payments, broken down by service.
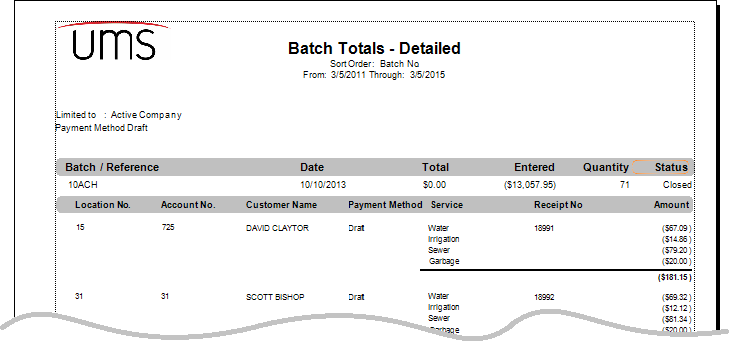
Figure 393: Batch Totals Report Example
In addition to identifying information (Location and Account numbers, Customer names) each payment will be broken down by pay method, service, and amount.
Budget Billing Reconciliation
The Budget Billing Reconciliation report compares the amount budget billed customers are being charged to their actual billing amount for the entered date range. This report can be used to verify that budget billed customers are being charged appropriately, or to help evaluate adjustments to the budgeted amounts.
From the main menu bar, select Reporting > Financial Reports > Budget Billing Reconciliation to open the Budget Billing Reconciliation report options window.
Figure 394: Budget Billing Reconciliation Report Options
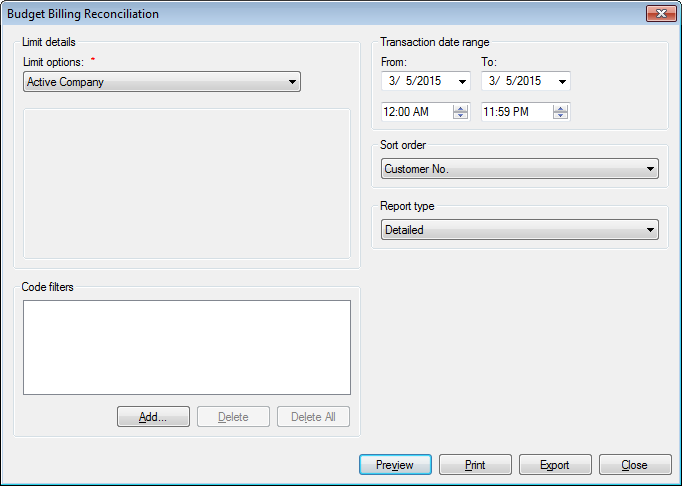
Limit details. Select the desired Limit options and Code filters. Refer to the linked sections for further details.
Transaction date range. Select the appropriate date and time range for the report. Refer to Date Range for more specific information on entering dates and times.
- Sort order. Select the applicable sort order from the drop-down
menu.
- Report Type. Select Detailed, Condensed, or Summary from the
drop-down menu.
A detailed report will include each budget-billed Customer and the budget details for each applicable service. The report will include the number of charges in each case, and a comparison of the actual billed amounts against the budget-billed amounts. A proposed new budget amount will be included, based on established usage.
- Select the output option (Preview, Print, Export) for the report.
Refer to Output for further details.
WUDB Export
Water Utility Date Base System (WUDB) - This system was designed and developed to assist utility companies with the tracking of their delinquent accounts. As a customer leaves owing a bill with no intention of paying WUDB can assist in tracking them to their next utility.
Go to Reporting > Financial Reports > Credit Review Export to create a file of Final Billed Customers that have not paid their final bill amount.
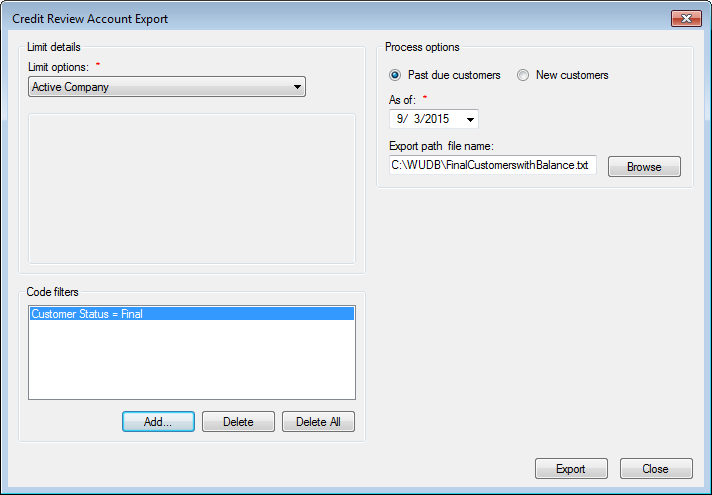
Figure 395: Final Billed Customers with Past Due Balance
Final Billed Customers with Past Due Balances
Code Filters. Click on “Add” to select “Final” accounts. Click on “Ok” to return to the Credit Review Account Export Screen
Process options. Select Past due customers
As of date. This date will determine the accounts pulled. If you want to exclude accounts that were final billed during the last three months, set the date back three months
Export Path & File Name. Click on the “Browse” button to name the file that will be uploaded to the WUDB website
Export. Click on the Export button to start the pull of data and create the file
New Customers
Process options. Click on New customers
Date range. Enter the From and To dates creating a date range
Export Path & File Name. Click on the “Browse” button to name the file that will be uploaded to the WUDB website
Export. Click on the Export button to start the pull of data and create the file
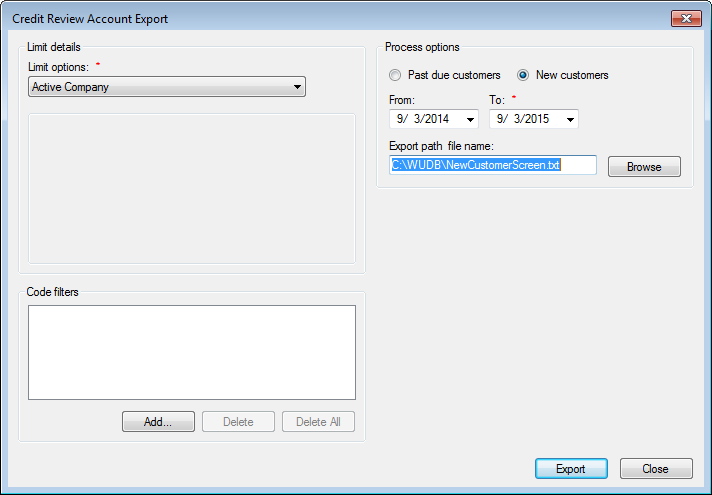
Figure 396: Credit Review Account Export
File Format Layout for Uploading Delinquent Customers
The format of the data file you upload must be a Tab Delimited Text File
Date of Debt |
SSN |
Driver Lic. |
FirstName |
LastName |
Address |
City |
State |
Zip |
|---|---|---|---|---|---|---|---|---|
9/09/01 |
5555555 |
123456789 |
Jane |
Doe |
12 Main |
Anywhere |
AR |
99999 |
File Format Layout for Uploading New UMS Customers
The format of the data file you upload must be a Tab Delimited Text File
FirstName |
LastName |
SSN |
Driver’s Lic. |
Address |
City |
State |
Zip |
|---|---|---|---|---|---|---|---|
Jane |
Doe |
555555555 |
123456789 |
12 Main |
Anywhere |
AR |
99999 |
There cannot be any quotation marks included in these fields. If data is missing in any of the fields, the field must remain blank.
The config file exporting from UMS the Final Accounts with a positive balance and the exporting from UMS of New Accounts is WUDBExportConfig and may be accessed from the UMS Server Configuration folder.
Enhanced GL Report
The Enhanced General Ledger Report lists transactions as they will be (or have been) exported to the accounting software via Export GL Transaction on the Posting menu. This report will list transactions, grouped by GL Code. If Payment is the only transaction type selected, transactions will be grouped by Payment Type.
From the main menu bar, select Reporting > Financial Reports > Enhanced General Ledger Report to open the Enhanced General Ledger Report options window.
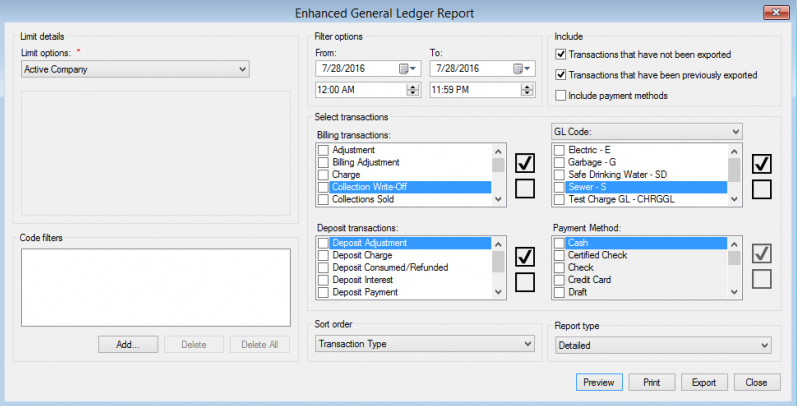
Figure 397: Enhanced General Ledger Report
Limit details. Select the desired Limit options and Code filters. Refer to the linked sections for further details.**
Filter Options. Enter dates and times into the From and To fields, as applicable. Refer to Date Range for more specific information on entering dates.**
Include: When you select Transactions that have not been exported, only transactions that have been posted and have not been exported to the accounting software will show in the reports. You can run a report for Transactions that have been previously exported to the accounting software. In addition, when you select Include payment methods, the Payment Method box will be enabled so that you can filter the report by the payment method, such as "Cash."
Select Transactions. The Enhanced GL Report form now has the option to filter by Billing Transactions along with the Deposit Transactions.
Select all the items in the Billing or Deposit Transactions box with the Check box. Clear all the transaction with the empty box.
To limit the report to specific transactions items, check one or more of the item in the Billing or Deposit Transaction boxes.
Sort Order.
Transaction Type - The report will group on the lists in the Billing and Deposit Transactions boxes.
Transaction Date - The report will group on the lists in the Billing and Deposit Transactions boxes and sort by the Transaction Date in each of the groupings.
Session No. - The report will group on the lists in the Billing and Deposit Transactions boxes and sort by the Session No. in each of the groupings.
General Ledger Report
The General Ledger Report lists transactions as they will be (or have been) exported to the accounting software, via Export GL Transactions on the Posting menu. This report can be used to verify that the transactions are posting to the accounting software correctly.
From the main menu bar, select Reporting > Financial Reports > General Ledger Report to open the General Ledger Report options window.
Figure 398: General Ledger Report
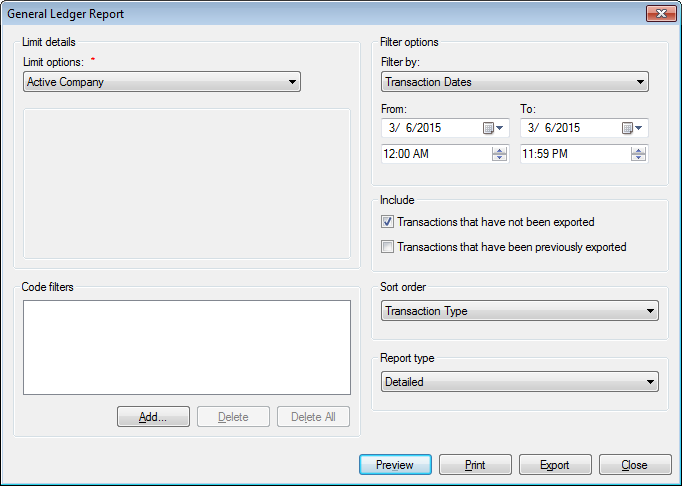
Limit details. Select the desired Limit options and Code filters. Refer to the linked sections for further details.
Filter by. Select the desired filter (Transaction Dates or Session No.) from the drop-down menu. The available filter options fields will change according to your selection.
Transaction Dates. This is the default option, as depicted in the above example. Enter dates and times into the From and To fields, as applicable. Refer to Date Range for more specific information on entering dates.
Session No. With this selection, a Session No. box will become available.
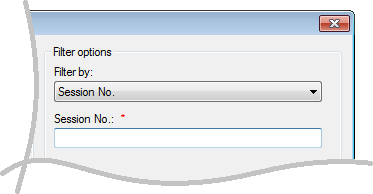
Figure 399: General Ledger Report Filter by Session No.
Enter a number for the session in which the transactions in question were closed. The Session No. field will only accept numbers.
- Include. Choose whether to include transactions which have and/or
have not been previously exported. Check the box(es) next to your selection to include these items in the report.
Sort order. Select the applicable sort order from the drop-down menu.
- Report Type. Select Detailed, Condensed, or Summary from the
drop-down menu.
- Select the output option (Preview, Print, Export) for the report.
Refer to Output for further details.
Liens Released Report
The Liens Released Report shows all Customers who have had liens attached to property, and later had those liens removed.
From the main menu bar, select Reporting > Financial Reports > Liens Released Report to open the Liens Released Report options window.
Figure 400: Budget Billing Reconciliation Report Options
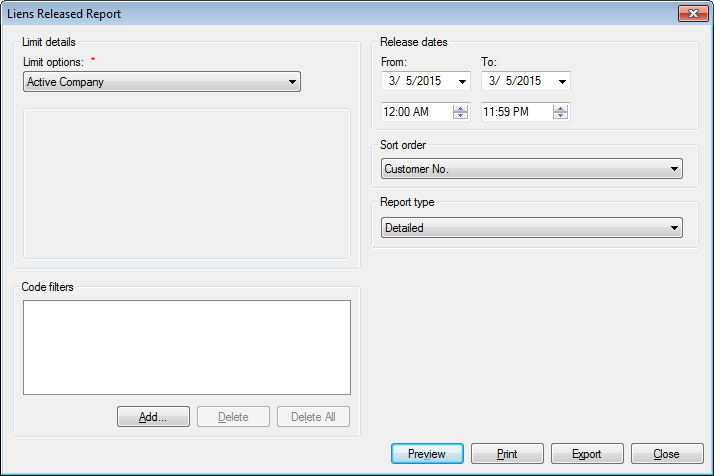
Limit details. Select the desired Limit options and Code filters. Refer to the linked sections for further details.
Release dates. Select the appropriate date and time range for the report. Refer to Date Range for more specific information on entering dates and times.
- Sort order. Select the applicable sort order from the drop-down
menu.
- Report Type. Select Detailed or Summary from the drop-down
menu. Condensed is not an option for this Report.
- Select the output option (Preview, Print, Export) for the report.
Refer to Output for further details.
Open Balances
The Open Balances report lists all accounts with unpaid balances as of the entered date. Each listing includes the amount currently owed, broken down by service.
From the main menu bar, select Reporting > Financial Reports > Open Balances to open the Open Balances options window.
Figure 401: Open Balances Report Options
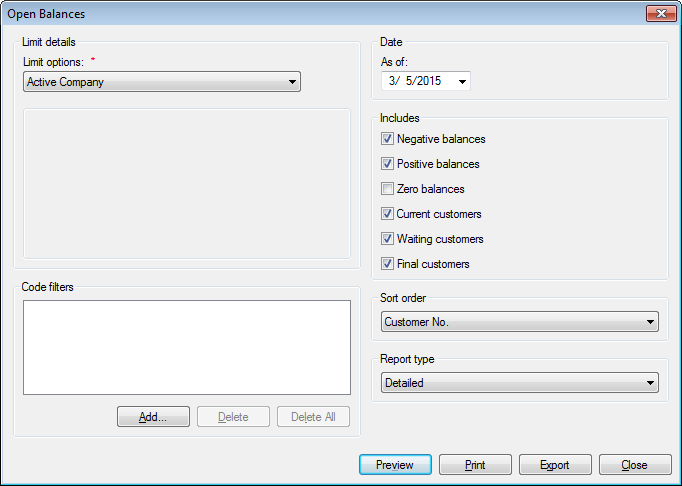
Limit details. Select the desired Limit options and Code filters. Refer to the linked sections for further details.
Date / As of. Select the appropriate date cutoff for the report. Refer to Date Range for more specific information on entering dates.
- Includes. Select the type(s) of balances and the type(s) of
customers to include in the report, by clicking the checkboxes on or off, as applicable.
Note: Any combination of Customer types may be selected to limit the scope of the report. If none is chosen, all Customer types will be included in the query.
At least one balance type must be selected, or the report will not return any results.
Sort order. Select the applicable sort order from the drop-down menu.
- Report Type. Select Detailed, Condensed, or Summary from the
drop-down menu.
A detailed report will include identification information (Location number and address, Customer name and Account number) as well as total balances as of the specified date, broken down by service.
- Select the output option (Preview, Print, Export) for the report.
Refer to Output for further details.
Operations Summary
The Operations Summary Report gives an overview of total commodity (water, gas, and/or electricity, for example) bought and sold, as well as providing totals for adjustments and known loss. The report also includes a transaction summary and aging, deposit summary, and usage by user-defined groups. This report should be run by service or related groups of services in order to provide a complete overview of monthly totals.
From the menu, select Reporting>Financial Reports>Operations Summary. The Operations Summary Report dialog box displays.
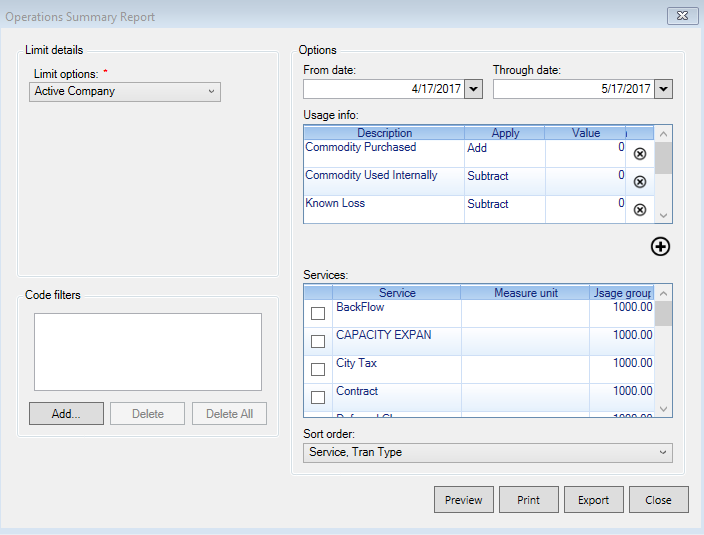
Figure 402: Operations Summary Report – Saved Reports
Limit options. Select the desired Limit options and Code filters. Refer to the linked sections for further details.
From/To dates. Select the appropriate date and time range for the report. Refer to Date Range for more specific information on entering dates and times.
Usage info. Includes some default options for helping calculate the commodity loss by units and percentage. These can be removed and user-defined options can be created to assist with individualized reporting. Use the Delete buttons on individual rows or the Add button below the grid to customize.
Services. This section enables users to select the desired reporting services. For consistency in loss reporting, either single services or multiple related services should be selected. For example, gas and water services run together would not likely provide accurate or useful information.
In this Services section, the Measure Unit must be selected. Note that this need not necessarily be the measure unit actually used in UMS; the report will convert from the actual unit of measure to the selected unit of measure. This can be helpful for "commonizing" report information for a service utilizing meters with different units of measure.
Also in this Services section, the Usage Group may be changed from default of 1000. This number is used for the report's Usage by Groups section which provides an overview of total usage for the period divided into the selected tiers. The Usage Grouping report provides 11 usage tiers. "Zero Usage" is always the first tier, and "Over X" is always the top tier (where X is a multiple of ten times the selected Usage Group). Tiers in between these are at 1x, 2x, 3x, and so on, of the user-selected Usage Group.
Sort Order. Controls the display (order and grouping) of the transactions in the Transaction Summary section. Options are "Service, Tran Type", "Service, Tran Type, Revenue Class", and "Tran Type, Service".
Select the output option (Preview, Print, Export) for the report. Refer to Output for further details.
Posting Totals
The Posting Totals report lists transaction details and totals for selected posting sessions. This report can be used to see all transactions posted with a specific session.
From the main menu bar, select Reporting > Financial Reports > Posting Totals to open the Posting Totals options window.
Figure 403: Posting Totals
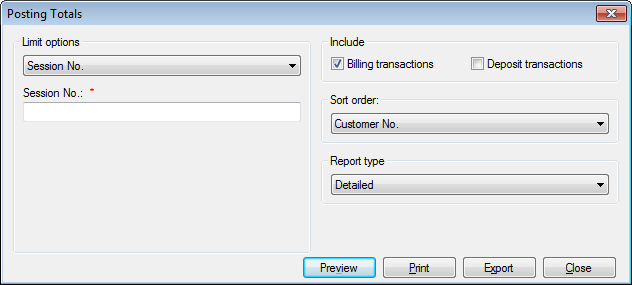
Limit options. Click the drop-down list arrow, and choose to limit by Session No. or by Transaction Date. The screen will change accordingly.
Session No. This is the default selection, shown in the above example.
Enter the number for the session in which the transactions in question were closed. The Session No. field will only accept numbers.
Transaction Date. With this selection, the available fields will change:
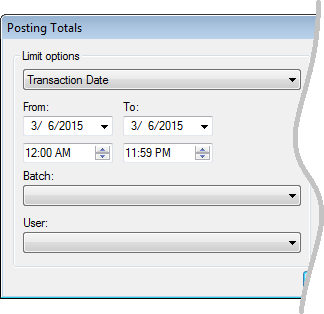
Figure 404: Posting Totals limited by Transaction Date
From/To dates. Select the appropriate date and time range for the report. Refer to Date Range for more specific information on entering dates and times.
Batch. (Optional) Select a batch from the drop-down menu to limit the results to a specific batch within the entered Transaction Date range.
User. (Optional) Select a username from the drop-down menu to limit the results to those created by a specific user within the entered Transaction Date range.
- Includes. Select whether to include Billing transactions
and/or Deposit transactions in the report, by clicking the checkboxes on or off, as applicable.
Sort order. Select the applicable sort order from the drop-down menu.
- Report Type. Select Detailed, Condensed, or Summary from the
drop-down menu.
A detailed report will include specific transaction details for the selected session(s), as well as Transaction Type and Transaction Code summaries.
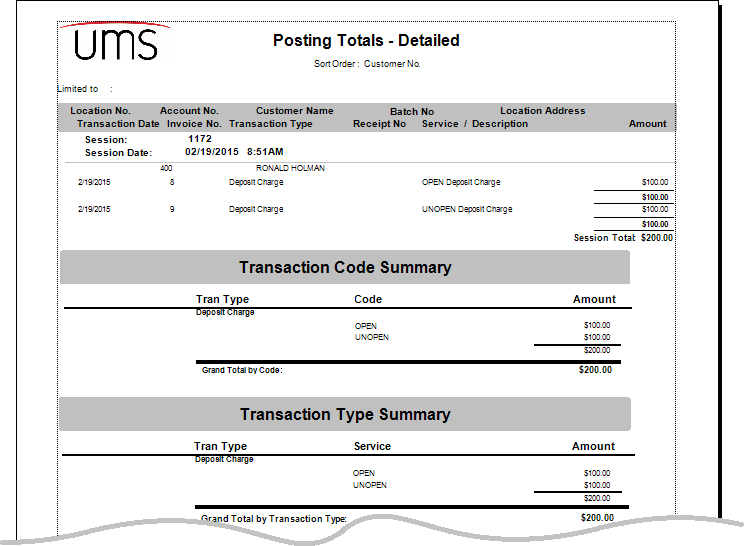
Figure 405: Posting Totals Report Example
- Select the output option (Preview, Print, Export) for the report.
Refer to Output for further details.
Pre-Posting Financials Review
The Pre-Posting Financials Review reports all unposted transactions. This report is useful for review and verification of transactions, so that mistakes can be corrected before the work is finalized. No limit options are available, as this report is designed to include all unposted transactions for the active company.
This is the same as the Pre-Posting Report from the Post Transactions screen.
From the main menu bar, select Reporting > Financial Reports > Pre-Posting Financials Review to open the Pre-Posting Report options window.
Figure 406: Pre-Posting Financials Review Report Options
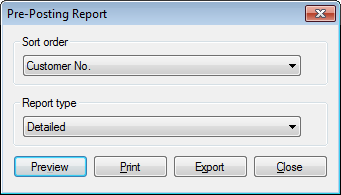
Sort order. Select the applicable sort order from the drop-down menu.
- Report Type. Select Detailed, Condensed, or Summary from the
drop-down menu.
A detailed report will include specific transaction details for all unposted transactions, grouped by Account and broken down by service.
- Select the output option (Preview, Print, Export) for the report.
Refer to Output for further details.
Transaction List
The Transaction List is a powerful report, allowing the user to generate a list of individual transaction types to assist in verifying totals. Any combination of transaction types (charges, adjustments, taxes, payments, etc.) can be included in the report, making it highly customizable.
From the main menu bar, select Reporting > Financial Reports > Transaction List to open the Transaction List options window.
Figure 407: Transaction List Report Options

Limit details. Select the desired Limit options and Code filters. Refer to the linked sections for further details. In addition to the standard limit options, this report can be limited by User ID and Exempt Tax.
- ** Utility Active Status**. Select to limit the results to either active
or inactive utilities. The option is defaulted to include both.
User ID. Select a username from the drop-down menu to limit the results to those created by a specific user.
Exempt Tax. Select whether tax-exempt transactions should be included in the report. When the box is checked on, the report will include transactions that are tax-exempt.
Date Range. Select the appropriate date/time range for the report. Refer to Date Range for more specific information on entering dates and times.
- Transaction Types. Select the type(s) of transactions to include
in the report, by clicking the checkboxes on or off, as applicable. Use the Check All (
 ) and Uncheck
All (
) and Uncheck
All ( ) buttons next to the list to facilitate
selection.
) buttons next to the list to facilitate
selection.
- Deposit Transactions. Select the type(s) of deposit transactions
to include in the report, by clicking the checkboxes on or off, as applicable. Use the Check All (
) and Uncheck
All () buttons next to the list to facilitate
selection.
Sort order. Select the applicable sort order from the drop-down menu.
- Report Type. Select Detailed, Condensed, or Summary from the
drop-down menu.
A detailed report will include a list of all transactions created within the specified date range, grouped by Account and broken down by specific transaction type.
- Select the output option (Preview, Print, Export) for the report.
Refer to Output for further details.
Utility Billing Override Report
The Utility Billing Override Report lists all service overrides in effect for the company, within the specified limits. No date selection is allowed, as overrides are not date-specific.
From the main menu bar, select Reporting > Financial Reports > Utility Billing Override Report to open the Utility Billing Override options window.
Figure 408: Utility Billing Override Report Options
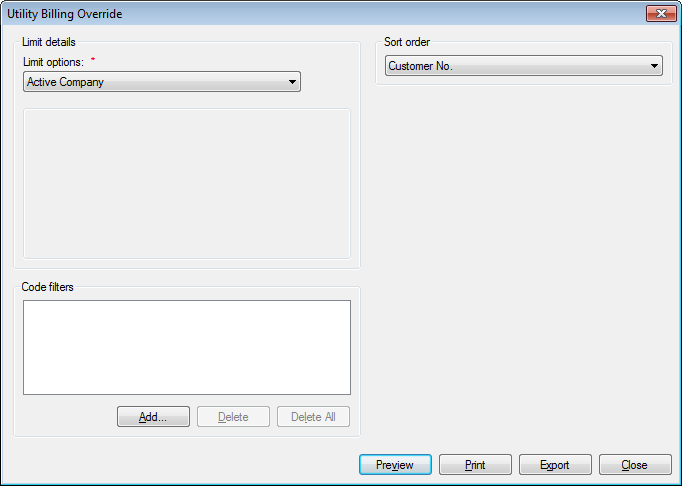
Limit details. Select the desired Limit options and Code filters. Refer to the linked sections for further details.
Sort order. Select the applicable sort order from the drop-down menu.
- Select the output option (Preview, Print, Export) for the report.
Refer to Output for further details.
Write Off Balance
The Write-Off Balance report lists all written-off Accounts and the associated balances as of a specified date. The report includes the date the write-off occurred, the amount originally written off, any reinstated amounts, and the current write-off balance.
This report differs from the Bad Debt Write Off List report in that the Write-Off Balance report includes any reinstated amounts and current balances, as opposed to just the written-off amounts for bad debts.
From the main menu bar, select Reporting > Financial Reports > Write Off Balance to open the Write off Balance options window.
Figure 409: Write Off Balance
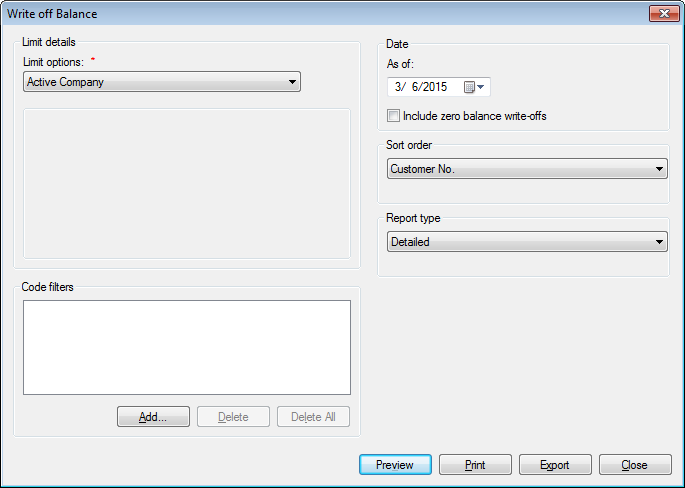
Limit details. Select the desired Limit options and Code filters. Refer to the linked sections for further details.
Date / As of. Select the appropriate date cutoff for the report. Refer to Date Range for more specific information on entering dates.
- Include zero-balance write-offs. If a previously written-off
balance is later paid, the current balance may be zero. Check the box on to include these balances in the report.
Sort order. Select the applicable sort order from the drop-down menu.
- Report Type. Select Detailed, Condensed, or Summary from the
drop-down menu.
A detailed report will include a list of all write-offs created as of the specified date, with any reinstated amounts and current balances as of the report cutoff date.
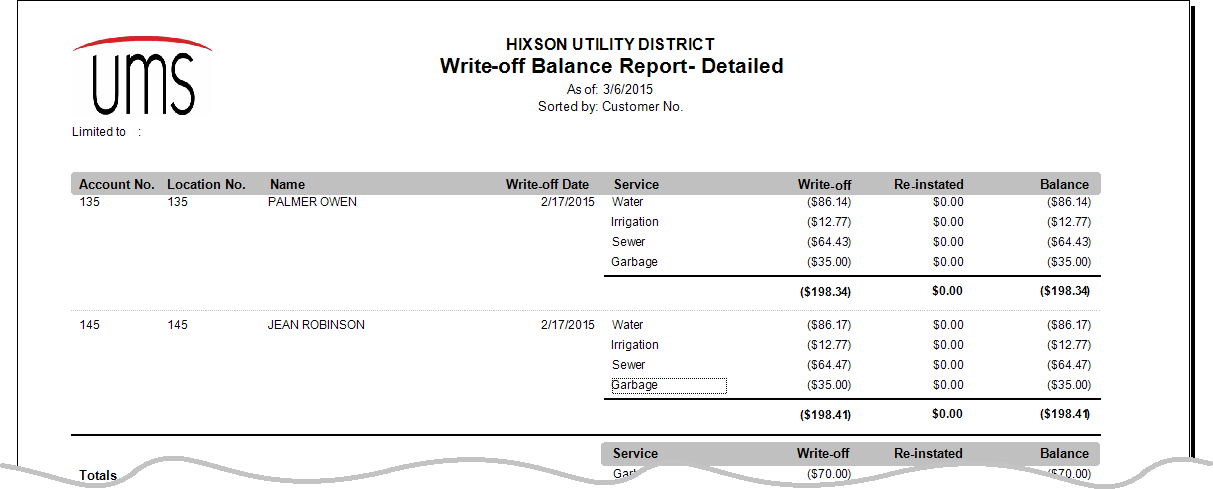
Figure 410: Transaction List Report Example
- Select the output option (Preview, Print, Export) for the report.
Refer to Output for further details.
History Reports
The history reports group includes all reports designed to list the past activity in Accounts, transactions, or any other area for which activity is recorded in UMS. These reports are often used to summarize or reconcile data.
Account History
The Account History report provides all historical usages and charges for services over a selected period of time. The report is a useful tool to review a customer’s payment history, credits, and meter readings during the specified time.
From the main menu bar, select Reporting > History Reports > Account History to open the Account History report options window.
Figure 411: Account History Report Options
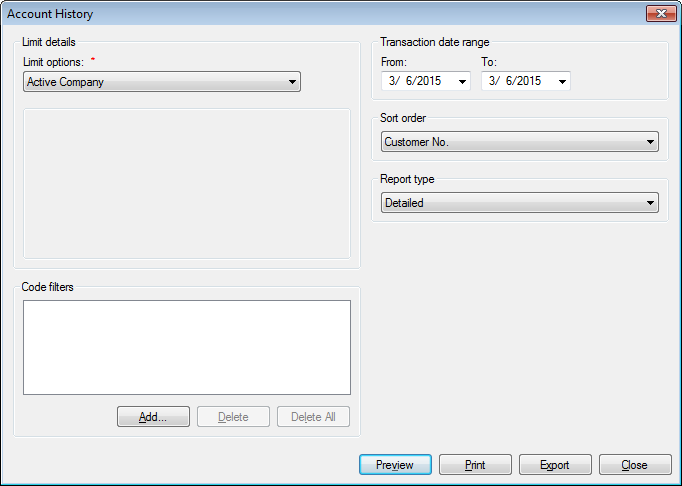
Limit details. Select the desired Limit options and Code filters. Refer to the linked sections for further details.
Transaction date range. Select the appropriate date and time range for the report. Refer to Date Range for more specific information on entering dates and times.
- Sort order. Select the applicable sort order from the drop-down
menu.
- Report Type. Select Detailed or Summary from the drop-down
menu. Condensed is not an option for this report.
- Select the output option (Preview, Print, Export) for the report.
Refer to Output for further details.
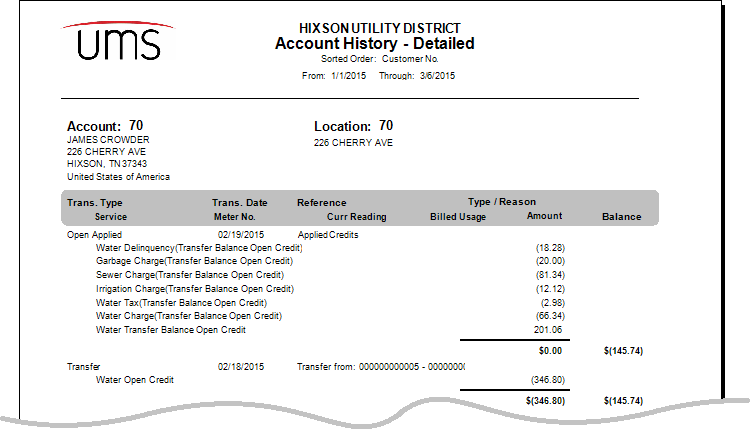
Figure 412: Account History Report Example
Average Charge List
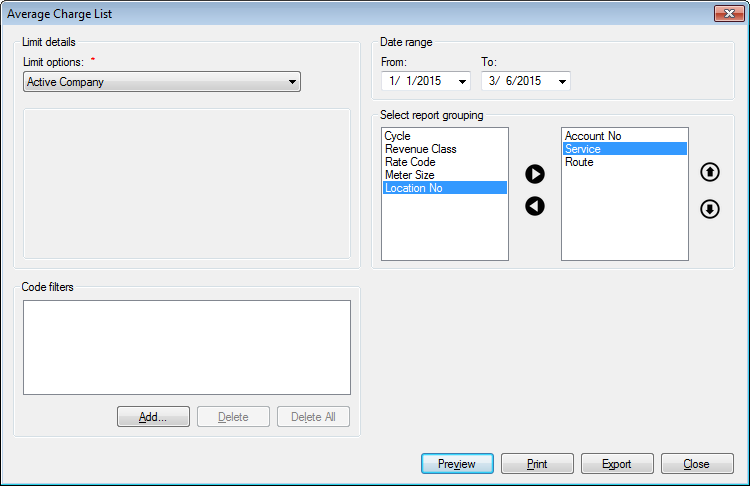
The Average Charge List is a summary of the average charges for one specific Customer or for a group of customers over a specified date range.
From the main menu bar, select Reporting > History Reports > Average Charge List to open the Average Charge List report options window.
Figure 413: Average Charge List Report Options
Limit details. Select the desired Limit options and Code filters. Refer to the linked sections for further details.
Transaction date range. Select the applicable date range for the report. Refer to Date Range for more specific information on entering dates.
Select Report Grouping. Move the item(s) by which you want to group results from the list on the left to the box on the right. Highlight the items in question and use the left/right arrows (
 /
/ ) to move them back and forth between the
boxes. Use the up/down arrows (
) to move them back and forth between the
boxes. Use the up/down arrows ( /
/ ) to re-order the
selected criteria.
) to re-order the
selected criteria.- Select the output option (Preview, Print, Export) for the report.
Refer to Output for further details.
Report type is not an option because this report has a pre-defined format. The information included will depend on the groupings selected and the ordering within the groupings. The example below is based on the above-selected grouping and order (Account No., Service, and Route):
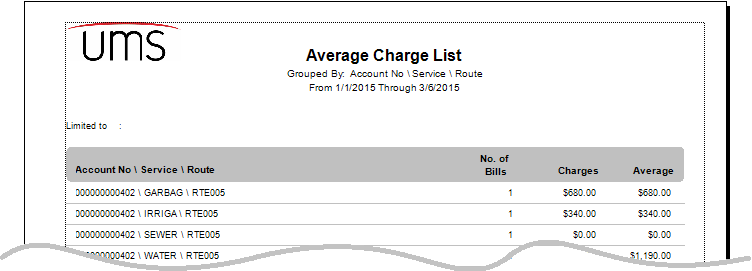
Figure 414: Average Charge List Report Example
Average Usage List
The Average Usage List Report is a summary of the average use of services (usages) over a specified date range. The report generated shows number of bills during that time, total usage of a service, and the average of use during that time.
From the main menu bar, select Reporting > History Reports > Average Usage List to open the Average Usage List report options window.
Figure 415: Average Usage List Report Options

Limit details. Select the desired Limit options and Code filters. Refer to the linked sections for further details.
Transaction date range. Select the applicable date range for the report. Refer to Date Range for more specific information on entering dates.
Select Report Grouping. Move the item(s) by which you want to group results from the list on the left to the box on the right. Highlight the items in question and use the left/right arrows (
/) to move them back and forth between the
boxes. Use the up/down arrows (/) to re-order the
selected criteria.- Select the output option (Preview, Print, Export) for the report.
Refer to Output for further details.
Report type is not an option because this report has a pre-defined format. The information included will depend on the groupings selected and the ordering within the groupings. The example below is based on the above-selected grouping and order (Account No., Meter Size, and Route):
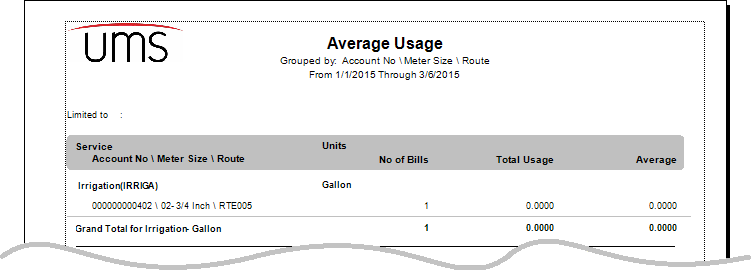
Figure 416: Average Usage List Report Example
Consumption History
The Consumption History report lists the consumption history for a Customer or group of customers for selected service(s) over a specified date range. The report can be generated for just the top consumers for each service, a specified number of the highest users by consumption or charges during the defined time period.
From the main menu bar, select Reporting > History Reports > Average Usage List to open the Average Usage List report options window.
Figure 417: Consumption History Report Options
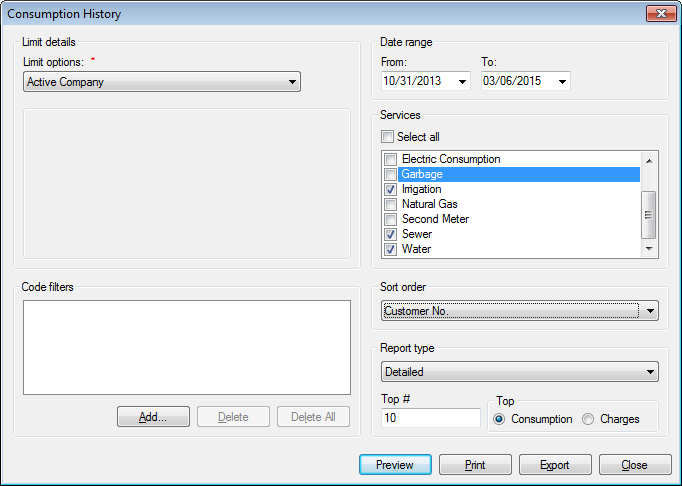
Limit details. Select the desired Limit options and Code filters. Refer to the linked sections for further details.
Date range. Select the appropriate date range for the report. Refer to Date Range for more specific information on entering dates.
- Services. Select the services to include in the report, by
clicking the checkboxes on or off, as applicable. Use the Select All checkbox at the top of the list to facilitate selection.
Note: When Select All is turned on, its checkbox will have a check mark, indicating that all services are selected. However, the individual service checkmarks will not automatically appear. Once the Select All box is checked, the boxes in the list may or may not be checked, but they are in fact selected.
Sort Order. Select the applicable sort order from the drop-down menu.
- Report Type. Select Detailed or Summary from the drop-down menu.
Condensed is not an option for this report.
A detailed report will include identification information (Location number and address, Customer name and Account number) as well as usage information for all the users within the specified limits, from the specified date range, broken down by service.
If a number of top consumers is selected (see Top #, below), the report will list only those top users from the date and limit range selected.
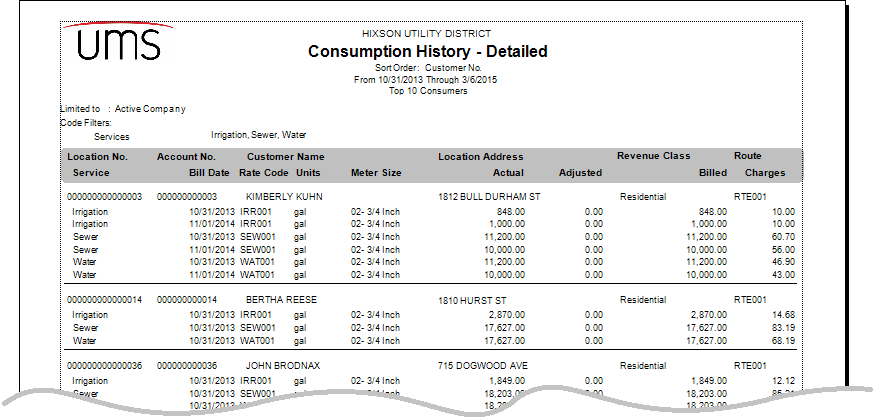
Figure 418: Consumption History Report Example
- Top # and Top. Optional. Specify a number of top users to list by
typing a number in the Top # field, and then choosing the criterion to use (Consumption or Charges) for the ranking. If this section is filled in, the report will be generated only for the top users within the defined date and limit ranges.
- Select the output option (Preview, Print, Export) for the report.
Refer to Output for further details.
Contract Payment History
The Contract Payment History report lists the history of payments made by contract customers within a specified date range.
From the main menu bar, select Reporting > History Reports > Average Usage List to open the Average Usage List report options window.
Figure 419: Contract Payment History Report Options

Limit details. Select the desired Limit options and Code filters. Refer to the linked sections for further details.
Date range. Enter the date range for the report in the From and To fields. Refer to Date Range for further details on entering dates.
- Sort order. Select the applicable sort order from the drop-down
menu.
- Report Type. Select Detailed or Condensed from the drop-down
menu. Summary is not an option for this report.
In addition to identifying information (Location and Account numbers and Customer names), a detailed report will include principal and interest charges, payments, voids, and overall contract balances with each transaction.
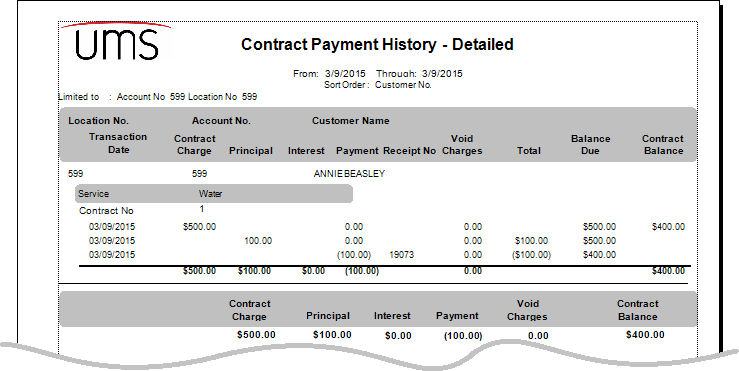
Figure 420: Contract Payment History Report Example
- Select the output option (Preview, Print, Export) for the report.
Refer to Output for further details.
Customer Change History
The Customer Change History report lists all Web user information changes.
From the main menu bar, select Reporting > History Reports > Customer Change History to open the Customer Change History report options window.
Figure 421: Customer Change History Report Options
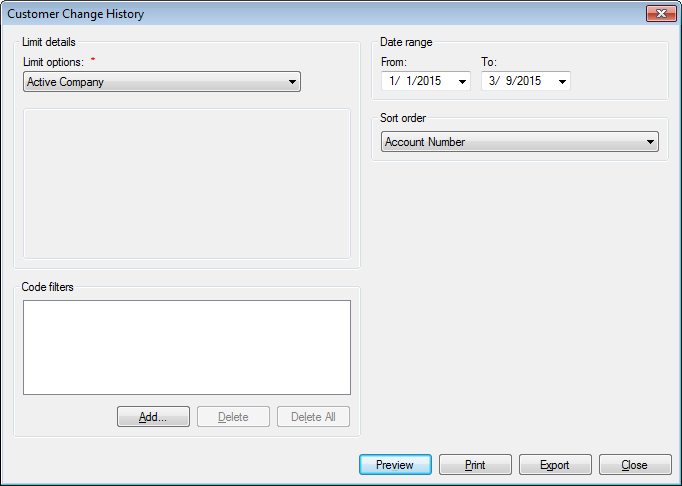
Limit details. Select the desired Limit options and Code filters. Refer to the linked sections for further details.
Date range. Enter the date range for the report in the From and To fields. Refer to Date Range for further details on entering dates.
- Sort order. Select the applicable sort order from the drop-down
menu.
- Select the output option (Preview, Print, Export) for the report.
Refer to Output for further details.
Customer Payment History
The Customer Payment History report details the previous payments made by Customers within a defined time period. For added flexibility, the report can be limited by payment amount as well as by specific payment type(s).
From the main menu bar, select Reporting > History Reports > Customer Payment History to open the Customer Payment History report options window.
Figure 422: Customer Payment History Report Options
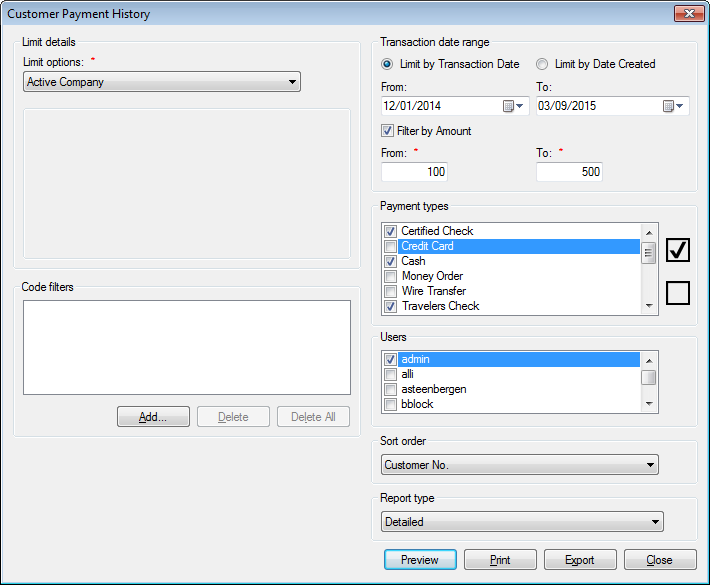
Limit details. Select the desired Limit options and Code filters. Refer to the linked sections for further details.
Payment sources. Limit the report to specific sources for special case reporting. Selecting no options here is the same as selecting all. Criteria will be displayed at the top of the output report.
Transaction date range. First, select whether to use Transaction Date or Date Created for the date range. Click the radio button next to either Limit by Transaction Date or Limit by Date Created. Then, enter the date range (transaction date) or date and time range (created date) for the report. Refer to Date Range for further details on entering dates.
Filter by Amount. Click this checkbox on if you wish to limit the report to transactions above or below certain amounts, or within a specified range. If this option is selected, the From and To fields just below will become active. Enter the lower and/or upper amount limit for your query.
Payment types. Select the payment type(s) to include in the report, by clicking the checkboxes next to the listed items on or off, as applicable. Use the Select All or Deselect All buttons to the side of the list to facilitate selection.
Users. Limit the report to transactions created by specific Users by clicking the checkboxes next to the listed usernames on or off, as applicable.
- Sort order. Select the applicable sort order from the drop-down
menu.
- Report Type. Select Detailed, Condensed, or Summary from the
drop-down menu.
In addition to identifying information (Location and Account numbers, Customer name and billing address), a detailed report will include details (date, type, receipt number) of each payment received, with the associated charges broken down by service. The detailed report will also flag payments that have been transferred or reversed, while also marking payments that are the result of a transfer.
The condensed version of the report will also flag reversed and transferred payments.
All reports will include a summary of payment methods, a breakdown of payments by service, a breakdown of payments by the transaction code they applied to, and a breakdown of payments by source (Manual, Autopay, Online, etc.). These summaries will exclude payments that have been reversed or transferred.
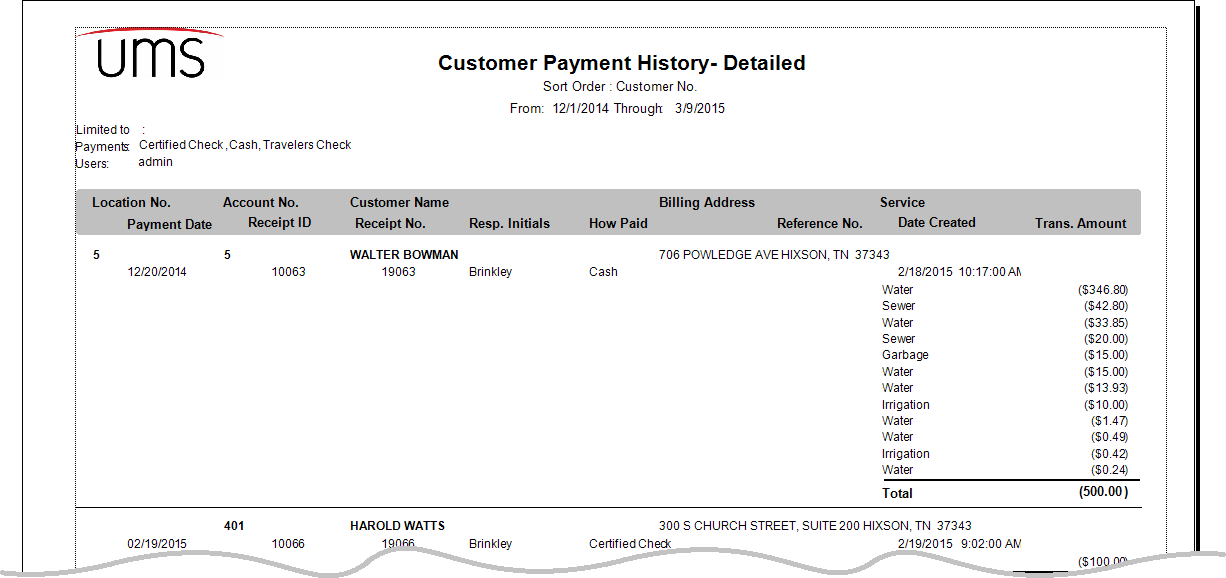
Figure 423: Customer Payment History Report Example
Meter Reading History
The Meter Reading History report provides a historical look at the meter reading numbers for a specific meter over a given period of time.
From the menu, select Reporting>History Reports>Meter Reading History. The Meter Reading History dialog box displays
Figure 424: Meter Reading History
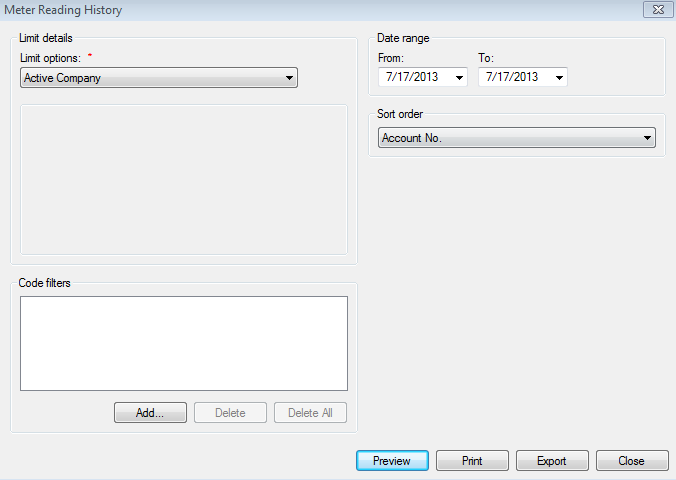
Limit options. Select the desired limit options
Code filters. Select the desired code filters
Date range: From/To. Specifies the date range. The dates selected in each field, and all dates in between, are included in the report
Sort Order. Click the drop-down list arrow and select how you want to sort the report
Account No. Sorts and groups the meter reading history by the account number
Location No. Sorts and groups meter reading history by the location number
Customer Name. Sorts and groups meter reading history by the name of the customer
Read Sequence. Sorts the report by read date
Select whether to Preview, Print or Export the data. The displayed data will be limited by what report grouping you select
Usage Grouping Report
The Usage Grouping Report provides a historical look at the meter reading numbers for a specific meter over a given period of time.
From the menu, select Reporting>History Reports>Usage Grouping Report. The Usage Grouping Report dialog box displays
Figure 425: Usage Grouping Report
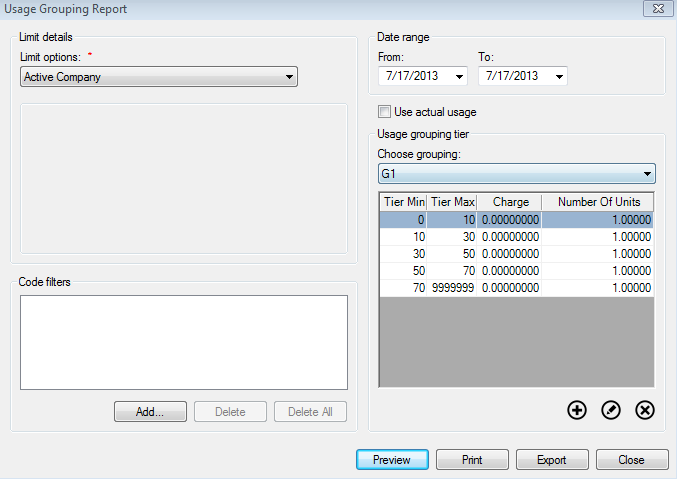
Limit options. Select the desired limit options
Code filters. Select the desired code filters
Date range: From/To. Specifies the date range. The dates selected in each field, and all dates in between, are included in the report
Use actual usage. Click the box to base report on actual usage
Usage group tier. Select from the pull down menu which grouping to use
Select whether to Preview, Print or Export the data. The displayed data will be limited by the dates selected: Report includes:
Revenue Class. Displays class of account (residential, commercial, etc.)
Service. Type of service rendered
Rate Code. Displays the rate code for that particular service and customer
Tier Min and Max. Minimum and maximum usage for that service and customer
No. of Bills. Displays number of bills that utilize those services
Charge. Amount charged for those services
Usage. Amount of that service used during the specified time
Service Order History
The Service Order History provides a historical look at the meter reading numbers for a specific meter over a given period of time.
From the menu, select Reporting>History Reports>Service Order History. The Service Orders History dialog box displays
Figure 426: Service Orders History
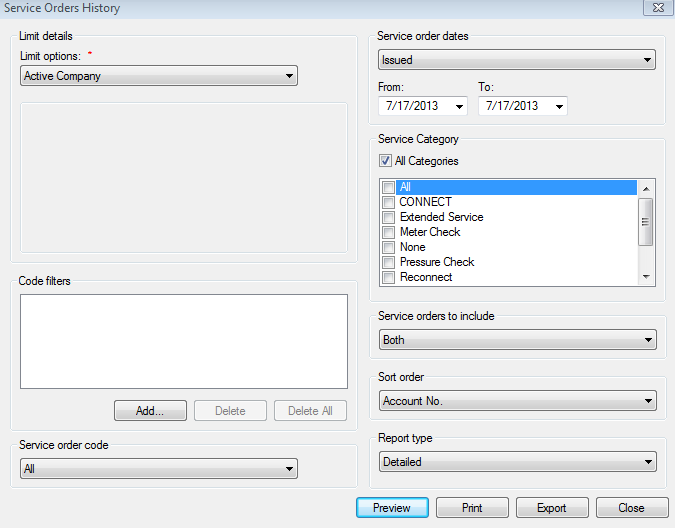
Limit options. Select the desired limit options
Code filters. Select the desired code filters
Service order code. Select the type of service order needed in the report
Service order dates. Select from the following categories for reporting on service order dates:
Issued. Service orders not yet completed but assigned for completion
Completed. Service orders that have been completed and entered into the system
Processed. Service orders not yet issued or completed, but entered into the system
Date range: From/To. Specifies the date range.
Service orders to include. Choose Both, Incomplete, or Complete
Sort order. Click the drop-down list arrow and choose which way you want to sort the report. Options include:
Account No. Sorts and groups the meter reading history by the account number
Location No. Sorts and groups meter reading history by the location number
Location Address. Physical address of meter
Issue Date. Sorts and groups by the date the order(s) were issued
Completion Date. Sorts and groups report into the dates the service orders were completed
Process. Sorts and groups report into the date the service orders were processed
Category. Sorts and groups report by category of service order
Report Type. Select Detailed, Condensed, or Summary from the drop-down menu.
Select whether to Preview, Print or Export the data.
Multiple Fixed Item History
The Multiple Fixed Item History report provides a historical look items repaired at a single location or for a specified time.
From the menu, select Reporting>History Reports>Multiple Fixed Item History. The Multiple Fixed Item History dialog box displays
Figure 427: Multiple Fixed Item History Report
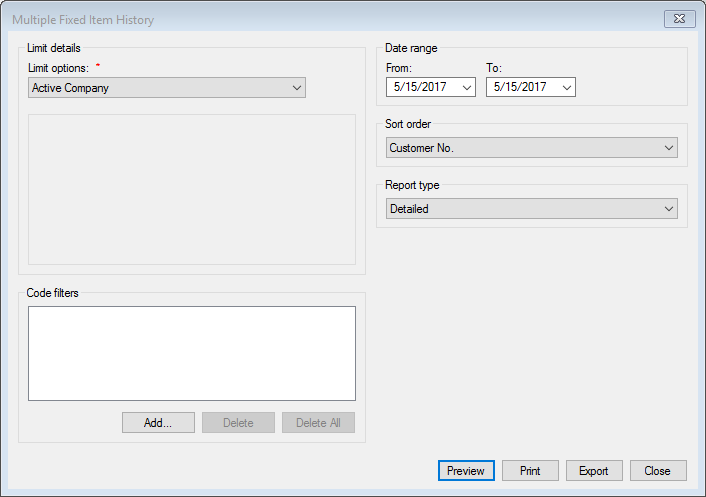
Limit options. Select the desired limit options
Code filters. Select the desired code filters
Date range: From/To. Specifies the date range. The dates selected in each field, and all dates in between, are included in the report
Sort Order. Click the drop-down list arrow and choose which way you want to sort the report. Options include:
Account No. Sorts and groups the meter reading history by the account number
Location No. Sorts and groups meter reading history by the location number
Customer Name. Sorts report by the customer name at each location
Route. Sorts and groups report into the routes. Helps determine issues in a specific region
Service Address. Sorts and groups report into actual physical location of the issues
Report Type. Select Detailed, Condensed, or Summary from the drop-down menu.
Select whether to Preview, Print or Export the data. The displayed data will be limited by the dates selected
Move Out Report
The Move Out Report provides a report detailing which locations have been either emptied or experienced a move out during the specified time frame.
From the menu, select Reporting>History Reports>Move Out Report. The Move Out Report dialog box displays
Figure 428: Move Out Report
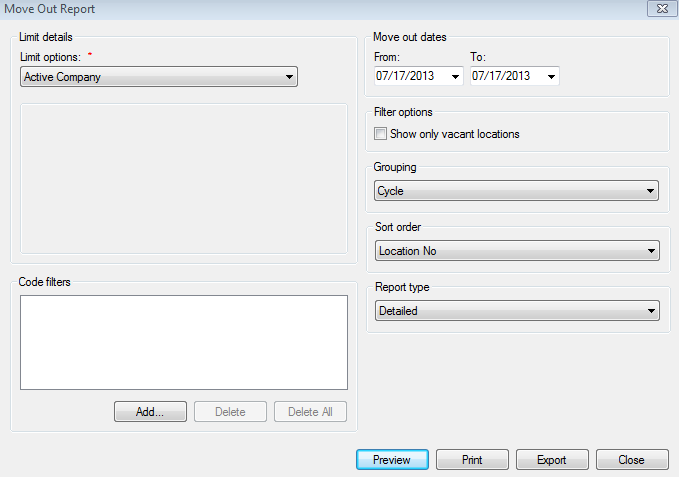
Limit options. Select the desired limit options
Code filters. Select the desired code filters
Move out dates: From/To. Specifies the date range. The dates selected in each field, and all dates in between, are included in the report
Filter options. Click box to show vacant locations only
Grouping. Select either Cycle, Route, Community, or Move Out Date to display on the move out report
Sort order. Click the drop-down list arrow and choose which way you want to sort the report. Options include:
Location No. Sorts and groups meter reading history by the location number
Service Address. Physical address of location that experienced a move out
Move Out Account No. Sort by the account number that was moved out, while filtering out other accounts in the same location
Move Out Customer Name. Sorts by the actual name on the account that moved
Move Out Date. Sorts by the date the account holder moved out
Report Type. Select Detailed, Condensed, or Summary from the drop-down menu.
Select whether to Preview, Print or Export the data. The displayed data will be limited by the dates selected
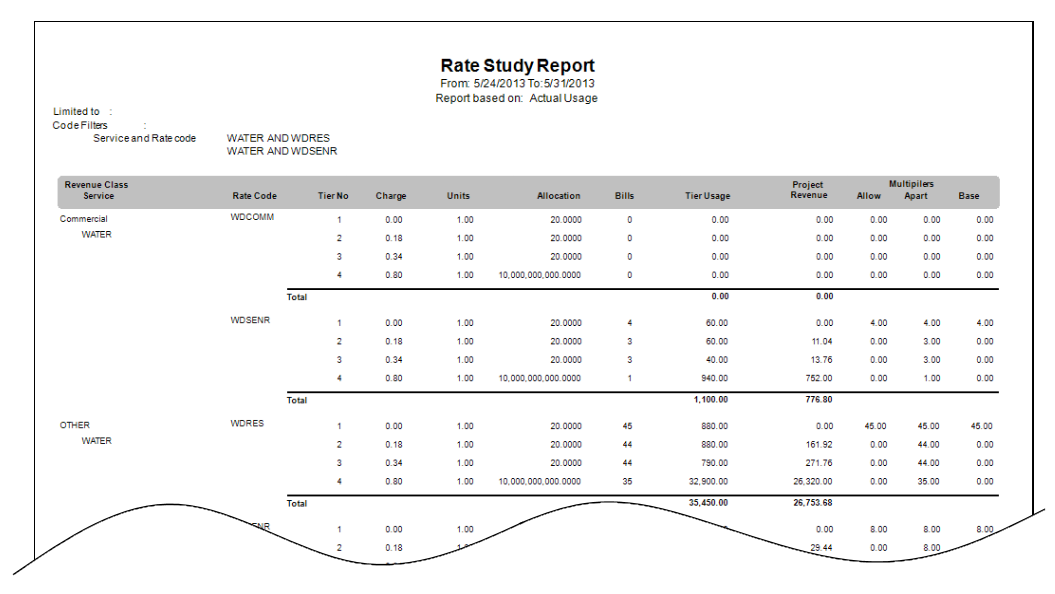
Rate Study Report
From the menu bar, select Reporting>History Reports>Rate Study Report. The Rate Study dialog box display
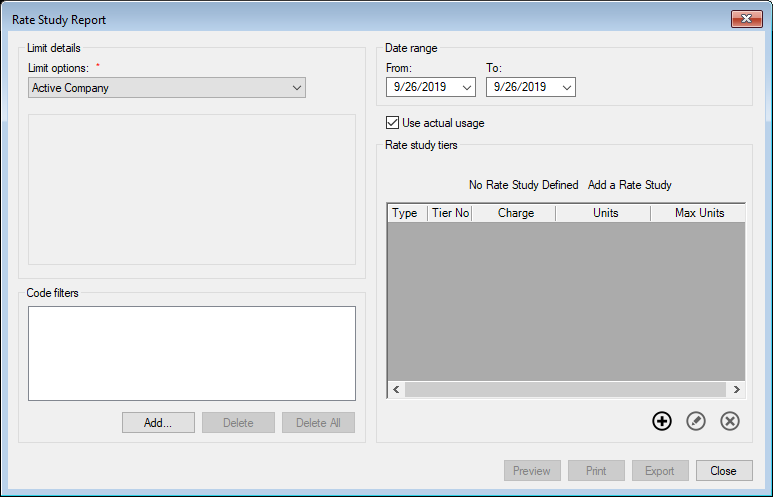
Select the desired Limit options, such as Revenue Class, Service, and Rate code.
Click Add
 and add the desired Code Filters to further
limit the accounts that are being processed.
and add the desired Code Filters to further
limit the accounts that are being processed.Enter a date range in From and To for the usage to use for the study, which is defaulted to today's date.
Use actual usage is selected by default. De-selecting this causes the report to use the billed usage.
Select the Rate Study. The first rate study is selected by default. The rate study tier structure is displayed below the rate study name.
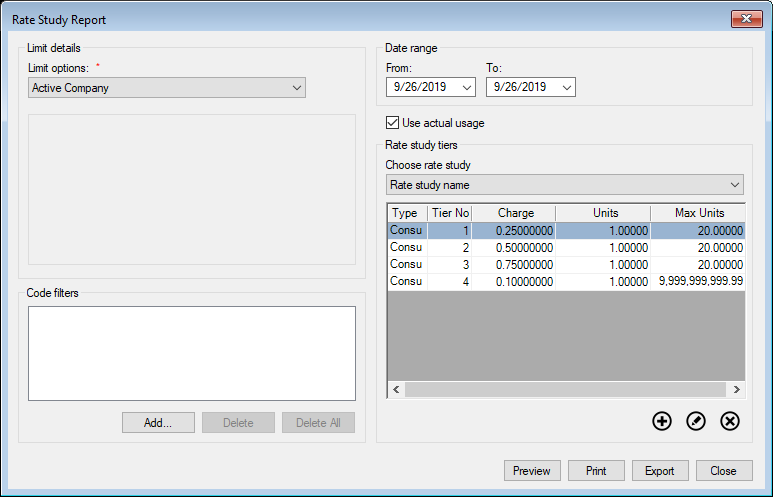
Click the add
 button to create a new rate study. If the list is blank,
add a rate study. See Add Edit Rate Study below.
button to create a new rate study. If the list is blank,
add a rate study. See Add Edit Rate Study below.Click Preview, Print or Export to process the rate study.
Preview. To preview the report prior to printing, click Preview
Print. To print the report, click Print
Export. To save the report so it can be viewed in another program (such as MS Excel, Adobe PDF, or Crystal Reports), click Export. Then in the Save As dialog box, select the location for the file and the file type, click Save
Close. When you are done with these options, click Close
Add Edit Rate Study
By clicking the Add or Edit button, the Edit Rate Study dialog will display.
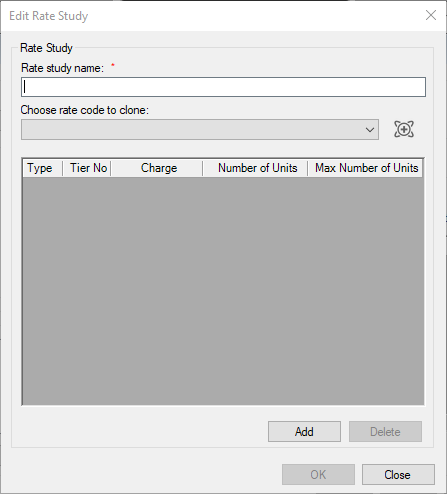
Enter a unique name for the rate study.
To make a copy of an existing rate code's tier structure, select a rate from the drop down list. Skip to step 5 to manually create the tier structure or add to an existing one.
The clone
 button copies the most effective consumption tiers from
the rate to provide a starting point for the rate study.
button copies the most effective consumption tiers from
the rate to provide a starting point for the rate study.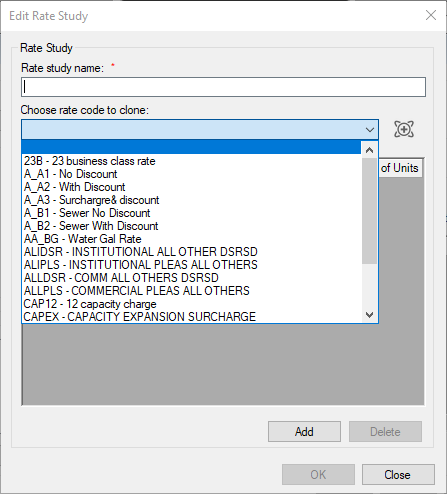
Use the add button to create a new tier row. The tier numbers are controled by the system.
Enter the Charge or cost per unit, the number of units for the charge, and the maximum volume units allowed for the tier. Repeat steps 5 and 6 until all the desired tiers are defined.
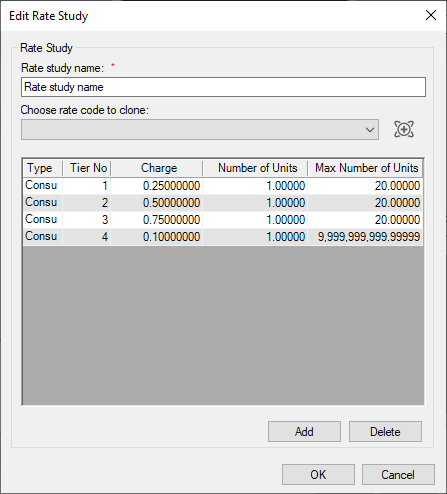
- Note: The max volume unit is consider as the next volume. If tier 1 is
from 0 to 2000 and tier 2 is from 2001 to 6000, the maximum volume units for tier 1 is 2000 and tier 2's maximum volume units is the next 4000 (6000 - 2000 = 4000).
- Note: The final tier should have the maximum volume units set to
99999999.9999.
Click the ok button to save the tier structure and close the dialog.
List Reports
Account Inactivity
The Account Inactivity Report identifies and provides Current or Waiting Accounts/Locations with no activity (Charges and/or Usage) within 30, 60, 90, 120, and 120+ day time periods, as well as Accounts/Locations that have never had activity.
From the menu, select Reporting>List Reports>Account Inactivity. The Account Inactivity screen will display.
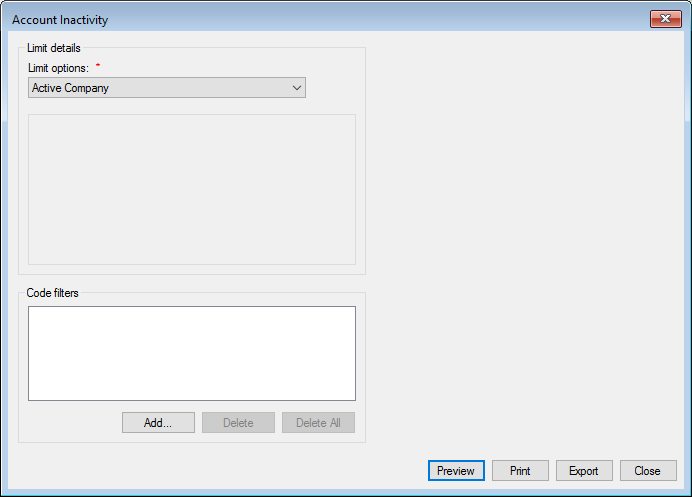
Figure 429: Account Inactivity Report
Limit options. Select the desired limit options
Code filters. Select the desired code filters
Select whether to Preview, Print or Export the data. The data includes:
Aging Time Period: The time period in which Accounts/Locations with no activity appear.
No Activity in the last 30 days
No Activity in the last 60 days
No Activity in the last 90 days
No Activity in the last 120 days
No Activity in the last 120+ days
No Activity
Route: The route assigned to the location.
Customer No.: The customer’s account number.
Location No.: The location number.
Service Address: The location’s service address.
Customer Contact List
The Customer Contact List provides a list of all contacts as defined for each customer. Individual contact types can be selected and deselected, allowing the user to customize the Customer Contact List.
From the menu, select Reporting>List Reports>Customer Contact List. The Customer Contact list dialog box displays.
Figure 430: Customer Contact List
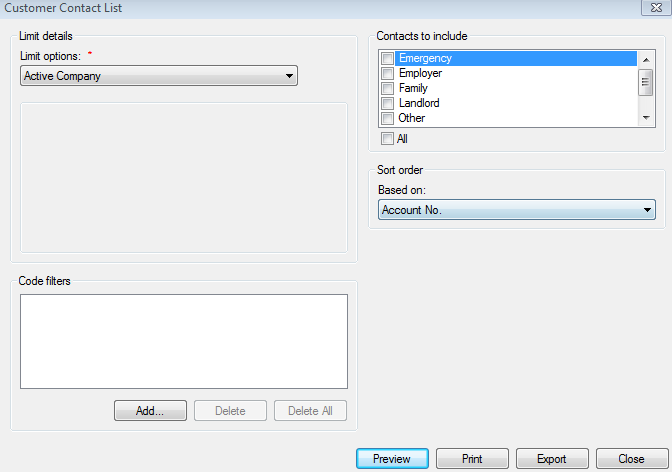
Limit options. Select the desired limit options
Code filters. Select the desired code filters
Contacts to include. Click on the contact to include. To select multiple contacts, press/hold the Ctrl key and click on each contact type
Sort order. Click the drop-down list arrow and select how you want to sort the report
Account No. Sorts and groups contacts by the account number of the customer
- Customer Name. Sorts and groups contacts alphabetically by the
customer's name, sorting last name first
- Contact Name. Sorts and groups contacts alphabetically by the
contact's name, sorting last name first
- Contact Address. Sorts and groups contacts by the contact's
address, sorting first by street name and then by number
Select whether to Preview, Print or Export the data. The data includes:
- Account No. The account number of the customer who is associated
with the contact
- Customer Name. The name of the customer who is associated with
the contact
Customer Address. The customer's billing address
- City, State, Zip. The customer's billing city, state, and zip
code
Contact Type. The contact type, as specified by the user
Contact Name. The contact's name
Contact Phone. The contact's phone number
Contact Address. The contact's street address, city, state, and zip
Contact Email. The contact's email address
- Receives Copy. Specifies the manner in which the contact is to receive a copy
of the bills or notices
Distinct Account Numbers. Displays the total number of accounts included in the report
Number of Contacts. Displays the total number of contacts included in the report
Contact Type. Lists all Contact Types included in the report and count for each type
Contact Receives Copy. Lists all Communication Preferences and count of contacts for each
Customer List
The Customer List displays a list of all customers within the specified criteria. The customer and account information is listed, including billing address and telephone numbers.
From the menu, select Reporting>List Reports>Customer List. The Customer List dialog box displays.
Figure 431: Customer List
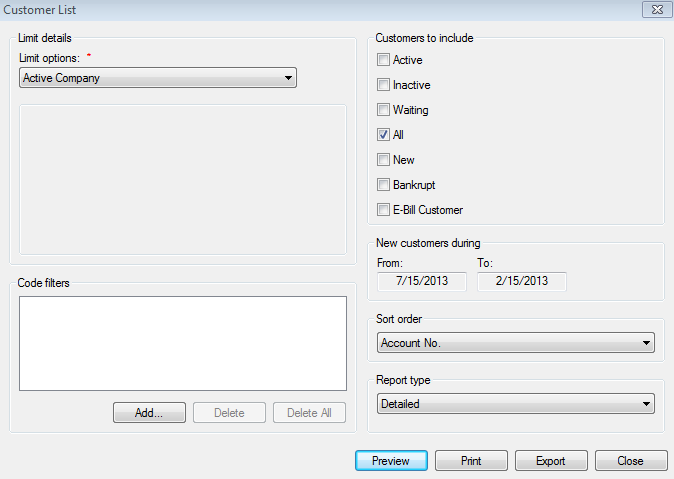
Limit options. Select the desired limit options
Code filters. Select the desired code filters
Customers to include. Click in the checkbox next to each customer to include: Active, Inactive, Waiting, All, With email address, Without email address, No checks, No payments, Bankrupt, E-Bill customer or New
Active. Includes customers who have been moved into a location
Inactive. Includes customers who have not been moved into a location
Waiting. Includes customers who have been moved into a location that already has an active customer. They will remain in this status at this location until the original customer is final billed
All. Includes all customers in the company
With email address. Includes customers with an email address.
Without email address. Includes customers without an email address.
No checks. Includes customers who are flagged for no checks.
No payments. Includes customers who are flagged for no payments.
Bankrupt. Includes customers who have filed for bankruptcy.
E-Bill customer. Includes customers who have an associated email address and are receiving their statement via email.
New. Includes customers that were entered as a new customer within the specified date range under New customers during
New customers during: From/To. Specifies the date range. The dates selected in each field, and all dates in between, are included in the report. Enabled when **New* is selected under Customers to include*
Sort order. Click the drop-down list arrow and select how you want to sort the report
Account No. Sorts and groups customers by the account number to which the transaction was applied
Customer Name. Sorts and groups customers alphabetically by the customer's name, sorting last name first
Alternate Customer ID. Sorts and groups customers by the Alternate Customer ID, which is the Conversion ID from the customer tab on the Control Panel
Route + Read Sequence. Sorts and groups customers alphabetically by their route number, and ascending by their read sequence.
Report type. Click the drop-down list arrow and select the type of information the report contains—Detailed or Summary
Select whether to Preview, Print or Export the data. The data includes:
Account No. The account number associated with the contact
Customer Name. The customer's name associated with the contact
Billing Address. The customer's billing address
City, State, Zip. The customer's mailing city, state, and zip code
Home Phone. The customer's home telephone number, beginning with the area code
Work Phone. The customer's work telephone number, beginning with the area code
Customer Notes
The Customer Notes displays a list of all customer notes within the specified criteria. The report includes identifying information, name, address, note category, grace date, prints on date, and note expiration date.
From the menu, select Reporting>List Reports>Customer Notes. The Customer Notes dialog box displays.
Figure 432: Customer Notes List
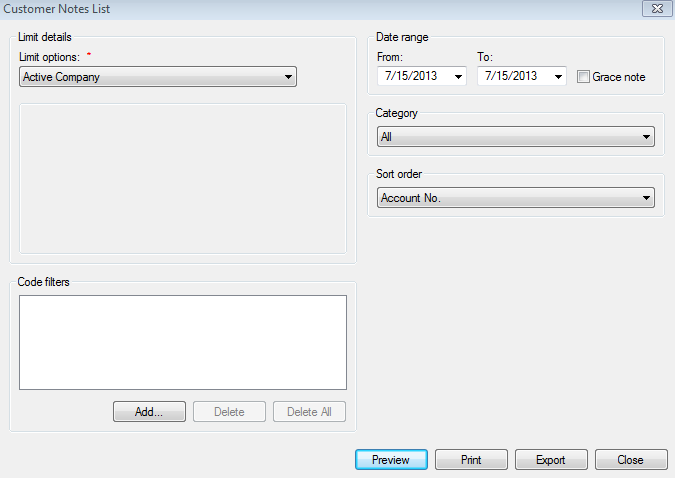
Limit options. Select the desired limit options.
Code filters. Select the desired code filters.
Date range: From/To. Specifies the date range. The dates selected in each field, and all dates in between, are included in the report.
Category. Indicates which note category to include.
General. Includes notes that do not fall into other categories
Adjustment. Includes only notes related to adjustments
- Budget Customer. Includes only notes entered for customers with
budget billing
Complaint. Includes only notes filing a complaint
- Bill Notes. Includes notes that are entered to be printed on a
customer bill
Any custom Note Categories will be featured in this list
Sort order. Click the drop-down list arrow and select how you want to sort the report
- Account No. Sorts and groups customers by the account number to
which the transaction was applied
- Location No. Sorts and groups customers by the location number to
which the transaction was applied
- Note Date. Sorts and groups the notes based upon the creation
date.
- User - Sorts and groups the notes based upon the user who entered
the note
Select whether to Preview, Print or Export the data. The data includes:
Account No. The account number associated with the contact
Location No. The location number to which the account is attached
Customer Name. The customer's name associated with the contact
- Location Address. The location address to which the customer is
attached
Date created. The date on which the note was created
User name. The name of the user who created the note.
- Category. The name of the category under which the note was
created
Grace Date. The date for a grace period
Prints On. The item on which the note appears - i.e., statement
Expires. The date on which the note expires
CWP User List
The CWP user list report provides a list of CWP user accounts that have been created.
From the main menu bar, select Reporting > List Reports > CWP User List to open the CWP User List report options window.
CWP User List Report Options
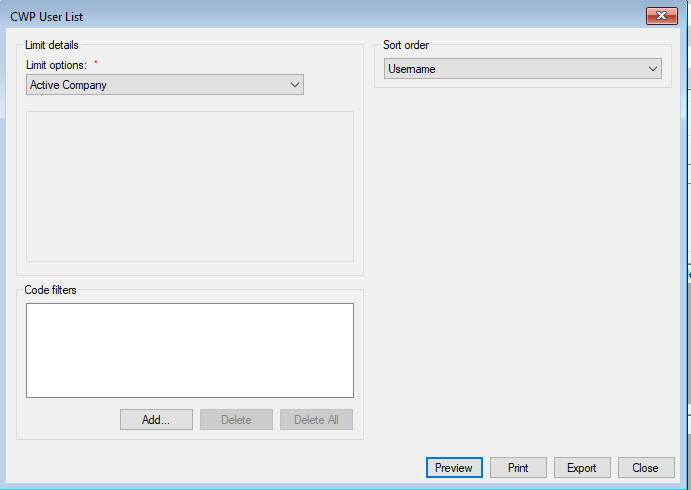
Limit details. Select the desired Limit options and Code filters. Refer to the linked sections for further details.**
Sort order. Select the applicable sort order from the drop-down menu.
Username: Sorts and groups the report by username.
User First Name: Sorts and groups the report by user first name.
User Last Name: Sorts and groups the report by user last name.
Email Address: Sorts and groups the report by user email address.
Customer No.: Sorts and groups the report by account number.
Location No.: Sorts and groups the report by location number.
Select the output option (Preview, Print, Export) for the report. Refer to Output for further details.
Location Current Customer List
The Location Current Customer List is similar to the Customer List, giving the same information about each customer, but it is limited to customers who are current at a location. Customers who are no longer current at any location, but still remain in the system, appear on the Customer List. However, they would not appear on the Location Current Customer List.
From the menu, select Reporting>List Reports>Location Current Customer List. The Location Current Customer List dialog box displays
Figure 433: Location Current Customer List
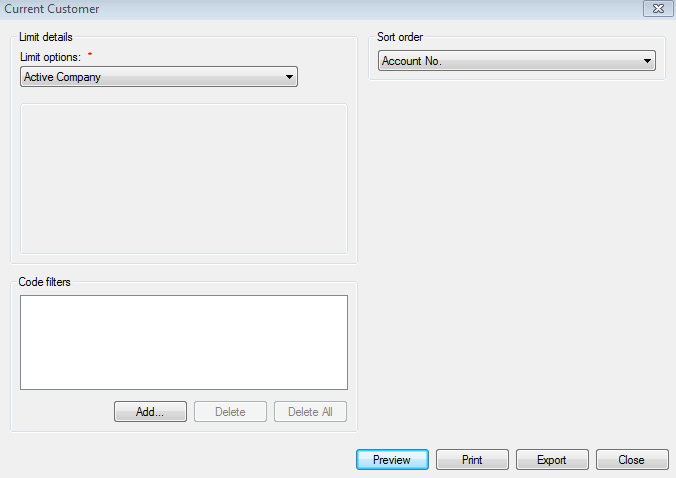
Limit options. Select the desired limit options
Code filters. Select the desired code filters
Sort order. Click the drop-down list arrow and select how you want to sort the report
- Account No. Sorts and groups customers by the account number to
which the transaction was applied
- Customer Name. Sorts and groups customers alphabetically by the
customer's name, sorting last name first
- Location No. Sorts and groups customers by the location number to
which the transaction was applied
- Location Address. Sorts and groups customers by the service
address, sorting first by street name and then by number
Select whether to Preview, Print or Export the data. The data includes:
Account No. The account number associated with the contact
Customer Name. The customer's name associated with the contact
- Customer Work Phone No. The customer's work telephone number,
beginning with the area code
- Customer Phone No. The customer's home telephone number,
beginning with the area code
Location No. The location number to which the account is attached
- Location Address. The location address to which the customer is
attached
- Location City, State, Zip, Country. The city, state, zip, and
country for the location address
Location Notes
The Location Notes lists the notes entered on the Customer Information screen for the specified date range.
From the menu, select Reporting>List Reports>Location Notes. The Location Notes List dialog box displays.
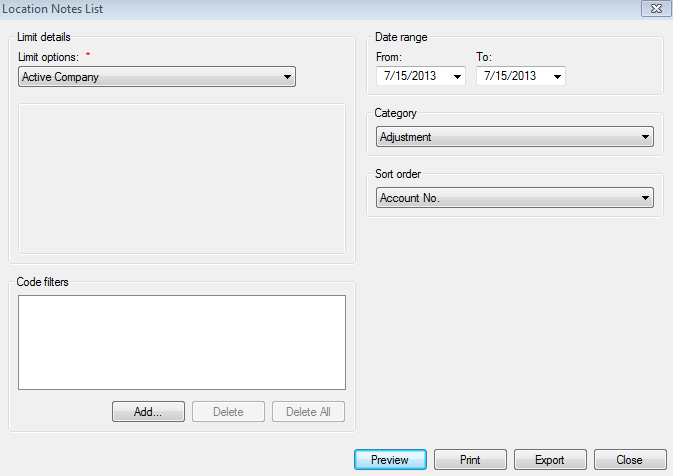
Figure 434: Location Notes List
Limit options. Select the desired limit options
Code filters. Select the desired code filters
Date range: From/To. Specifies the date range. The dates selected in each field, and all dates in between, are included in the report
Category. Indicates which note category to include
Sort Order. Click the drop-down list arrow and select how you want to sort the report
- Account No. Sorts and groups the notes by the account number, to
which they apply
- Location No. Sorts and groups the notes by the location number,
to which they apply
- Note Date. Sorts and groups the notes by the date the note was
entered
- User. Sorts and groups the notes by the applicable instituting
user
Select whether to Preview, Print or Export the data. The data includes:
- Location No. The reference number for the location, to which, the
note applies
- Location Address. The address of the location, to which, the note
applies
- Account No. The reference number for the customer, to which, the
note applies
- Customer Name. The name of the customer, to which, the note
applies
Date Created. The date, in which, the note was established
User Name. The name of the user who instituted the note
Category. The group for which the note applies
Note. The note in its entirety
Location Services List
The Location Services List displays a list of services for a location along with any applicable multipliers.
From the menu, select Reporting>List Reports>Location Services List. The Location Services List dialog box displays.
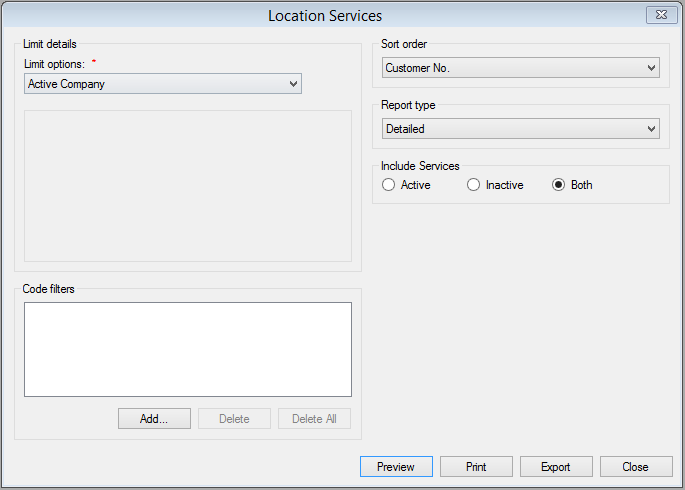
Figure 435: Location Services List
Limit options. Select the desired limit options
Code filters. Select the desired code filters
Sort order. Click the drop-down list arrow and select how you want to sort the report
- Account No. Sorts and groups customers by the account number to
which the transaction was applied
- Customer Name. Sorts and groups customers alphabetically by the
customer's name, sorting last name first
- Location No. Sorts and groups customers by the location number to
which the transaction was applied
- Location Address. Sorts and groups customers by the service
address, sorting first by street name and then by number
- Alternate Location ID. Sorts and groups customers by the
different customer identifiers
Report type. Click the drop-down list arrow and select the type of information the report contains—Detailed, Condensed, or Summary
Include Services. Select whether to limit the report to only show Active services, only Inactive services, or Both.
Select whether to Preview, Print or Export the data. The data includes:
Location No. The location number to which the account is attached
- Location Address. The location address to which the customer is
attached
Account No. The account number associated with the contact
Customer Name - The customer's name associated with the contact
Service. The service for this location
- Base Multiplier. The number by which the read usage is multiplied
to reach the actual usage
- Allowance Multiplier. The number by which the read usage is
multiplied to reach the actual usage
- Consumption Tier. The number by which the read usage is
multiplied to reach the actual usage
Location Contacts List
The Location Contacts List provides a listing of location specific contacts.
From the menu, select Reporting>List Reports>Location Contacts List. The Location Contacts list dialog box displays.
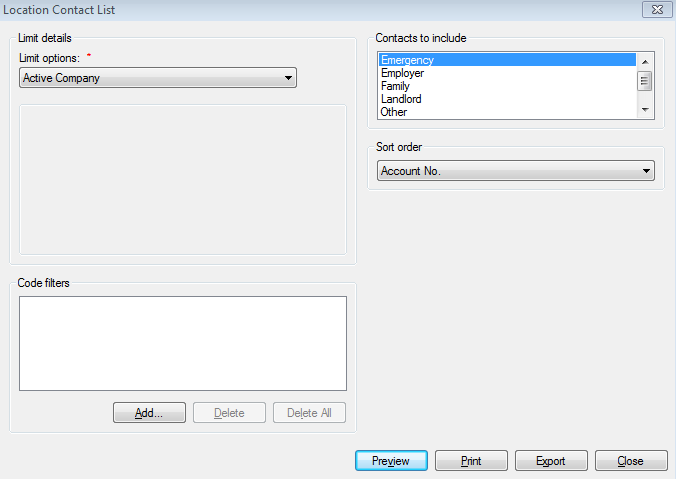
Figure 436: Location Contacts List
Limit options. Select the desired limit options
Code filters. Select the desired code filters
Contacts to include. Click on the contact to include. To select multiple contacts, press/hold the Ctrl key and click on each contact type
- Emergency. Use this category for the contact information of an in
case of emergency contact
- Employer. Use this category for the contact information of a
customer's employer
- Family. Use this category to enter the contact information of an
immediate family member(s)
- Landlord. Use this category for the contact information of a
customer's landlord, if it is rental property
- Other. Use this category if the contact does not conform to one
of the above mentioned categories
- Any Custom Report type that has been added for your company will be
listed there
Sort order. Click the drop-down list arrow and select how you want to sort the report
- Account No. Sorts and groups the contacts by the account number,
to which they apply
- Customer Name. Sorts and groups the contacts by the customer
name, to which they apply
- Contact Name. Sorts and groups the contacts by the contacts name,
in alphabetical order
- Contact Address. Sorts and groups the contacts by the contacts
address.
- Location No. Sorts and groups the contacts by the location
number, to which they apply
- Location Address. Sorts and groups the contacts by the location
address, to which they apply
Select whether to Preview, Print or Export the data. The data includes:
- Location No. The reference number for the location, to which, the
contact applies
- Location Address. The address of the location, to which, the
contact applies
- Location City/State. The city and state of the location, to
which, the contact applies
- Account No. The reference number for the customer, to which, the
contact applies
- Customer Name. The name of the customer, to which, the contact
applies
Contact Name. The name or the contact person or business
Contact Type. The category, under which, the contact was assigned
- Contact Address. The address of the contact person or business in
question
Contact City/State. The city and state of the contacts address
Contact Phone No. The telephone number of the contact
- Copy of Bill? Whether or not the contact is to receive a copy of
the customer's bill
Location Vacant List
The Location Vacant List provides a quick list of all locations that are vacant.
From the menu, select Reporting>List Reports>Location Vacant List. The Location Vacant List dialog box displays.
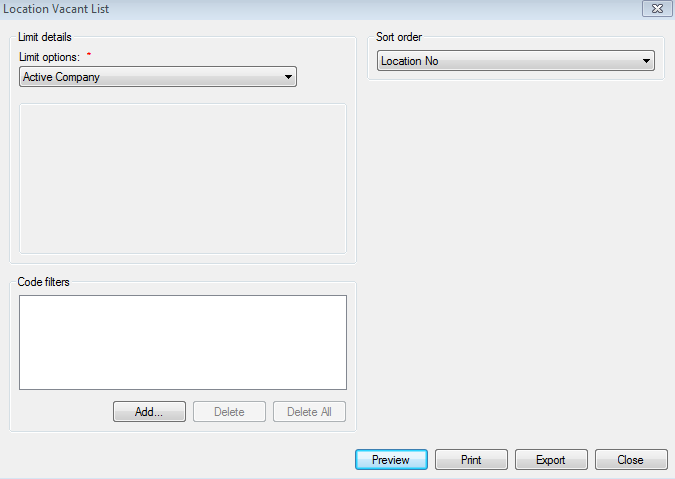
Figure 437: Location Vacant List
Limit options. Select the desired limit options
Code filters. Select the desired code filters
Sort order. Click the drop-down list arrow and select how you want to sort the report
- Location No. Sorts and groups data by the location number of the
location
Service Address. Sorts the report by the location service address
Select whether to Preview, Print or Export the data. The data includes:
Route. The Route number associated with the location
- Location No. The location number of the location that the meter
is associated with
Building No. The location address' building number
Unit No. The location address' unit number
Service Address. The service location address
Mailing Labels
The Mailing Labels report provides printable address labels and #10 envelopes for each customer within the specified limitations and inclusions.
From the menu, select Reporting>List Reports>Mailing Labels. The Mailing Labels dialog box displays.
Figure 438: Mailing Labels
In order to use both labels and envelopes, the default selection for Customer Mailing Labels report type must be removed in Report Association.
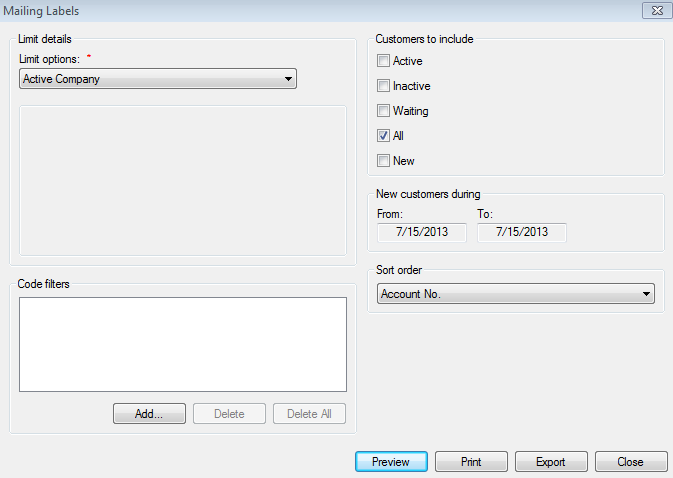
Limit options. Select the desired limit options
Code filters. Select the desired code filters
Customers to include. Click in the checkbox next to each customer to include: Active, Inactive, Waiting, All, With email address, Without email address, No checks, No payments, or New
Active. Includes customers who have been moved into a location
Inactive. Includes customers who have not been moved into a location
Waiting. Includes customers who have been moved into a location that already has an active customer. They will remain in this status at this location until the original customer is final billed.
All. Includes all customers in the company
With email address. Includes customers with an email address.
Without email address. Includes customers without an email address.
No checks. Includes customers who are flagged for no checks.
No payments. Includes customers who are flagged for no payments.
New. Includes customers that were entered as a new customer within the specified date range under New customers during.
New customers during: From/To. Specifies the date range. The dates selected in each field, and all dates in between, are included in the report. Enabled when **New* is selected under Customers to include*
Sort order. Click the drop-down list arrow and select how you want to sort the report
Account No. Sorts and groups the contacts by the account number, to which they apply
Customer Name. Sorts and groups the contacts by the customer name, to which they apply
Zip Code. Sorts and groups the contacts by zip code, to which they apply
Route + Read Sequence. Sorts and groups customers alphabetically by their route number, and ascending by their read sequence.
Select whether to Preview, Print or Export the data. Based on selection of the labels or the report, The data includes:
Mailing Labels. Three columns across and ten rows down
Envelope Report. Centered mailing address of the customer.
NOTE: The Mailing Labels are formatted for use with a laser printer and should work with a Standard Avery address label.
Multiple Fixed Item List
The Multiple Fixed Item List provides a list of all accounts that have services assigned to a multiple-fixed rate type.
From the menu, select Reporting>List Reports>Multiple Fixed Item List. The Multiple Fixed Item dialog box displays.
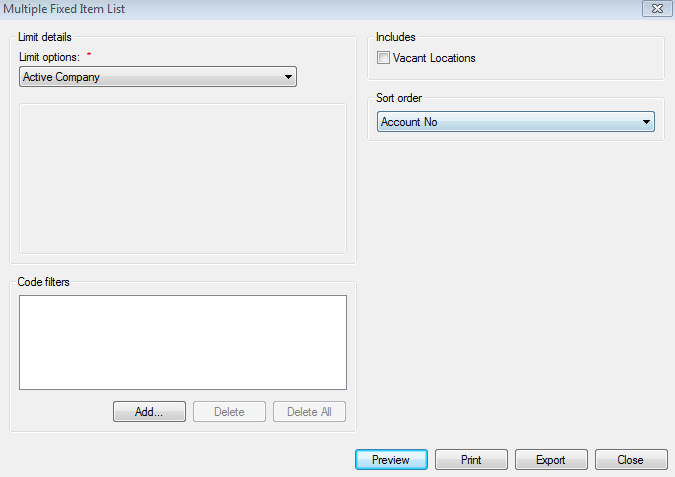
Figure 439: Multiple Fixed Item List
Limit options. Select the desired limit options
Code filters. Select the desired code filters
Includes. Select to include vacation units in the report
Sort order. Click the drop-down list arrow and select how you want to sort the report
Account No. Sorts and groups data by the account number of the customer
Location No. Sorts and groups data by the location number of the location
Customer Name. Sorts data by customer name
Location Address. Sorts the report by the location service address
Route No. Sorts the data by the route
Select whether to Preview, Print or Export the data. The data includes:
Account No. The account number of the customer
- Location No. The location number of the location that the meter
is associated with
Customer Name. The name of the customer
Location Address. The service location address
Route. The Route number associated with the location
- Service. The service that the Multi-Fixed rate type associated
with it
Rate Code. The Multi-Fixed rate code
- Item Code. The multiple fixed item codes for the specific rate
code and service
- Item Description. The multiple fixed item description as defined
in the setup of the multiple fixed item code
- Charge Per Item. The charge per item as defined in the multiple
fixed item rate code setup
- Quantity. The quantity for each item as defined at the utility
level of each service
Multiple Property Grouping List
The Multiple Property Grouping List provides a list of Bill Groups. It also displays the locations that are contained within each group.
From the menu, select Reporting>List Reports>Multiple Property Grouping List. The Multiple Property Grouping dialog box displays.
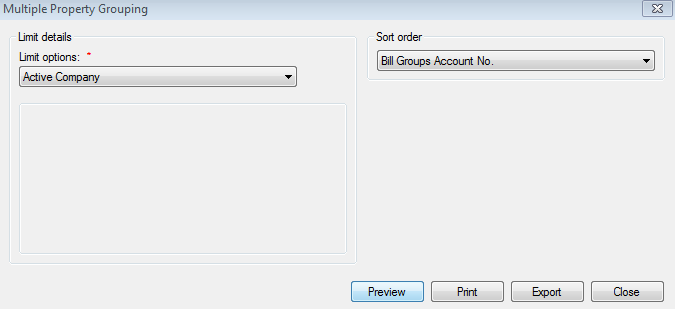
Figure 440: Multiple Property Grouping
Limit options. Click the drop-down list arrow and select either Active Company or Bill Group
Active Company. Runs the report for the entire current company
Bill Group. Allows user to limit report to a specific bill group
- When Bill Group is selected, click the Browse button and
locate the desired bill group
Sort order. Click the drop-down list arrow and select how you want to sort the report
- Bill Groups Account No. Sorts and groups the properties by the
bill groups account number
- Bill Groups Name. Sorts and groups the properties by the bill
group name, to which they apply
Select whether to Preview, Print or Export the data. The data includes:
Group Account No. The reference number of the bill group
Group Name. The name of the bill group
Group Address. The main address of the bill group
Group City, State, ZIP. The city and state of the bill group
- Location No. The reference number for the location, of which, the
bill group applies
- Location Address. The reference number for the location, of
which, the bill group applies
- Location City, State, ZIP. The city and state of the location, of
which, the bill group applies
- Customer Account No. The reference number for the location, of
which, the bill group applies
- Customer Name. The name of the customer, of which, the bill group
applies
Rate Code List
The Rate Code List provides a list of selected rate codes. It also contains detailed information, such as, charge amount, effective date, consumption, and unit volume.
From the menu, select Reporting>List Reports>Rate Code List. The Rate Code dialog box displays.
Figure 441: Rate Code List
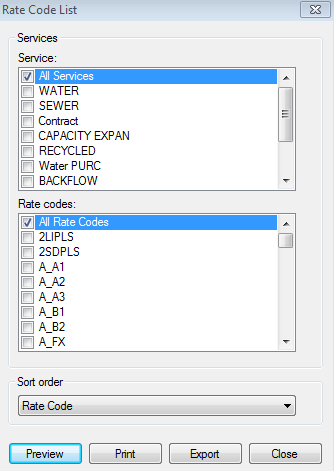
Service. Click next to each service to include in the report
All Services. Runs the report with all services
- Each of the services in the current company - allows the user to
limit to one or more service
Rate codes. Click next to each rate code to include in the report
All Rate Codes. Runs the report with all rate codes
- Each of the rate codes in the current company - allows the user to
limit to one or more rate code
Sort order. Click the drop-down list arrow and select how you want to sort the report
- Rate Code. Sorts the rate codes by rate code, in alphabetical
order
- Service + Rate Code. Sorts the rate codes by service then by rate
code, in alphabetical order
Select whether to Preview, Print or Export the data
Rate Code. The code, by which, the rate is defined
Rate Description. An explanation of the rate codes purpose
Rate Code Type. Describes the type of charge
Service. The name of the utility, on which the rate code applies
Service Order List
The Service Order List contains a detailed list of the work orders. The work orders generated are determined by the work order code, completion status, category, and work order dates perimeters set.
From the menu, select Reporting>List Reports>Service Order List. The Service Order List dialog box displays.
Figure 442: Service Order List

Limit options. Select the desired limit options
Code filters. Select the desired code filters
Service order dates. Indicates which service order dates to include. Click the drop-down list and select which service orders to include
Issued. The day the service order was created
Completed. The day the service order was completed
Processed. The day the service order was set to be worked
From/To. Specifies the date range. The dates selected in each field, and all dates in between, are included in the report
Service order code. Indicates which service order codes to include. The default option is All, but clicking on the dropdown allows limiting to one code at a time
Service orders to include. Indicates which service order codes to include. Click the drop-down list and select which service orders to include
- Both. Limits the report to a combination of incomplete and
complete service orders
Incomplete. Service orders, which have not been finished
Complete. Service orders, which have been finished
Sort order. Click the drop-down list arrow and select how you want to sort the report
- Account No. Sorts and groups the service order by the account
number, to which they apply
- Location No. Sorts and groups the service orders by the location
number, to which they apply
- Location Address. Sorts and groups the service orders by the
location address, to which they apply
- Issued Date. Sorts and groups the service orders by the date, on
which they were issued
- Completed Date. Sorts and groups the service orders by the date,
on which they were completed
- Process Date. Sorts and groups the service orders by the date, on
which they were processed
- Category. Sorts and groups the service order by the category, to
which they apply
Service order category. Indicates which service order categories to include—e.g., Reconnect, Repair, etc. Click the drop-down list and select which service orders to include
Select whether to Preview, Print or Export the data. The data includes:
- Location No. The reference number for the location, to which, the
work order applies
- Account No. The reference number for the customer, to which, the
work order applies
- Customer Name. The name of the customer, to which, the work order
applies
- Location Address. The address of the location, to which, the work
order applies
- Route. The number representing the course of travel, in which,
this account is read in the case of a metered service
- Work Order Number. The reference number that uniquely identifies
each work order
- Work Order Category. The type of work order. Work order
categories are established in the Add a Work Order screen
Service. The utility or service in question
- Work Order Code. The code, by which, the work order tasks are
defined
- Work Order Description. An explanation of the work order
code, in question
- Charges. The fee amount for the work order task and/or tasks, in
question
- Taxes. The taxes applied to the charge amount and/or charge
amounts, in question
Total. The sum of the charge(s) and/or taxes, in question
Comments. Any and all notes entered per task and work order
Bank List
The Bank List is a list of banks for which recurring payments are set up. The Bank List gives the routing number, bank name, and bank address for each bank, as they were defined in the system.** **
From the menu, select Reporting>List Reports>Bank List. The Bank List dialog box displays.
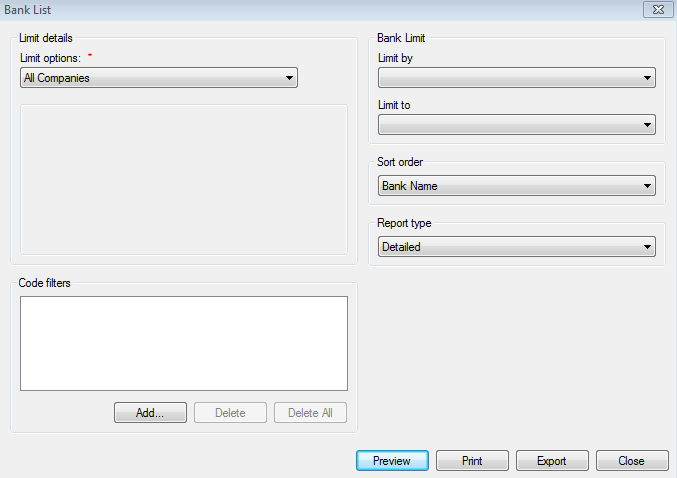
Figure 443: Bank List
Limit options. Select the desired limit options
Code filters. Select the desired code filters
Limit by. Select whether to limit the report by Bank Name or State
- Bank Name. Allows user to limit the report to a specific bank
name
- State. Allows user to limit report to banks located in a specific
state
Limit to. Corresponds with the selection made in the Limit By field. Select the applicable item
Sort order. Click the drop-down list arrow and select how you want to sort the report
Bank Name. Sorts and groups banks alphabetically by the bank name
State. Sorts and groups banks alphabetically by state
Bank Code. Sorts and groups banks by the user-defined bank code
Report type. Click the drop-down list arrow and select the type of information the report contains
Select whether to Preview, Print or Export the data. The data includes:
Bank Code. The code used to reference the bank's name
- Routing Number. The routing number entered in for the specific
bank location
Bank Name. The name entered for the bank
Address. The address of the bank
City/State. The city and state of the bank's location
Work Phone. The work telephone number for the bank
- Total Customers. The total number of customers with accounts
entered at this bank
Company. For Profit customers, the business name of the customer
Account Number. The system account number for the customer
Customer Name. The name of the customer
Account. The bank account number for the customer
Account Type. The selected account type for the customer
Auto Payment Report
The Auto Payment Report is a list of all customers who are set up for recurring draft or credit card payments. This report also lists the total number of customers signed up for each type of payment, with recurring credit card payments broken down by card brand.
From the menu, select Reporting>List Reports>Auto Payment Report. The Auto Payment Report dialog box displays.
Figure 444: Auto Payment Report
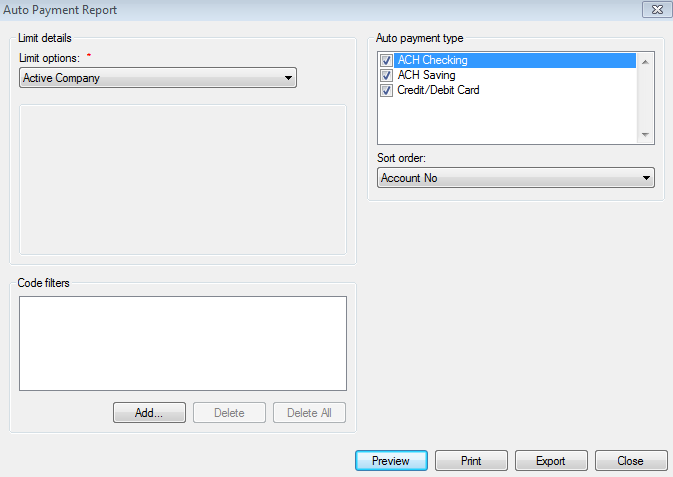
Limit options. Select the desired limit options
Code filters. Select the desired code filters
Auto Payment Type. In the list shown, click any of the auto payment types to include in the report
Sort order. Click the drop-down list arrow and select how you want to sort the report
Account No. Sorts the report by customer account number
Auto Payment Type. Sorts the report by the payment type
Name. Sorts the report alphabetically by Customer Name
Select whether to Preview, Print or Export the data. The data includes:
Account No. Customer's UMS Account number
Customer Name. Customer's name
Type. Type of recurring payment
Account. Account from which the payment is pulled
Routing No. Bank routing number
Bank Code. Code that identifies the bank
Bank Name. Common name of the bank
Expires. Credit Card expiration date
Phone. Contact phone number for the bank
- Totals. The total number of each type of recurring payment and
total number of auto payment customers is listed at the end of the report
Resident E-Bill/Recurring List
The Resident E-Bill/Recurring List provides a list of all accounts that have been setup for recurring bank draft or credit card payments. It also provides the ability to run the report for only those customers that are setup E-Bill notification. These are customers that have elected to receive an electronic billing notification via email.
From the menu, select Reporting>List Reports>Resident E-Bill/Recurring List. The Resident E-Bill/Recurring dialog box displays.
Figure 445: Resident E-Bill/Recurring List
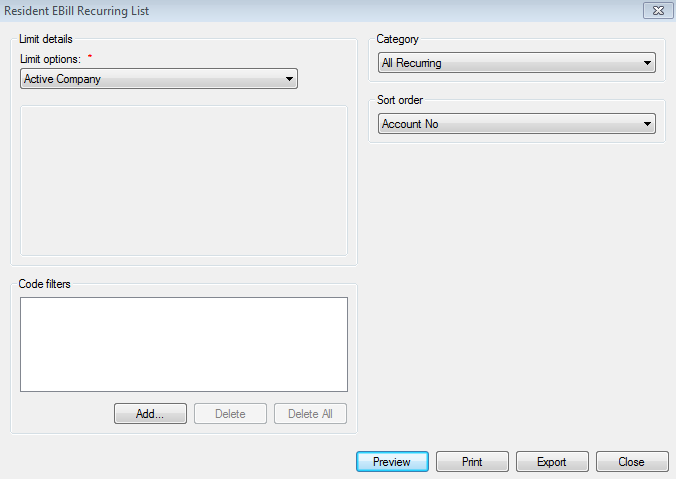
Limit options. Select the desired limit options
Code filters. Select the desired code filters
Category. Select the desired category to return in the report
All Recurring. Includes all types of recurring payments customers
Draft. Includes only the bank draft recurring customers
Credit Card. Includes only the credit card recurring customers
- All E-Bill. Only includes customers that are signed up for E-Bill
notification
Sort order. Click the drop-down list arrow and select how you want to sort the report
- Account No. Sorts and groups data by the account number of the
customer
Customer Name. Sorts data by customer name
- Recurring Payment Type. Sorts the report by the recurring payment
type
- E-Bill Status. Sorts the report by the E-Bill status which can
either be active or in-active
Select whether to Preview, Print or Export the data. The data includes:
Account No. The account number of the customer
Customer Name. The name of the customer
Recurring Payment Type. The recurring payment type
E-Bill Status. Shows if the E-Bill status is active or in-active
GL Chart of Accounts List
The GL Chart of Accounts List is a report showing all general ledger chart of accounts setup in UMS
From the menu, select Reporting>List Reports>GL Chart of Accounts List. The GL Chart of Accounts dialog box displays.
Figure 446: GL Chart of Accounts List
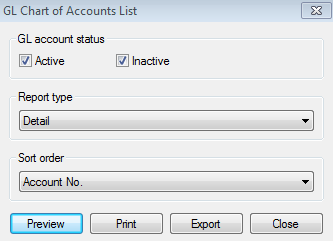
GL account status. Select the desired account status
Report Type. Click the drop-down list arrow and select the desired type of information
Detail. List the GL accounts
- Summary. Provides the total number of active and inactive GL
accounts
Sort Order. Click the drop-down list arrow and select how you want to sort the report
Account No. Sorts the report by the GL account number
- Description. Sorts the report by the GL account description,
alphabetically
Select whether to Preview, Print or Export the data
GL Code Group Report
This GL code Group report shows all general ledger code groups defined in UMS. It indicates the GL code group type, description, and associated account types.
From the menu, select Reporting>List Reports>GL Code Group Report. The GL Code Group Report dialog box displays.
Figure 447: GL Code Group Report
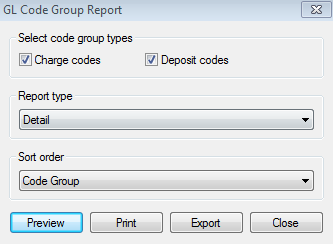
Select code group types. Select the desired code group (one or both)
Report Type. Click the drop-down list arrow and select the desired type of information
Sort Order. Click the drop-down list arrow and select how you want to sort the report
Code Group. Sorts the report by the GL code group
- Description. Sorts the report by the GL code group description,
alphabetically
Select whether to Preview, Print or Export the data
GL Code Assignments Report
This GL Code Assignments report shows general ledger code groups assigned to each defined code in UMS. The report also assists in identifying codes that are missing a GL code group assignment.
From the menu, select Reporting>List Reports>GL Code Assignment. The GL Code Assignment Report dialog box displays.
Figure 448: GL Code Assignments Report
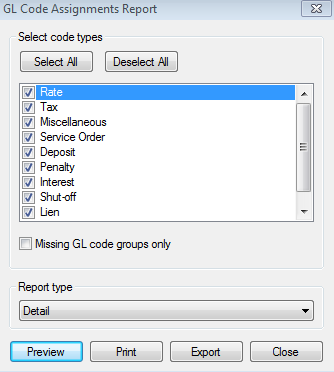
Select code types. Click the checkbox next to the desired code type or select all
Missing GL code groups only. Limits the report to rate codes that are not assigned to a GL code group
Report Type. Click the drop-down list arrow and select the desired type of information
Select whether to Preview, Print or Export the data
Missing Services List
This GL Code Assignments report shows general ledger code groups assigned to each defined code in UMS. The report also assists in identifying codes that are missing a GL code group assignment.
From the menu, select Reporting>List Reports>Missing Services. The GL Code Assignment Report dialog box displays.
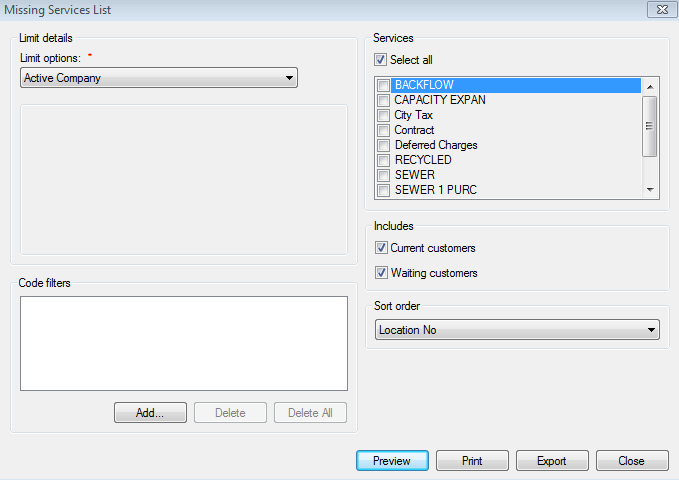
Figure 449: Missing Services List
Select code types. Click the checkbox next to the desired code type or select all
Missing GL code groups only. Limits the report to rate codes that are not assigned to a GL code group
Report Type. Click the drop-down list arrow and select the desired type of information
Select whether to Preview, Print or Export the data
Emergency Contact List
The Emergency Contact List is a report showing emergency contact information for your clients.
From the menu, select Reporting>List Reports>Emergency Contact List. The Emergency Contact List dialog box displays.
Figure 450: Emergency Contact

Limit options. Select the desired limit options
Code filters. Select the desired code filters
Sort Order. Click the drop-down list arrow and select how you want to sort the report
Account No. Sorts the report by the account number
Location No. Sorts the report by location number
Customer Name. Sorts the report by customer name
Location Address. Sorts the report by location address
Select whether to Preview, Print or Export the data
AMS Call Status List
This will be available only if the customer uses Tele-Works. Please refer to Tele-Works Guide for instructions. To reach the screen go to Reporting>List Reports>AMS Call Status List.
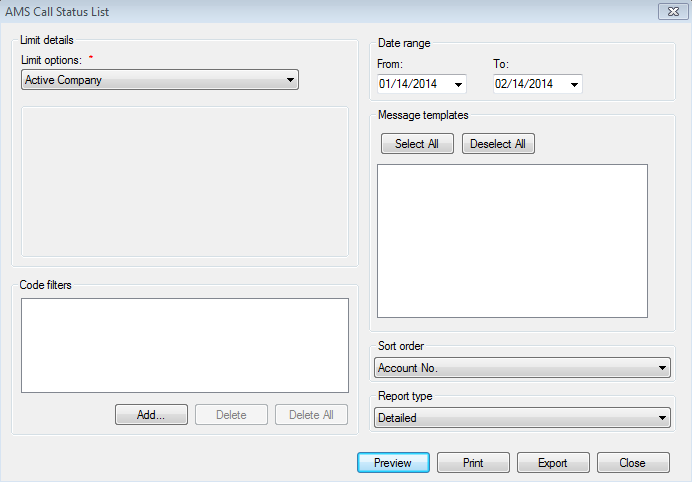
Figure 451: AMS Call Status List
Special Condition List
This GL Code Assignments report shows general ledger code groups assigned to each defined code in UMS. The report also assists in identifying codes that are missing a GL code group assignment.
From the menu, select Reporting>List Reports>Special Condition List.
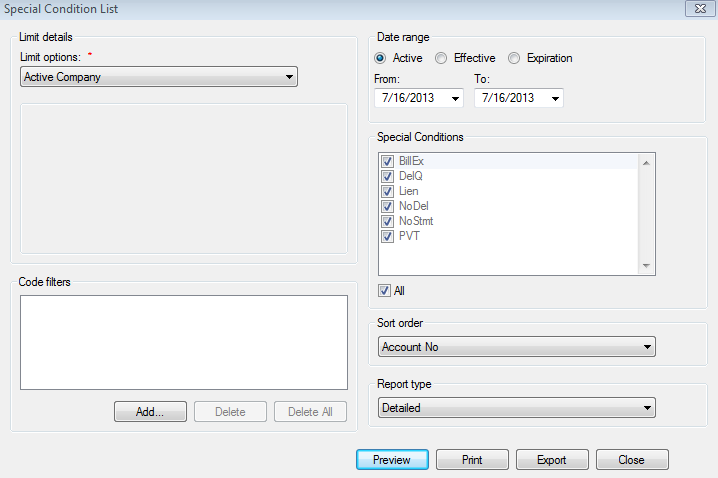
Figure 452: Special Condition List
Limit options. Select the desired limit options
Code filters. Select the desired code filters
Date Range: From/To. Options for Active, Effective, or Expiration of special conditions. Specifies the date range. The dates selected in each field, and all dates in between, are included in the report
Special Conditions. Select any or all special conditions for viewing on report. Check the box of each condition you want displayed, or check the All box
Sort Order. Click the drop-down list arrow and select how you want to sort the report
Account No. Sorts the report by the account number
Location No. Sorts the report by location number
Customer Name. Sorts the report by customer name
Location Address. Sorts the report by location address
Report Type. Click the drop-down list arrow and select the desired type of information
Select whether to Preview, Print or Export the data
Deleted Payment List
The Deleted Payment List report displays all the deleted payments that fit the criteria specified in the user interface. It is located at Reporting>List Reports>Deleted Payment List.
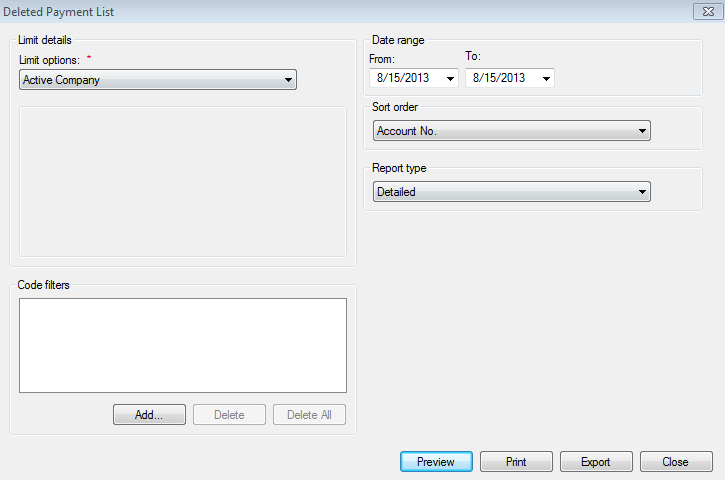
Figure 453: Deleted Payment List Report
Limit options. Select the desired limit options
Code filters. Select the desired code filters
Date Range: Options for the date range include:
Limit by Delete Date Assigns the following date range to query by payment deleted date
Limit by Payment Date Assigns the following date range to query by payment created date
From/To. Specifies the date range. The dates selected in each field, and all dates in between, are included in the report
Sort Order. Click the drop-down list arrow and select how you want to sort the report
Customer Number. Sorts the report by the customer number
Account No. Sorts the report by the account number
Customer Name. Sorts the report by customer name
Location No. Sorts the report by location number
Delete Date Sorts the report by date deleted
Original Transation Time Sorts the report by original transation time
User Deleted Sorts the report by the user who deleted the transation
Report Type. Click the drop-down list arrow and select the desired type of information
Select whether to Preview, Print or Export the data
Refund List Report
The Refund List Report enhancement displays a list of refund transactions that have been processed within the selected date range. To access this report go to Reporting>List Reports>Refund List Report.
Figure 454: Refund List Report Screen

Limit details: This drop-down menu includes the standard choices to limit the results within a specific range.
Code filters: This text box is for the standard code filters when limiting the results.
Refund dates: This section allows the report to be limited within the From and To date ranges entered.
Sort order: Options for the report include:
Account No: Orders the list by account number
Location No: Orders the list by location number
Refund Amount: Orders the list by refunded amounts
ZIPCode: Order the list according to the ZIPCode listed in the customer mailing address
Account Close Date: Orders the list by move out dates
Date of Refund: Orders the list by refund date
Report type: Detailed and Summary
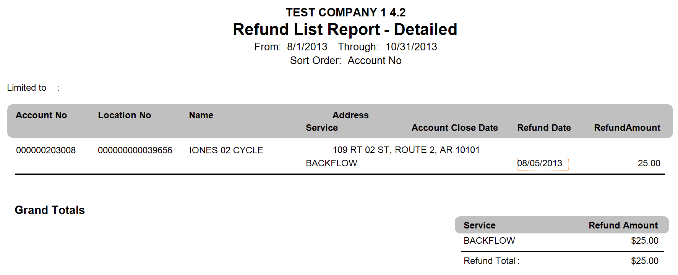
Figure 455: Refund List Report Printed
Meter Reports
Backflow History
The Backflow Testing History report was added to allow users to define and print backflow history reports. To access the report go to Reporting>MeterReports>Backflow History.
Figure 456: Backflow Testing History
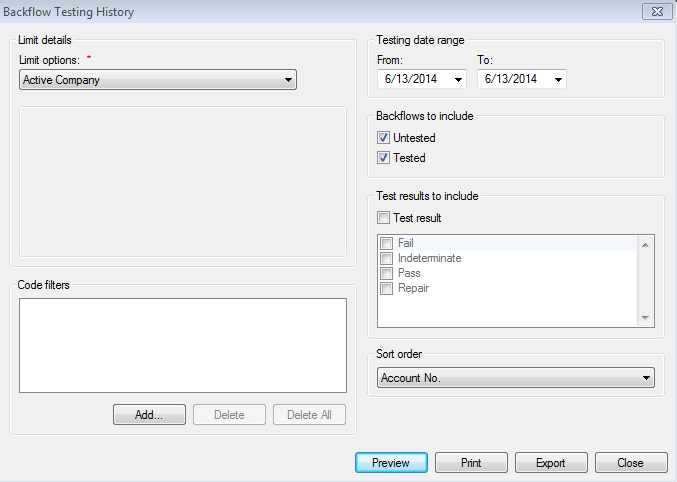
Limit options. Select the desired limit options
Code filters. Select the desired code filters
Testing date range: From/To. Specify the date range here
Backflows to include. Tested or Untested
- Test results to include. Specify the desired Test Results. If
result type is not specified, all test result types will be included
- Sort order. Click the drop-down menu and select the desired Sort
Order
Select to either Preview, Print, or Export the data
Backflow List Report
The Backflow List report was added to allow users to define and print a report that displays a list of backflow devices, based on specific criteria. To access the report go to Reporting>Meter Reports>Backflow List.
Figure 457: Backflow List Report

Limit options. Select the desired limit options
Code filters. Select the desired code filters
Date filters: From/To. Specify the date range here
Backflows to include. Tested or Untested
Meter size. When enabled, a list of meter sizes is shown
Assembly type. When enabled, a list of assembly sizes is shown
- Sort order. Click the drop-down menu and select the desired Sort
Order
Report type. Select desired report type from the drop-down menu
Select to either Preview, Print, or Export the data
Backflow Testing Schedule
The Backflow Testing Schedule report was added to allow users to define and print backflow testing schedule. To access the report go to Reporting>Meter Reports>Backflow Testing Schedule.
Figure 458: Backflow Testing Schedule
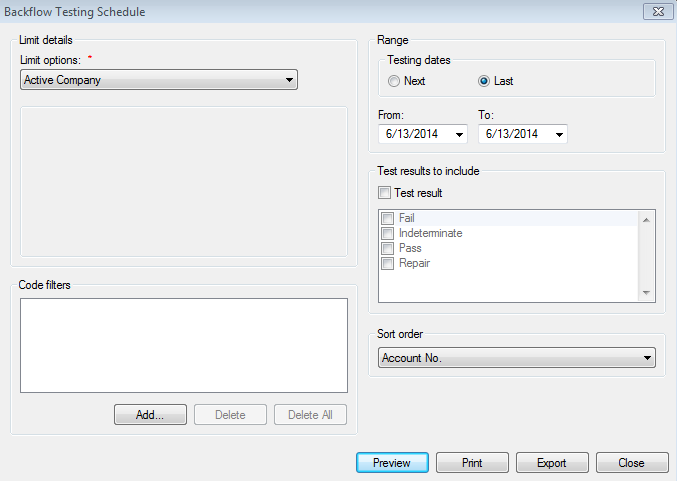
Limit options. Select the desired limit options
Code filters. Select the desired code filters
Range. Select the desired Testing Date; Next or Last
From/To. Specify the date range
- Test result. Specify the test result type. If result type is not
specified, all test result types will be included
- Sort order. Click the drop-down menu and select the desired Sort
Order
Select to either Preview, Print, or Export the data
Leak Detection
The Leak Detection report was added to allow users to define and print backflow history reports. To access the report go to Reporting>Meter Reports>Leak Detection.
Figure 459: Leak Detection

Limit options: Select the desired limit options
Code filters. Select the desired code filters
Status Type. Click the drop-down menu and select the status
- Meter reading dates. Specifies the date range. Applies only when
History is selected in the Status Type field
AMR. Click the drop-down menu and select the desired AMR
- Codes & Values. Allow further refining the data included in the
report. Click Add to display the Enter Selections for Ecodes and Values screen
- Include. Indicates which meters are included. Meters not marked
to Ignore Ecode, Meters marked to Ignore Ecode, All Meters
Sort order. Select desired sort option from the drop-down menu
Select to either Preview, Print, or Export the data
Meter Aging
The Meter Aging report was added to allow users to view the details pertaining to how long a meter has been set to a certain status. This report displays information about a particular meter and the number of days that meter has/had been set to a status. To access the report go to Reporting>Meter Reports>Meter Aging.
Figure 460: Meter Aging Report
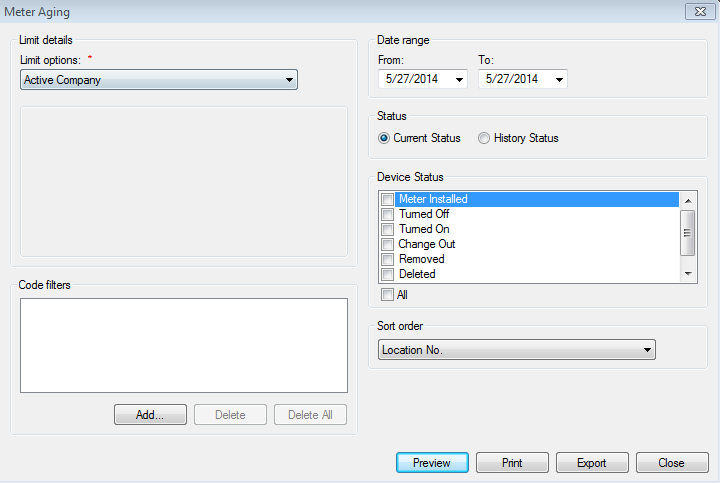
Limit options. Select the desired limit options
Code filters. Select the desired code filters
Date filters. From/To: Specify the date range here
Status. Select from Current Status or History Status
- Device Status. Using the check boxes, select any combination of
statuses for the device. Click All if all of the items are wanted
- Sort Order. Click the drop-down menu and select the desired Sort
Order
Select to either Preview, Print, or Export the data
Meter Change Out
The Meter Change Out report gives a listing of meters which have been changed out from service locations. To access the report go to Reporting>Meter Reports>Meter Change Out.
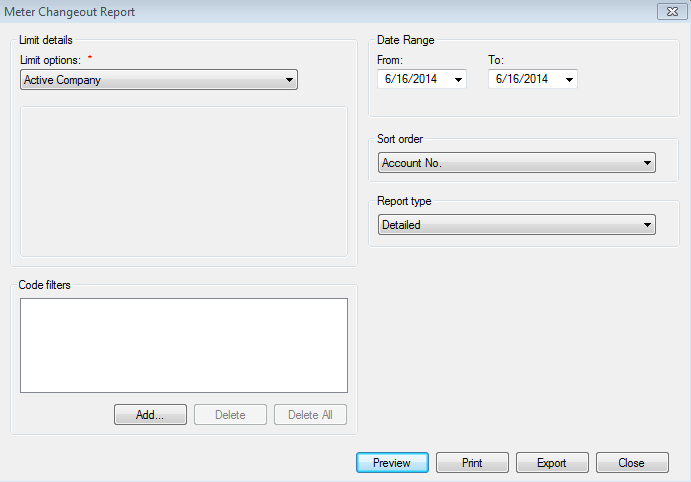
Figure 461: Meter Change Out Report
Limit options. Select the desired limit options
Code filters. Select the desired code filters
Date filters: From/To. Specify the date range here
- Sort order. Select from Account No., Location No., Route No., or
Change-Out Date
- Report type. Use the drop-down menu to select what type of report
you want to generate
Select to either Preview, Print, or Export the data
Meter Inventory List
The Meter Inventory List provides the amount of all meters, installed and stored, in inventory. To access the report go to Reporting>Meter Reports>Meter Inventory List.
Figure 462: Meter Inventory List
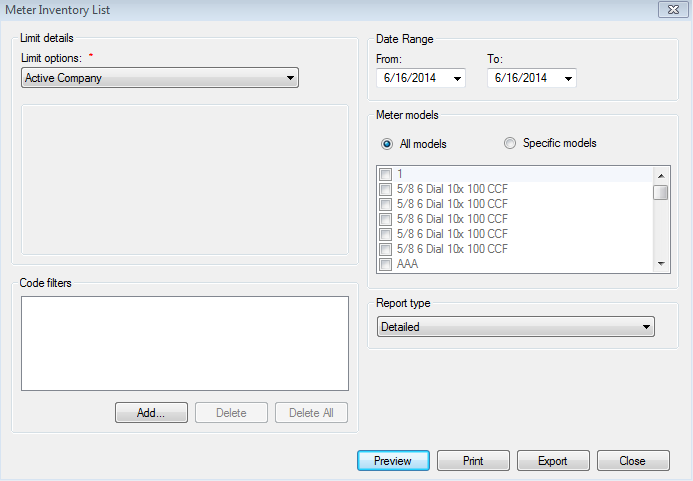
Limit options. Select the desired limit options
Code filters. Select the desired code filters
Date filters: From/To. Specify the date range here
- Meter models. Click the button to select All models, or click
the Specific models and use the check boxes below to select any combination of models
- Report type. Use the drop-down menu to select what type of report
you want to generate
Select to either Preview, Print, or Export the data
Meter List
The Meter List report creates a list of meters based on user specified criteria. To access the report go to Reporting>Meter Reports>Meter List.
Figure 463: Meter List
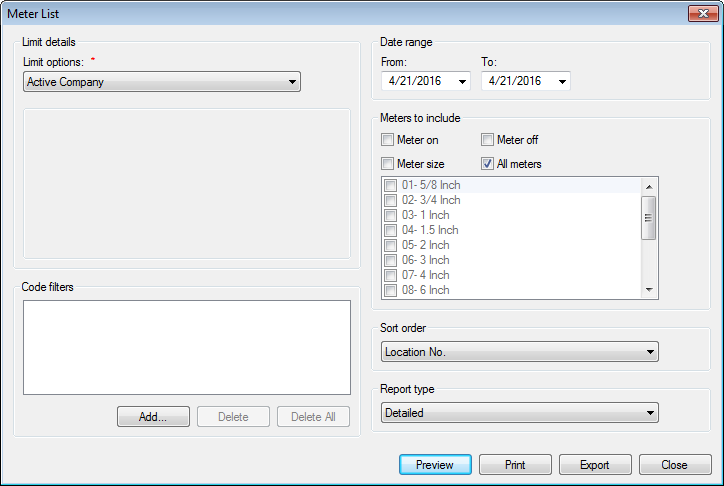
Limit options. Select the desired limit options
Code filters. Select the desired code filters
Date filters: From/To. Specify the date range here
- Meters to include. Select any combinations of meters to include
in the report.
Meter on
Meter off
Meter size
- All meters – When you select “All Meters”, all available limit
options are disabled
- Sort order. Select from Installation Date, Location No., Meter
No., Meter Size, Remote No., Test Date, Transmitter No.
- Report type. Use the drop-down menu to select what type of report
you want to generate
Select to either Preview, Print, or Export the data
Tester List
The Tester List report provides a list of active and inactive backflow testers. To access the report go to Reporting>Meter Reports>Tester List.
Figure 464: Tester List Report
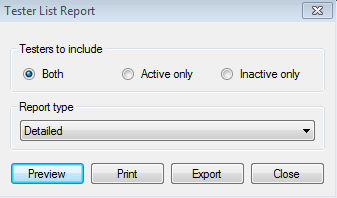
- Testers to include. Select which testers to include in the
report. Options are Both, Active only, and Inactive only
- Report type. Use the drop-down menu to select what type of report
you want to generate
Select to either Preview, Print, or Export the data
Notices
Collection Notice
The Collection Notice creates a letter to notify customer who’s account is in arrears and should be paid in full before the disconnect date to avoid additional late fees or having service cut-off. To access the report go to Reporting>Notices>Collection Notice.
Figure 465: Collection Notice
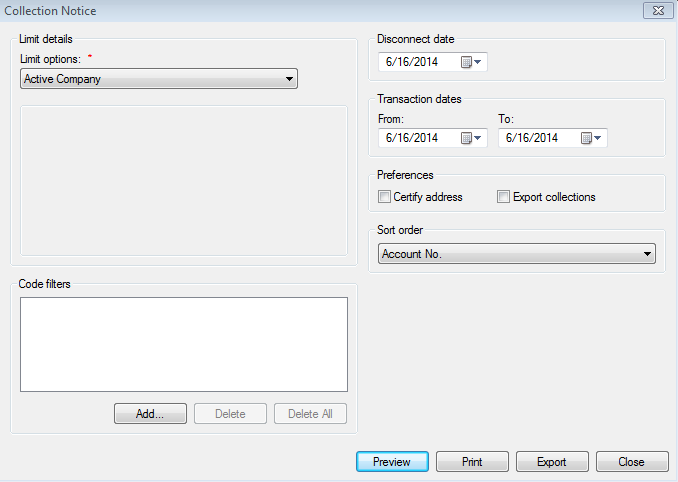
Limit options. Select the desired limit options
Code filters. Select the desired code filters
- Disconnect date. Specifies the date which disconnection will
occur
Transaction dates: From/To. Specify the date range here
- Certify address. Allows bills to be exported to a third-party
CASS certification application for address verification
Export collections. Exports the collection to a file
- Sort order. Select from Account No., Customer Name, Location No.,
Zip Code, CASS Sequence + Zip code
Select to either Preview, Print, or Export the data
Interest Notice
The Interest Notice informs the customer of a penalty applied to their account and when it must be paid to avoid further late charges and/or disconnection. To access the report go to Reporting>Notices>Interest Notice.
Figure 466: Interest Notice
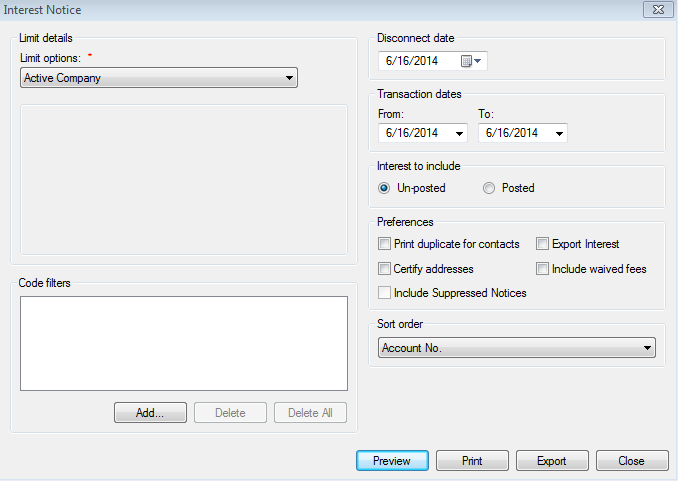
Limit options. Select the desired limit options
Code filters. Select the desired code filters
- Disconnect date. Specifies the date which disconnection will
occur
Transaction dates: From/To. Specify the date range here
- Print duplicate for contacts. When selected, a duplicate notice
is printed when multiple contacts are present in the system
- Certify address. Allows bills to be exported to a third-party
CASS certification application for address verification
Include Suppressed Notices. Exports the collection to a file
- Sort order. Select from Account No., Customer Name, Location No.,
Zip Code, CASS Sequence + Zip code
Select to either Preview, Print, or Export the data
Lien Notice
The Lien Notice serves to inform customers their past due balance is ready to be submitted as a lien against their taxes if not paid in full by the due date. To access the report go to Reporting>Notices>Lien Notice.
Figure 467: Lien Notice
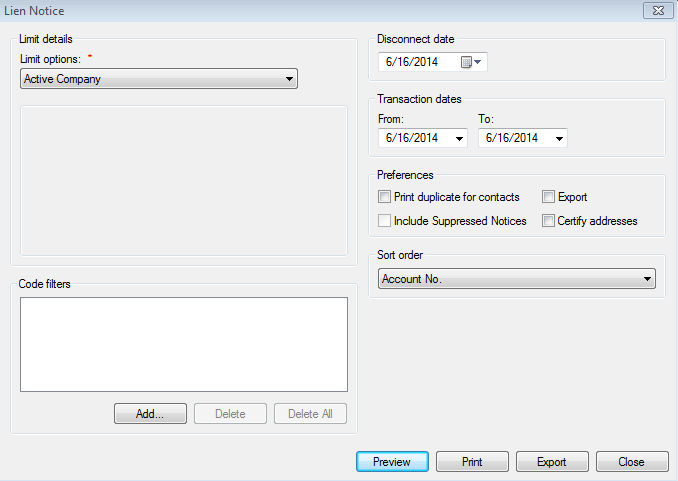
Limit options. Select the desired limit options
Code filters. Select the desired code filters
- Disconnect date. Specifies the date which disconnection will
occur
Transaction dates: From/To. Specify the date range here
- Print duplicate for contacts. When selected, a duplicate notice
is printed when multiple contacts are present in the system
Include Suppressed Notices. Exports the collection to a file
Export. Exports the file
- Certify address. Allows bills to be exported to a third-party
CASS certification application for address verification
- Sort order. Select from Account No., Customer Name, Location No.,
Zip Code, CASS Sequence + Zip code
Select to either Preview, Print, or Export the data
Lien Release Notice
The Lien Release Notice is a letter of release generated within UMS once the issue creating the lien has been settled. To access the report go to Reporting>Notices>Lien Release Notice.
Figure 468: Lien Release Notice
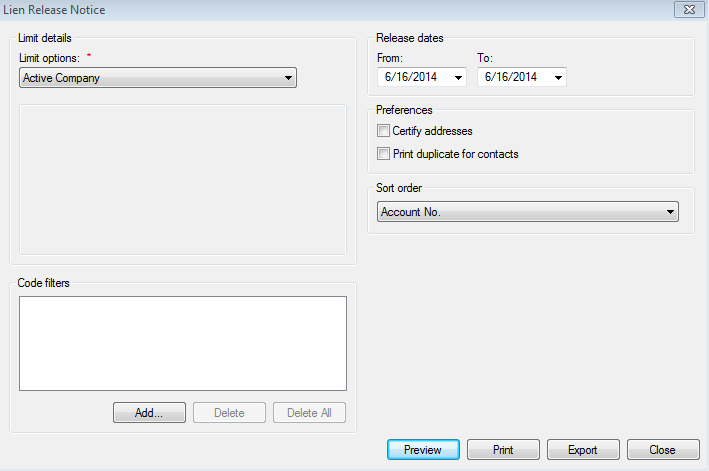
Limit options. Select the desired limit options
Code filters. Select the desired code filters
Release dates: From/To. Specify the date range here
- Certify address. Allows bills to be exported to a third-party
CASS certification application for address verification
- Print duplicate for contacts. When selected, a duplicate notice
is printed when multiple contacts are present in the system
- Sort order. Select from Account No., Customer Name, Location No.,
Zip Code, CASS Sequence + Zip code
Select to either Preview, Print, or Export the data
Payment Arrangement Notice
The Payment Arrangement Notice creates notices for customers who have setup payment arrangements with the company. To access the report go to Reporting>Notices>Payment Arrangement Notice.
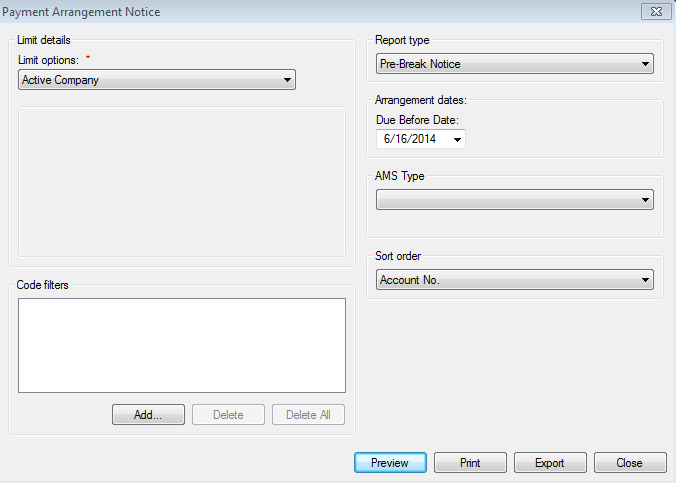
Figure 469: Payment Arrangement Notice
Limit options. Select the desired limit options
Code filters. Select the desired code filters
Report type. Choose from the following report types:
Pre-Break Notice
Pre-Break Arrangement Report
Broken Arrangement Report
Arrangement dates. Select the date range for the report
AMS Type. If desired, select the AMS type as the delivery method
- Sort order. Select from Account No., Customer Name, Location No.,
Zip Code, CASS Sequence + Zip code
Select to either Preview, Print, or Export the data
Penalty Notice
The Penalty Notice informs the customer of a penalty applied to their account and when it must be paid to avoid further late charges and/or disconnection. To access the report go to Reporting>Notices>Penalty Notice.
Figure 470: Penalty Notice

Limit options. Select the desired limit options
Code filters: Select the desired code filters
Date range: From/To. Specifies the date range for the report
- Print duplicate for contacts. When selected, a duplicate notice
is printed when multiple contacts are present in the system
- Certify address. Allows bills to be exported to a third-party
CASS certification application for address verification
- Export penalty. If desired, select the AMS type as the delivery
method
- Sort order. Select from Account No., Customer Name, Location No.,
Zip Code, CASS Sequence + Zip code
Select to either Preview, Print, or Export the data
Return Check Notice
Also called the NSF Notice, the Return Check Notice notifies the customer a payment instrument has been returned and an NSF fee has been charged to the account. To access the report go to Reporting>Notices>Return Check Notice.
Figure 471: Return Check Notice
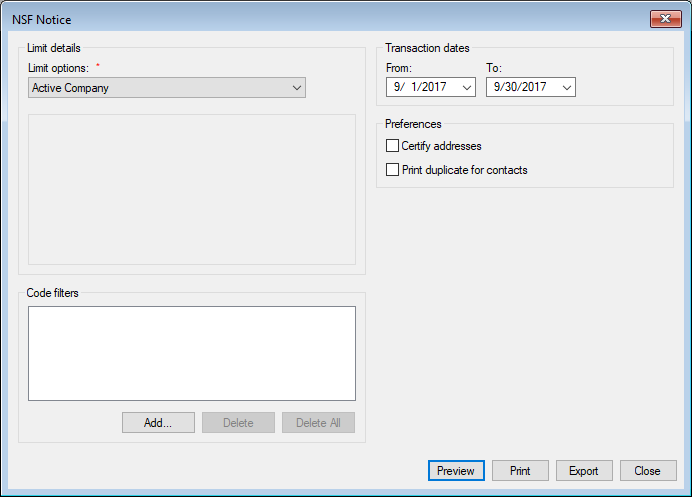
Limit options. Select the desired limit options
Code filters. Select the desired code filters
Date range: From/To. Specifies the date range for the report
- Certify address. Allows bills to be exported to a third-party
CASS certification application for address verification
- Print duplicate for contacts. Allows duplicate returned check notices to be printed
for contacts that are set to receive a copy of notices.
Select to either Preview, Print, or Export the data
Shut Off Notice
The Shut Off Notice informs customers their account must be paid by the given due date to avoid disconnection. To access the report go to Reporting>Notices>Shut Off Notice.
Figure 472: Shutoff Notice
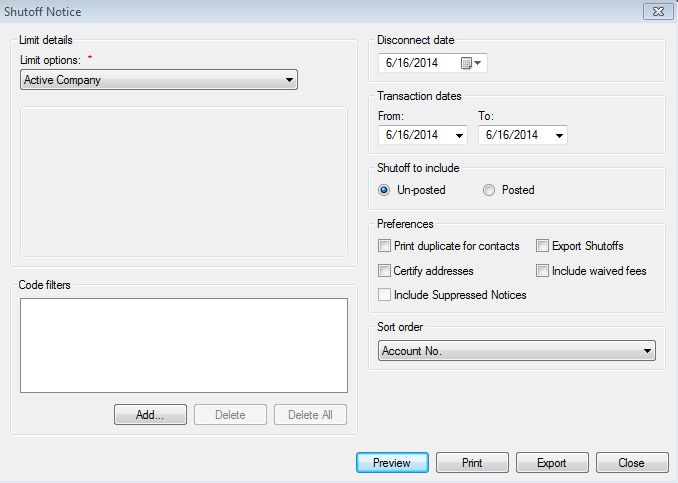
Limit options. Select the desired limit options
Code filters. Select the desired code filters
- Disconnect date. Specifies the date on which a disconnection will
occur
- Transaction date: From/To. Specifies the date range for the
report
- Print duplicate for contacts. When selected, a duplicate notice
prints when there are multiple contacts for a particular account
- Certify address. Allows bills to be exported to a third-party
CASS certification application for address verification
- Sort order. Select the desired sort option from the drop-down
menu
Select to either Preview, Print, or Export the data
Yearly Water Budget Letter
Each year after the new water budget is calculated, a letter is to be issued to all customers to notify them of their new water budget. To access the report go to Reporting>Yearly Water Budget Letter.
Figure 473: Yearly Water Budget Letter
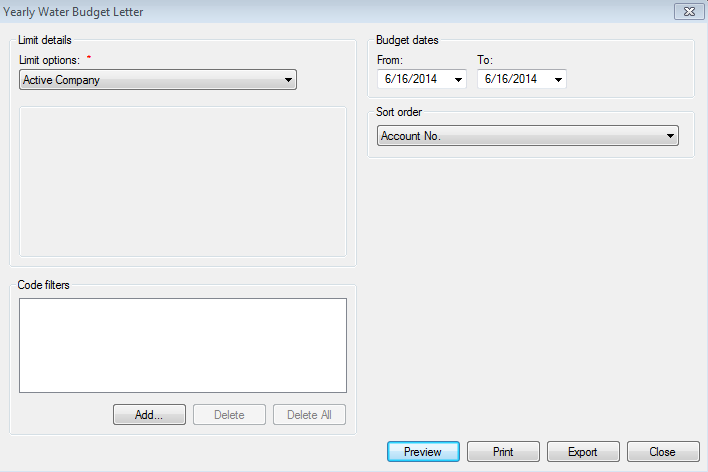
Limit options. Select the desired limit options
Date range: From/To. Specifies the date range for the report
- Sort order. Select the desired sort option from the drop-down
menu
Select to either Preview, Print, or Export the data
Register
Bill Register
The Bill Register lists the customers who were billed within a specified date range. To access the report go to Reporting>Register>Bill Register.
Figure 474: Bill Register
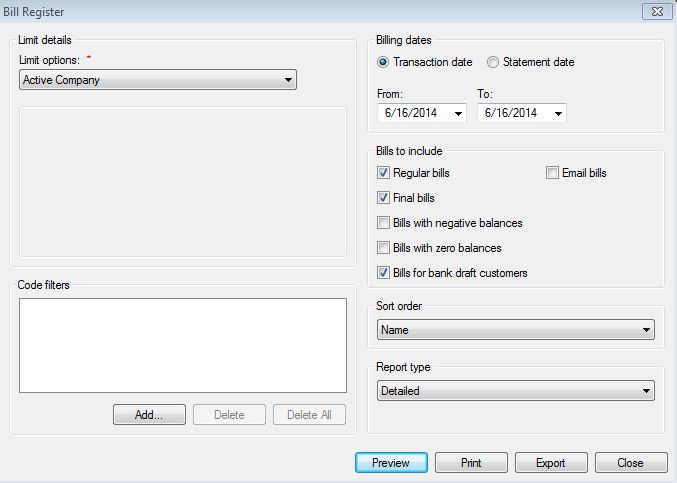
Limit options. Select the desired limit options
Code filters. Select the desired code filters
Billing dates. Specifies the date range
Bills to include. Specifies the bills to include in the report
- Regular bills. Includes the bills which do not meet the other
criteria
- Final bills. Includes all accounts which have been issued final
bills
- Bills with negative balances. Includes accounts with a negative
balance
Bills with zero balances. Includes accounts with a zero balance
- Bills for bank draft customers. Includes accounts which customers
use bank drafts as the payment method
- Sort order. Select the desired sort option from the drop-down
menu
Select to either Preview, Print, or Export the data
Charge Register
The Charge Register displays a list of every customer billed within a specified date range. To access the report go to Reporting>Register>Charge Register.
Figure 475: Charge Register
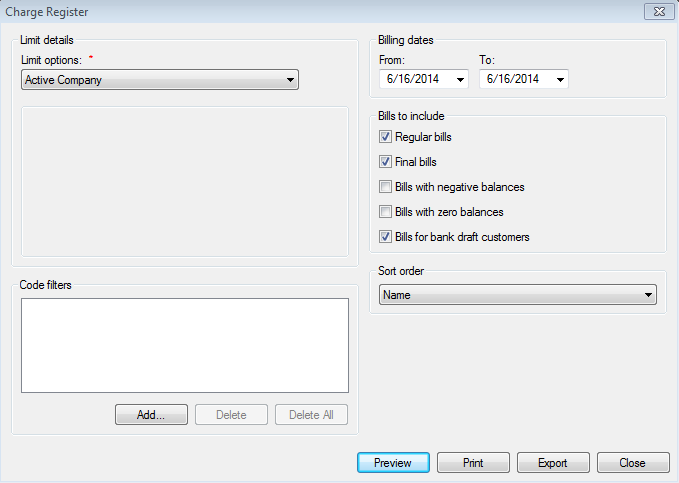
Limit options. Select the desired limit options
Code filters. Select the desired code filters
Billing dates. Specifies the date range
Bills to include. Specifies the bills to include in the report
- Sort order. Select the desired sort option from the drop-down
menu
Select to either Preview, Print, or Export the data
Collection Register
The Collection Register generates a list of all customers that are sent to collections. To access the report go to Reporting>Register>Collection Register.
Figure 476: Collection Register
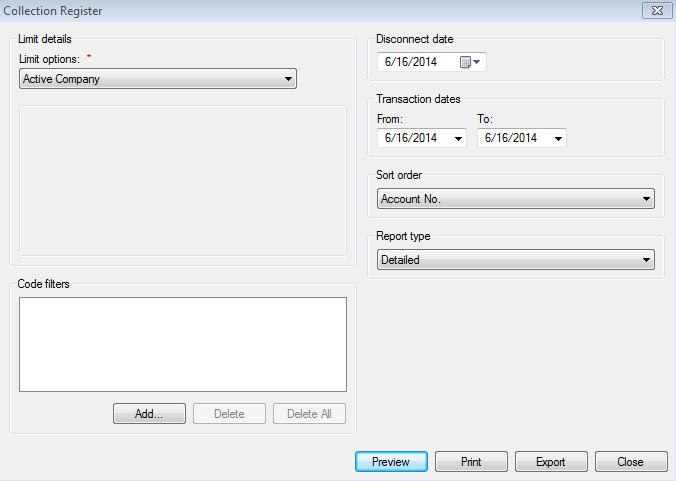
Limit options. Select the desired limit options
Code filters. Select the desired code filters
- Disconnect date. Specifies the date on which a disconnection will
occur
- Transaction date: From/To. Specifies the date range for the
report
- Sort order. Select the desired sort option from the drop-down
menu
- Report type. Choose from Detailed, Summary, or Condensed report
types
Select to either Preview, Print, or Export the data
Delinquency Register
The Delinquency Register generates a list of all customers that are delinquent. To access the report go to Reporting>Register>Delinquency Register.
Figure 477: Delinquency Register
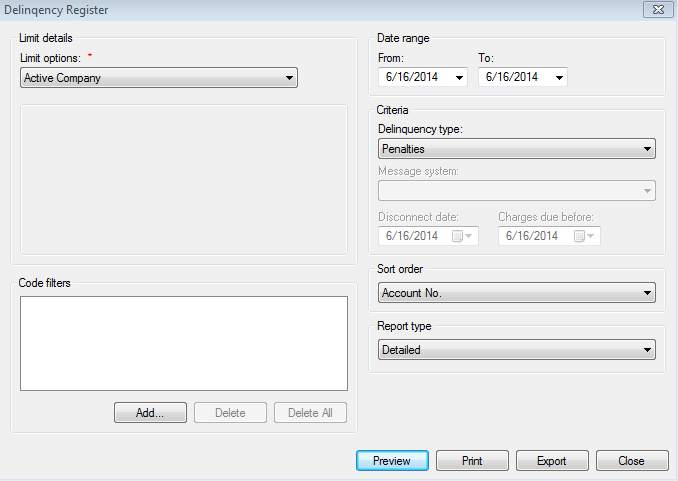
Limit options. Select the desired limit options
Code filters. Select the desired code filters
Date range: From/To. Specifies the date range for the report
- Delinquency type. Use the drop-down menu to select the type of
delinquency for the report. Options include:
Penalties
Interest
Shutoffs
Bad Debt Write-Offs
Collection Sold
Lien Creation
Lien Write-Offs
- Message system. Is only available if Shutoffs is selected in the
delinquency type. The Message system is the phone system that interacts with UMS
- Sort order. Select the desired sort option from the drop-down
menu
- Report type. Choose from either the Detailed, Summary, or
Condensed report types
Select to either Preview, Print, or Export the data
Deposit Register
The Deposit Register is a list of all deposits currently in the system. To access the report go to Reporting>Register>Deposit Register.
Figure 478: Deposit Register
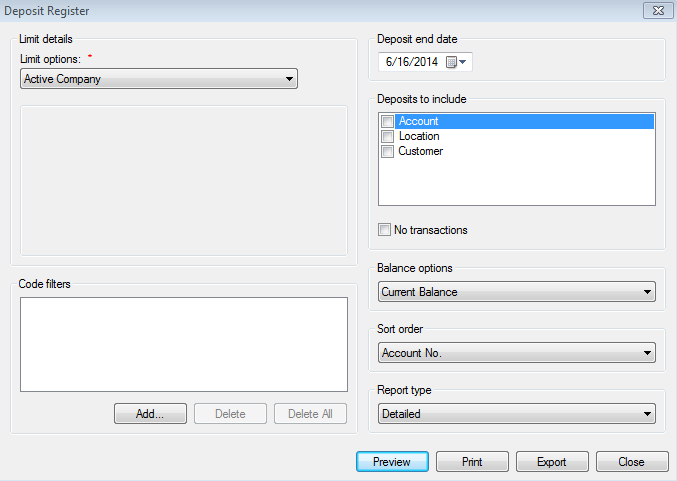
Limit options. Select the desired limit options
Code filters. Select the desired code filters
- Deposit end date. Specifies the date which the last deposit is
made to be included in the report
Deposits to include. Indicates which deposits to include
- Balance options. Indicates which deposits with balances to
include
- Sort order. Select the desired sort option from the drop-down
menu
Report type. Choose either the Detailed or Summary report
Select to either Preview, Print, or Export the data.
Revenue Class Totals
The Revenue Class Totals provides a method to generate a report based on the revenue classes. Revenue classes are a way to set up different classifications of revenue based on location and category. To access the report go to Reporting>Register>Revenue Class Totals.
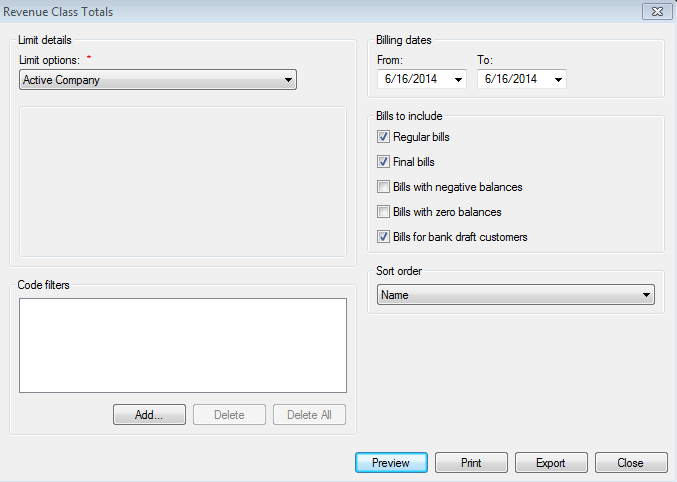
Figure 479: Revenue Class Totals Report
Limit options. Select the desired limit options
Code filters. Select the desired code filters
Billing Dates: From/To. Specifies the date range for the report
Bills to include. Options under this drop-down menu include
Regular Bills
Final Bills
Bills with Negative Balances
Bills with Zero Balances
Bills for Bank Draft Customers
- Sort order: Select the desired sort option from the drop-down
menu
Select to either Preview, Print, or Export the data
RUBS
Demographic List
The Demographic List generates a list of demographics related to sub metering, conservation, and stocks (if those modules are installed). To access the report go to Reporting>RUBS>Demographic List.
Figure 480: Demographic List
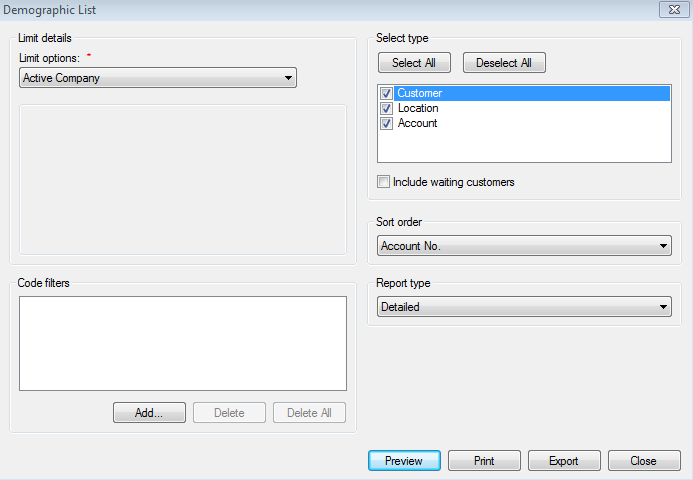
Limit options. Select the desired limit options
Code filters. Select the desired code filters
- Select type. Specifies the type of account that the demographics are
associated with, including Customer, Location, Account, and a checkbox beneath allows to choose waiting customers
Sort order. Select the desired sort option from the drop-down menu
Report type. Choose a Detailed or Summary report
Select to either Preview, Print, or Export the data
Unit Listing
The Unit Listing report provides a list based upon the customer, account, and/or location demographics, as well as vacancies. To access the report go to Reporting>RUBS>Unit Listing.
Figure 481: Unit Listing
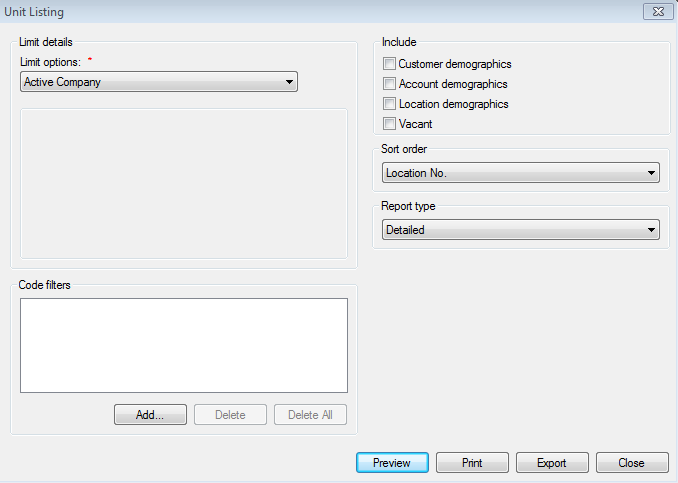
Limit options. Select the desired limit options
Code filters. Select the desired code filters
- Include. The following check boxes allow the user to include or
exclude certain demographic items, including:
Customer demographics
Account demographics
Location demograhics
Vacant
- Sort order. Select the desired sort option from the drop-down
menu
Report type. Choose from either a Detailed or Summary report
Select to either Preview, Print, or Export the data
Yearly Usage Summary
The Yearly Usage Summary reports provide a list of usage according to the selected year. To access the report go to Reporting>RUBS>Yearly Usage Summary.
Figure 482: Yearly Usage Summary
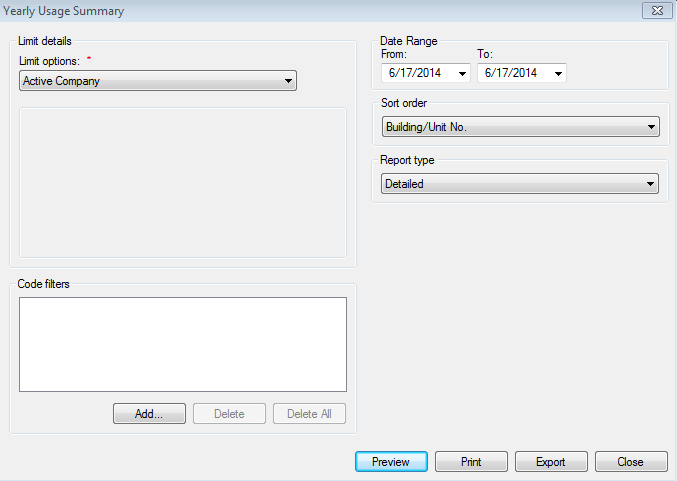
Limit options. Select the desired limit options
Code filters. Select the desired code filters
Date range: From/To. Specifies the date range for the report
- Sort order. Select the desired sort option from the drop-down
menu
Report type. Choose from either a Detailed or Summary report
Select to either Preview, Print, or Export the data
Custom Reports
Custom Reports are specified by the Utility and are used to provide customized data in report form. If the Utility does not have any custom reports, no reporting option will be displayed. Any custom report created will display here, however only individuals with correct security permissions will be able to view and/or print these reports. To access this report type go to Reporting>Custom Reports, and then choose the report to be generated.